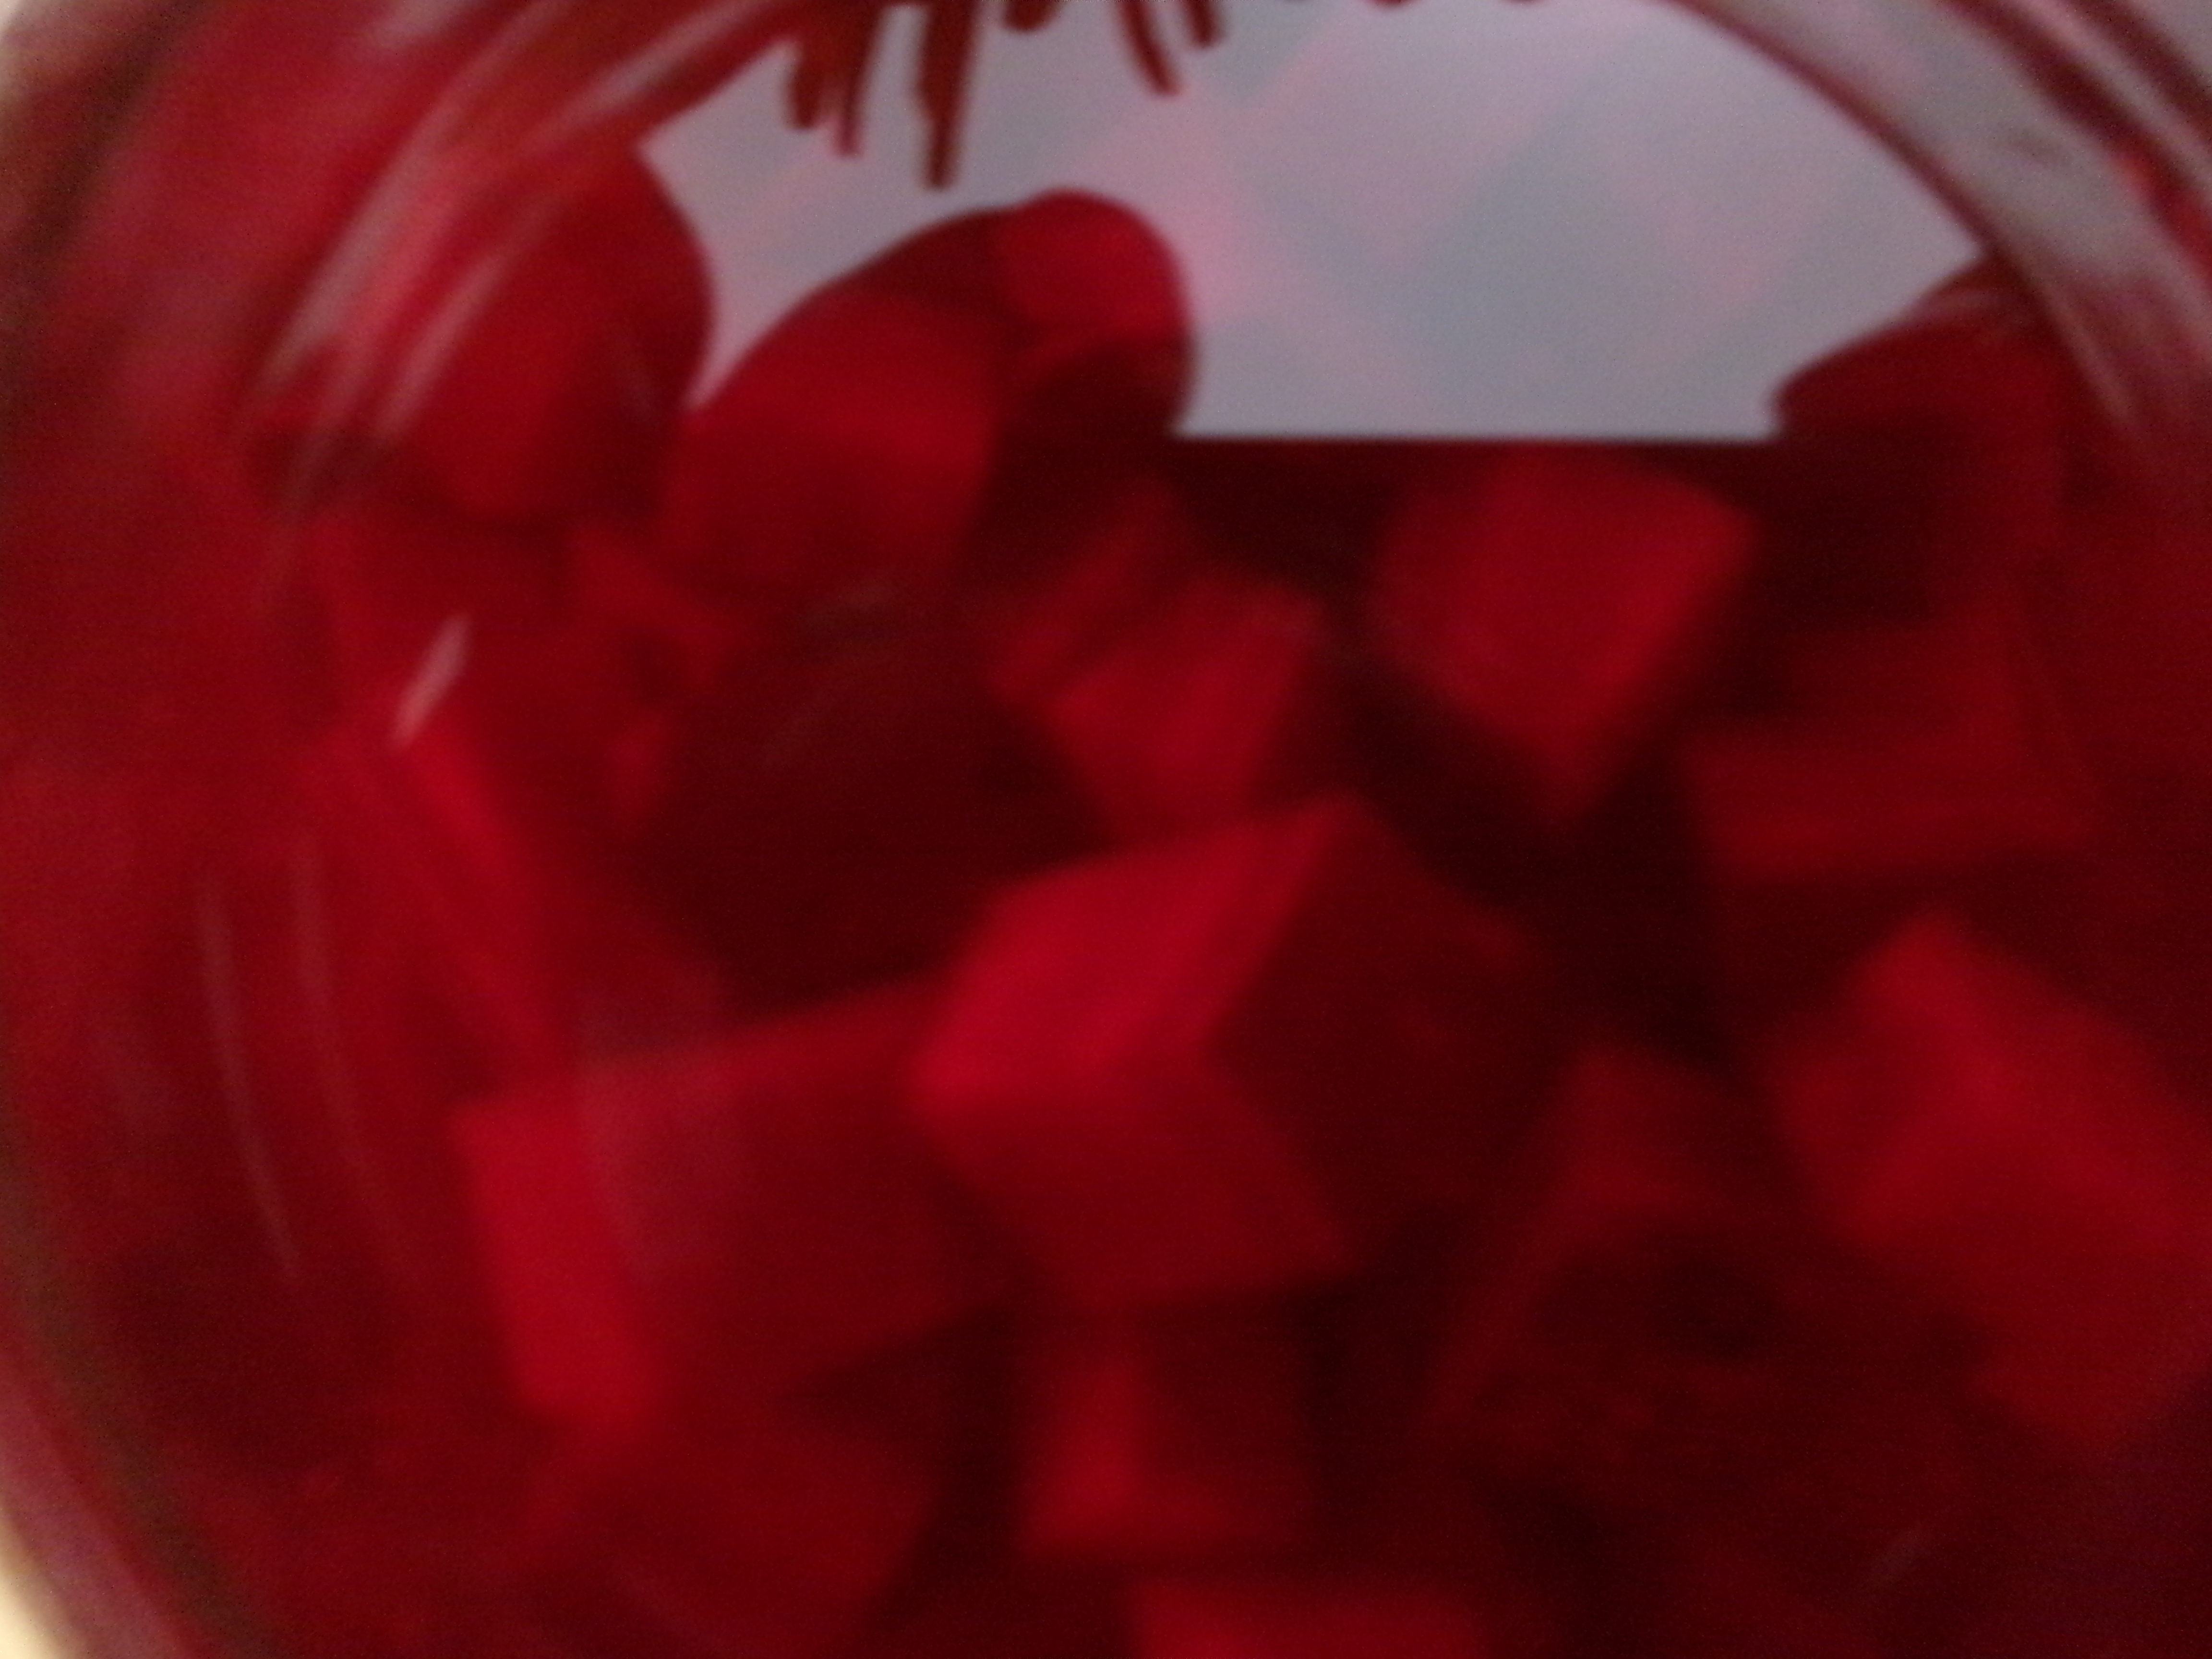
For those interested in a cool vegetal summer tonic, beet kvass is for you.
While we’ve talked about the fermented beverage kvass made of bread/ grains, this version is made entirely our out just beets. It’s certainly possible to substitute many-a different vegetable.
The process is as simple as cutting or grating beets and covering with water with a modest pinch of salt. Then let it ferment out at room temperature. After about three days or so hopefully the beets have given up a lot of their color and flavor and you have a dark scarlet brine. Give it a strain- being sure to cook up the lightly fermented solids. You can enjoy your beverage here, maybe with an ice cube or you can take it one step further.
Consider popping a tightened screw lid on it and let it ferment another day or so. Throw the jar in the fridge to cool and now you can enjoy a refreshingly cool effervecent, living drink!
You can find frikah on the grocery store shelves, a modern day relative long severed from her ancient past as a non mechanized ingenuity. It seems today’s frikah is still a young grain that has been roasted or toasted, though its place as an mass ingredient in the store has replaced its magnificent standing as a unique process of transforming nature’s will into easy food.
A hull is a fairly inedible thin casing that can grow around each individual kernel of certain grains. Different grains can have varying degrees of hulls from ones that release the kernel easily to ones that hold it tightly. They have been known to help in the germination of the seed, but as far as for human food, they can be a challenge to remove from every dang kernel. Given that all of the unmodernized heritage wheats we grow at our farm come with firm hulls, it feels comfortable to speculate that hulless varieties may have come about through thousands of years of careful selection to evolve to the ones that give freely. The kernels from hulless varieties pop out without any extra effort in the threshing process.
Getting a hull off is a monumental task without machinery. While threshing can be as easy as stomping or whacking the seedhead, dehulling wheat seems to require either crushing the grain and winnowing away the hull or passing every grain through a narrow passage that sort of peels the hull off as it goes through (imagine passing it through a sort of pasta roller-type situation with an opening slight enough that it wicks the covering hull off without crushing the grain). Thinking about how much grain a person needs to eat to live, an efficient solution to dehulling is an important problem for the unlocking of nutrients to a community.
Ripening wheat passes through several stages to reach its harvestable place which are often called things like milky stage, soft dough, and hard dough- in that order. Soft dough usually has the best bread making qualities because the starches aren’t fully developed and the protein/ gluten potential is highest, while hard dough is a fully mature seed that is rich in starch and best prepared for future germination, or getting milled for doughs that use binders like eggs, etc. The milky stage, before the grain matures to soft dough, is full of a white goo that when a kernel is squeezed oozes out. As the kernel moves from milky to soft-dough is the perfect time to harvest for frikah- you’ll see why.
After harvesting at the early edge of soft-dough, the next step is to dip the grains in water and scorch the seedheads over an open fire. The fire will ideally burn away all the chaff, hull and other plant materials while the immature kernel is still green and holding enough water, hopefully, to repel the flame and be still standing in the end.
Then as the name indicates, frikah which means to rub, the burnt wheat is rubbed free and winnowed for a smokey green wheat kernel. Interestingly as well, the heat from the fire also halts any further enzymatic processes thus holding the contents of the kernels in this stage. The kernels can now be dried and stored for later use.
If you want to see butter then look up. Sometimes a flat milk or heavy cream, and other times like puffy globs of fat clouds floating along in the buttermilk of the big bowl of sky. There is a Hindu story about that. The Gods had lost many of the treasures that gave them their powers including immortality and the way to get them back was to churn the treasures out of the milky sky. They used a mountain to do the churning, but it was too much for the Gods to handle on their own so they sought help from the Demon crew who all together got the treasures back. What an image, especially in the face of life’s sometimes unruly chaotic moments of loss, good and bad working together to shake up life to reveal its treasures hidden within. It’s interesting how our internal human processes can often mirror nature’s natural processes (who express themselves well with natural preservation). Wouldn’t it be more interesting when the challenges of life overwhelm our own horizon, to look up and see the clouds forming and say, yep it’s time to be made into butter again.
We all know that there are generally two ways to do most things anymore- the immediate way, reliably severed from the ecosystem, and the other that takes time and subtly penetrates and deepens into a moment that’s woven into existence’s greater expression. Butter can be made by buying cream, dropping it into a stand mixer, turning it on and walking away for long enough. The second, other way scours it of its purity, merging it with the natural imperfections with casein arm’s full of lactic acid bacterial life.
Letting time mature milk first separates the cream as the fat is less dense and will take its seat up high as a floating mountain (just be sure to be using unhomogenized milk). Other ways to do this is by force. Fresh milk can be spun, there are table top machines with varying levels of commercial and hobby ones, that mechanized or hand cranked, throw the milk and cream out in two different spouts using centripetal force based on their density. Using the slower method to create floating islands of risen cream lets you scoop the cream off, or another way to describe it is to skim.
After time has aged our cream into maturity where it can easily be plucked away separately, on its own we’ll let it keep ripening to the autumn of its life, where it gradually begins its rotting, just ever so much. This extra period is the culturing process where lactic acid bacteria adds interesting flavors, changes the acidity ever so slightly which helps with the final butter’s storage potential, and breaks things down to essentially get the final buttering ball rolling.
This culturing of cream can be matured for a couple hours or a couple days, relying on naturally occurring microbes or by adding your own through a kefir grain or backslopping a cultured product like yogurt, previous buttermilk or whathaveyou.
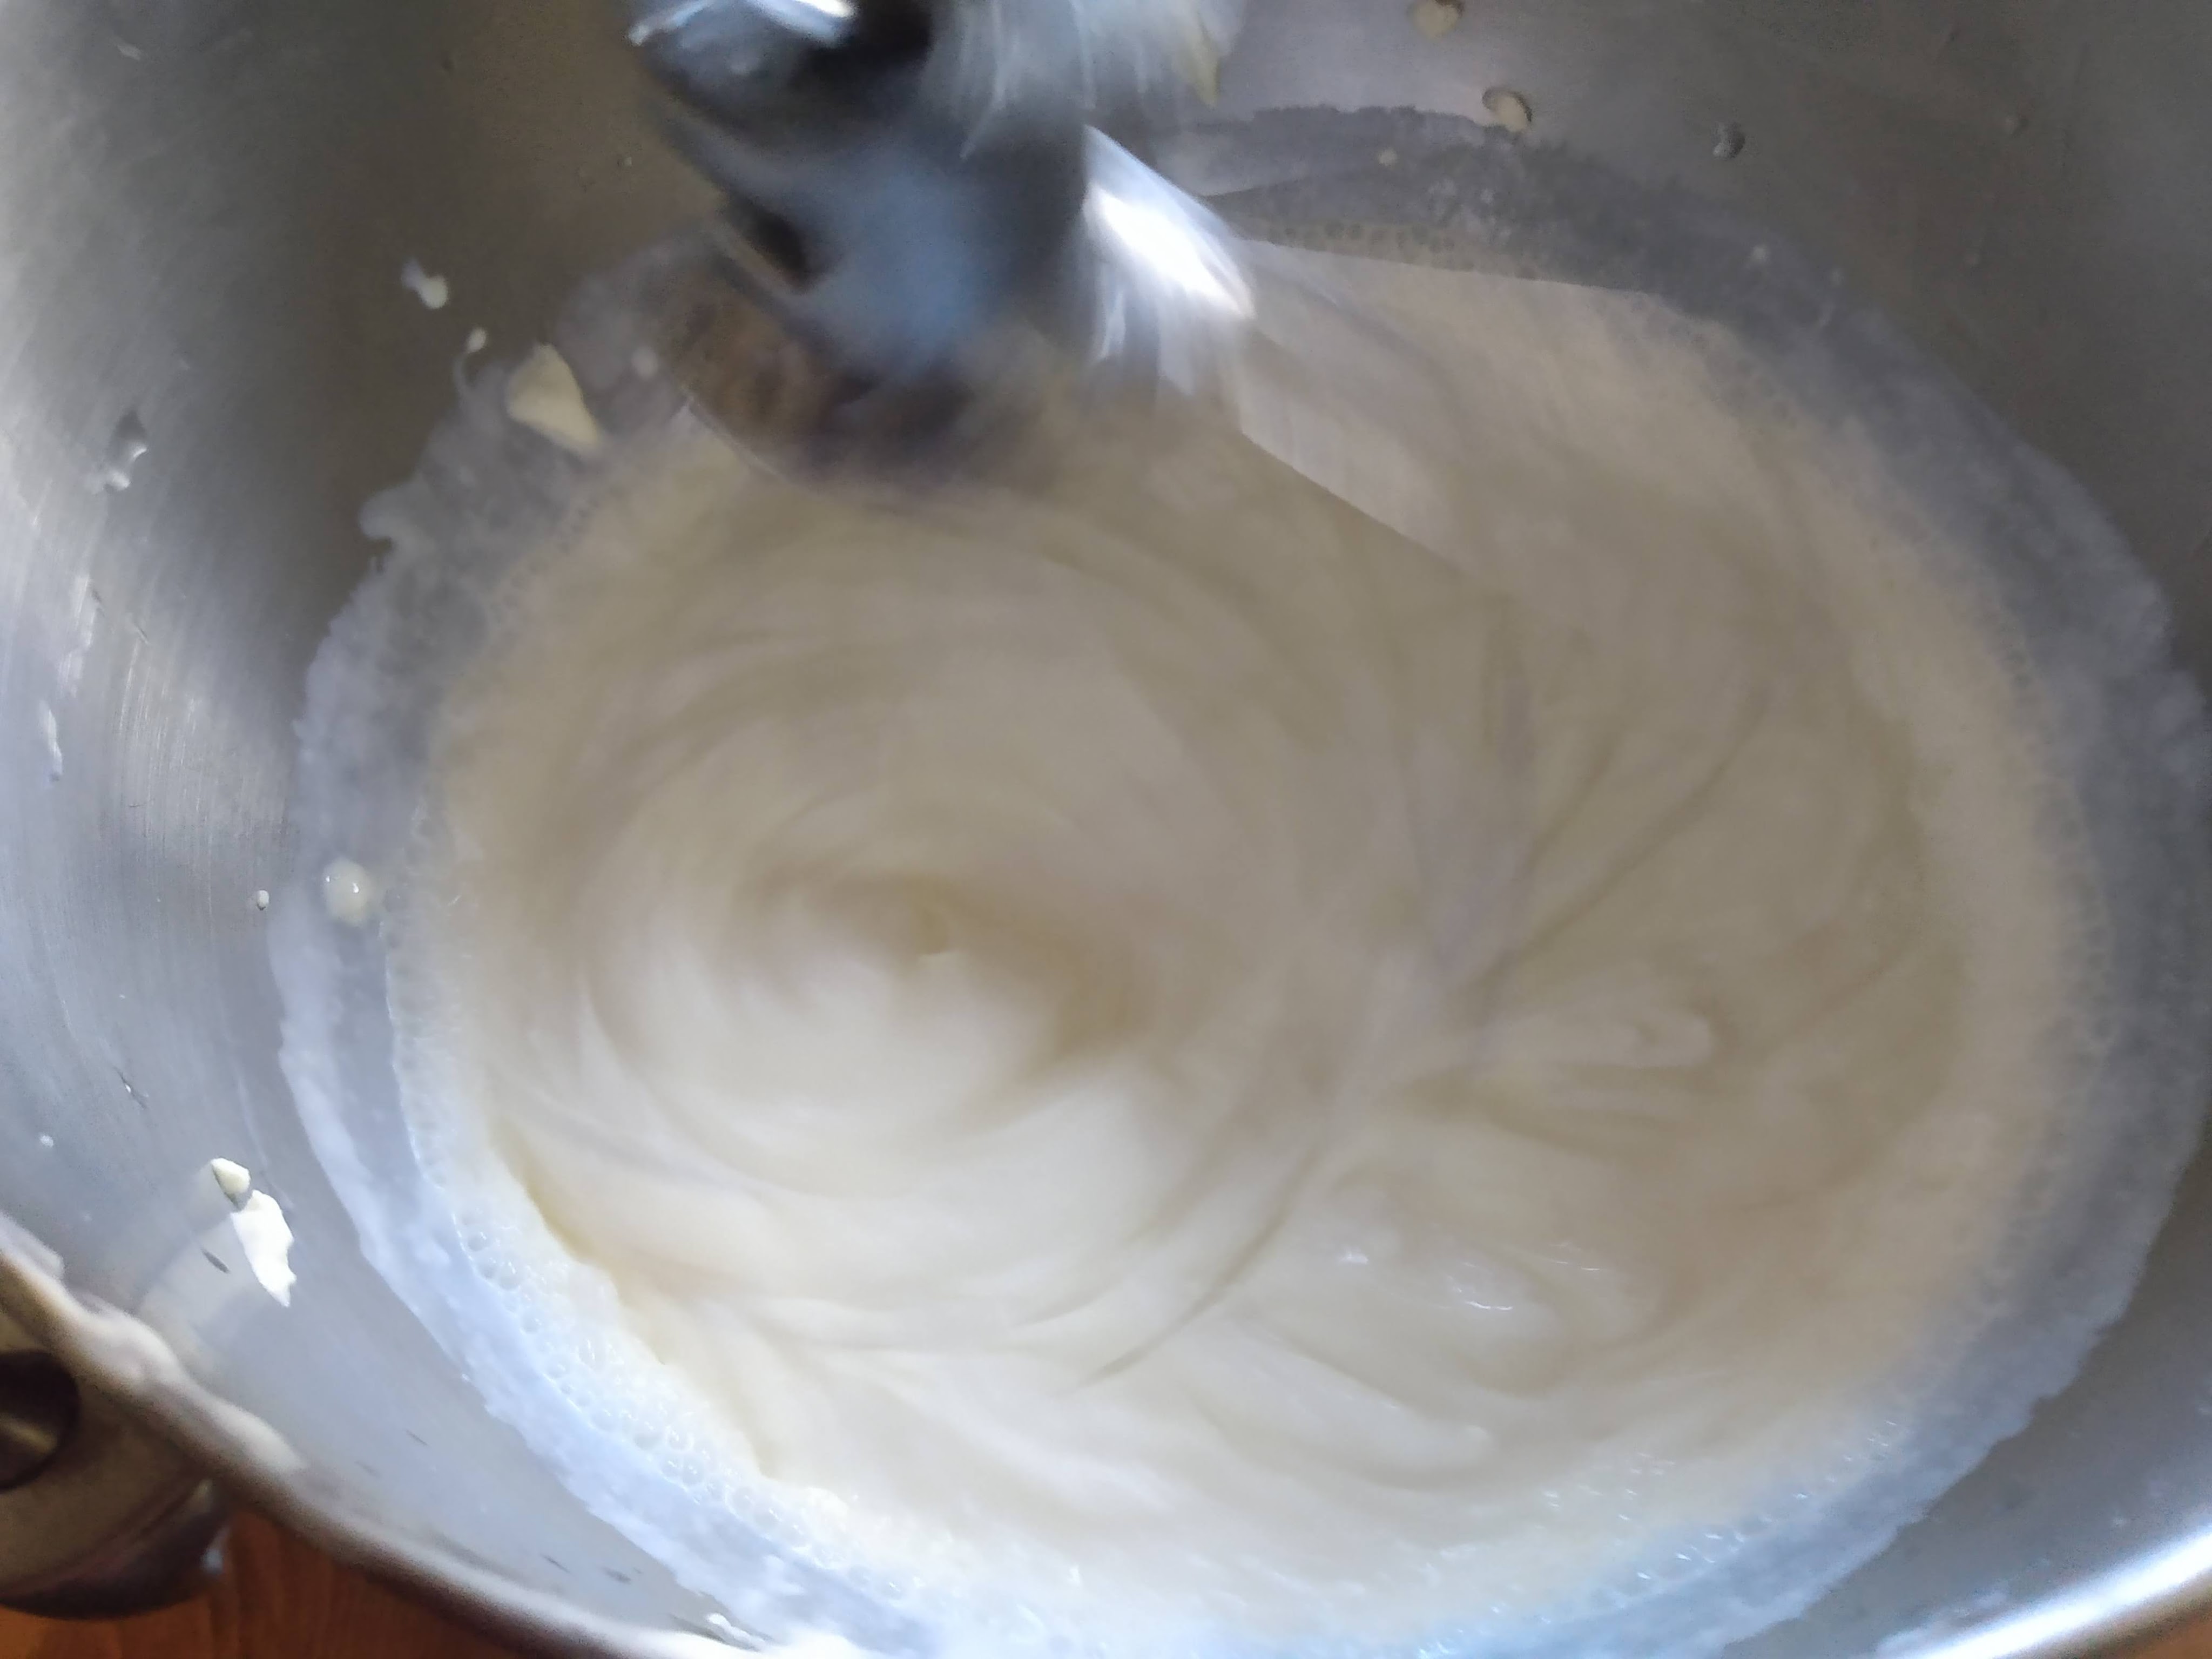
Then it’s time to churn.
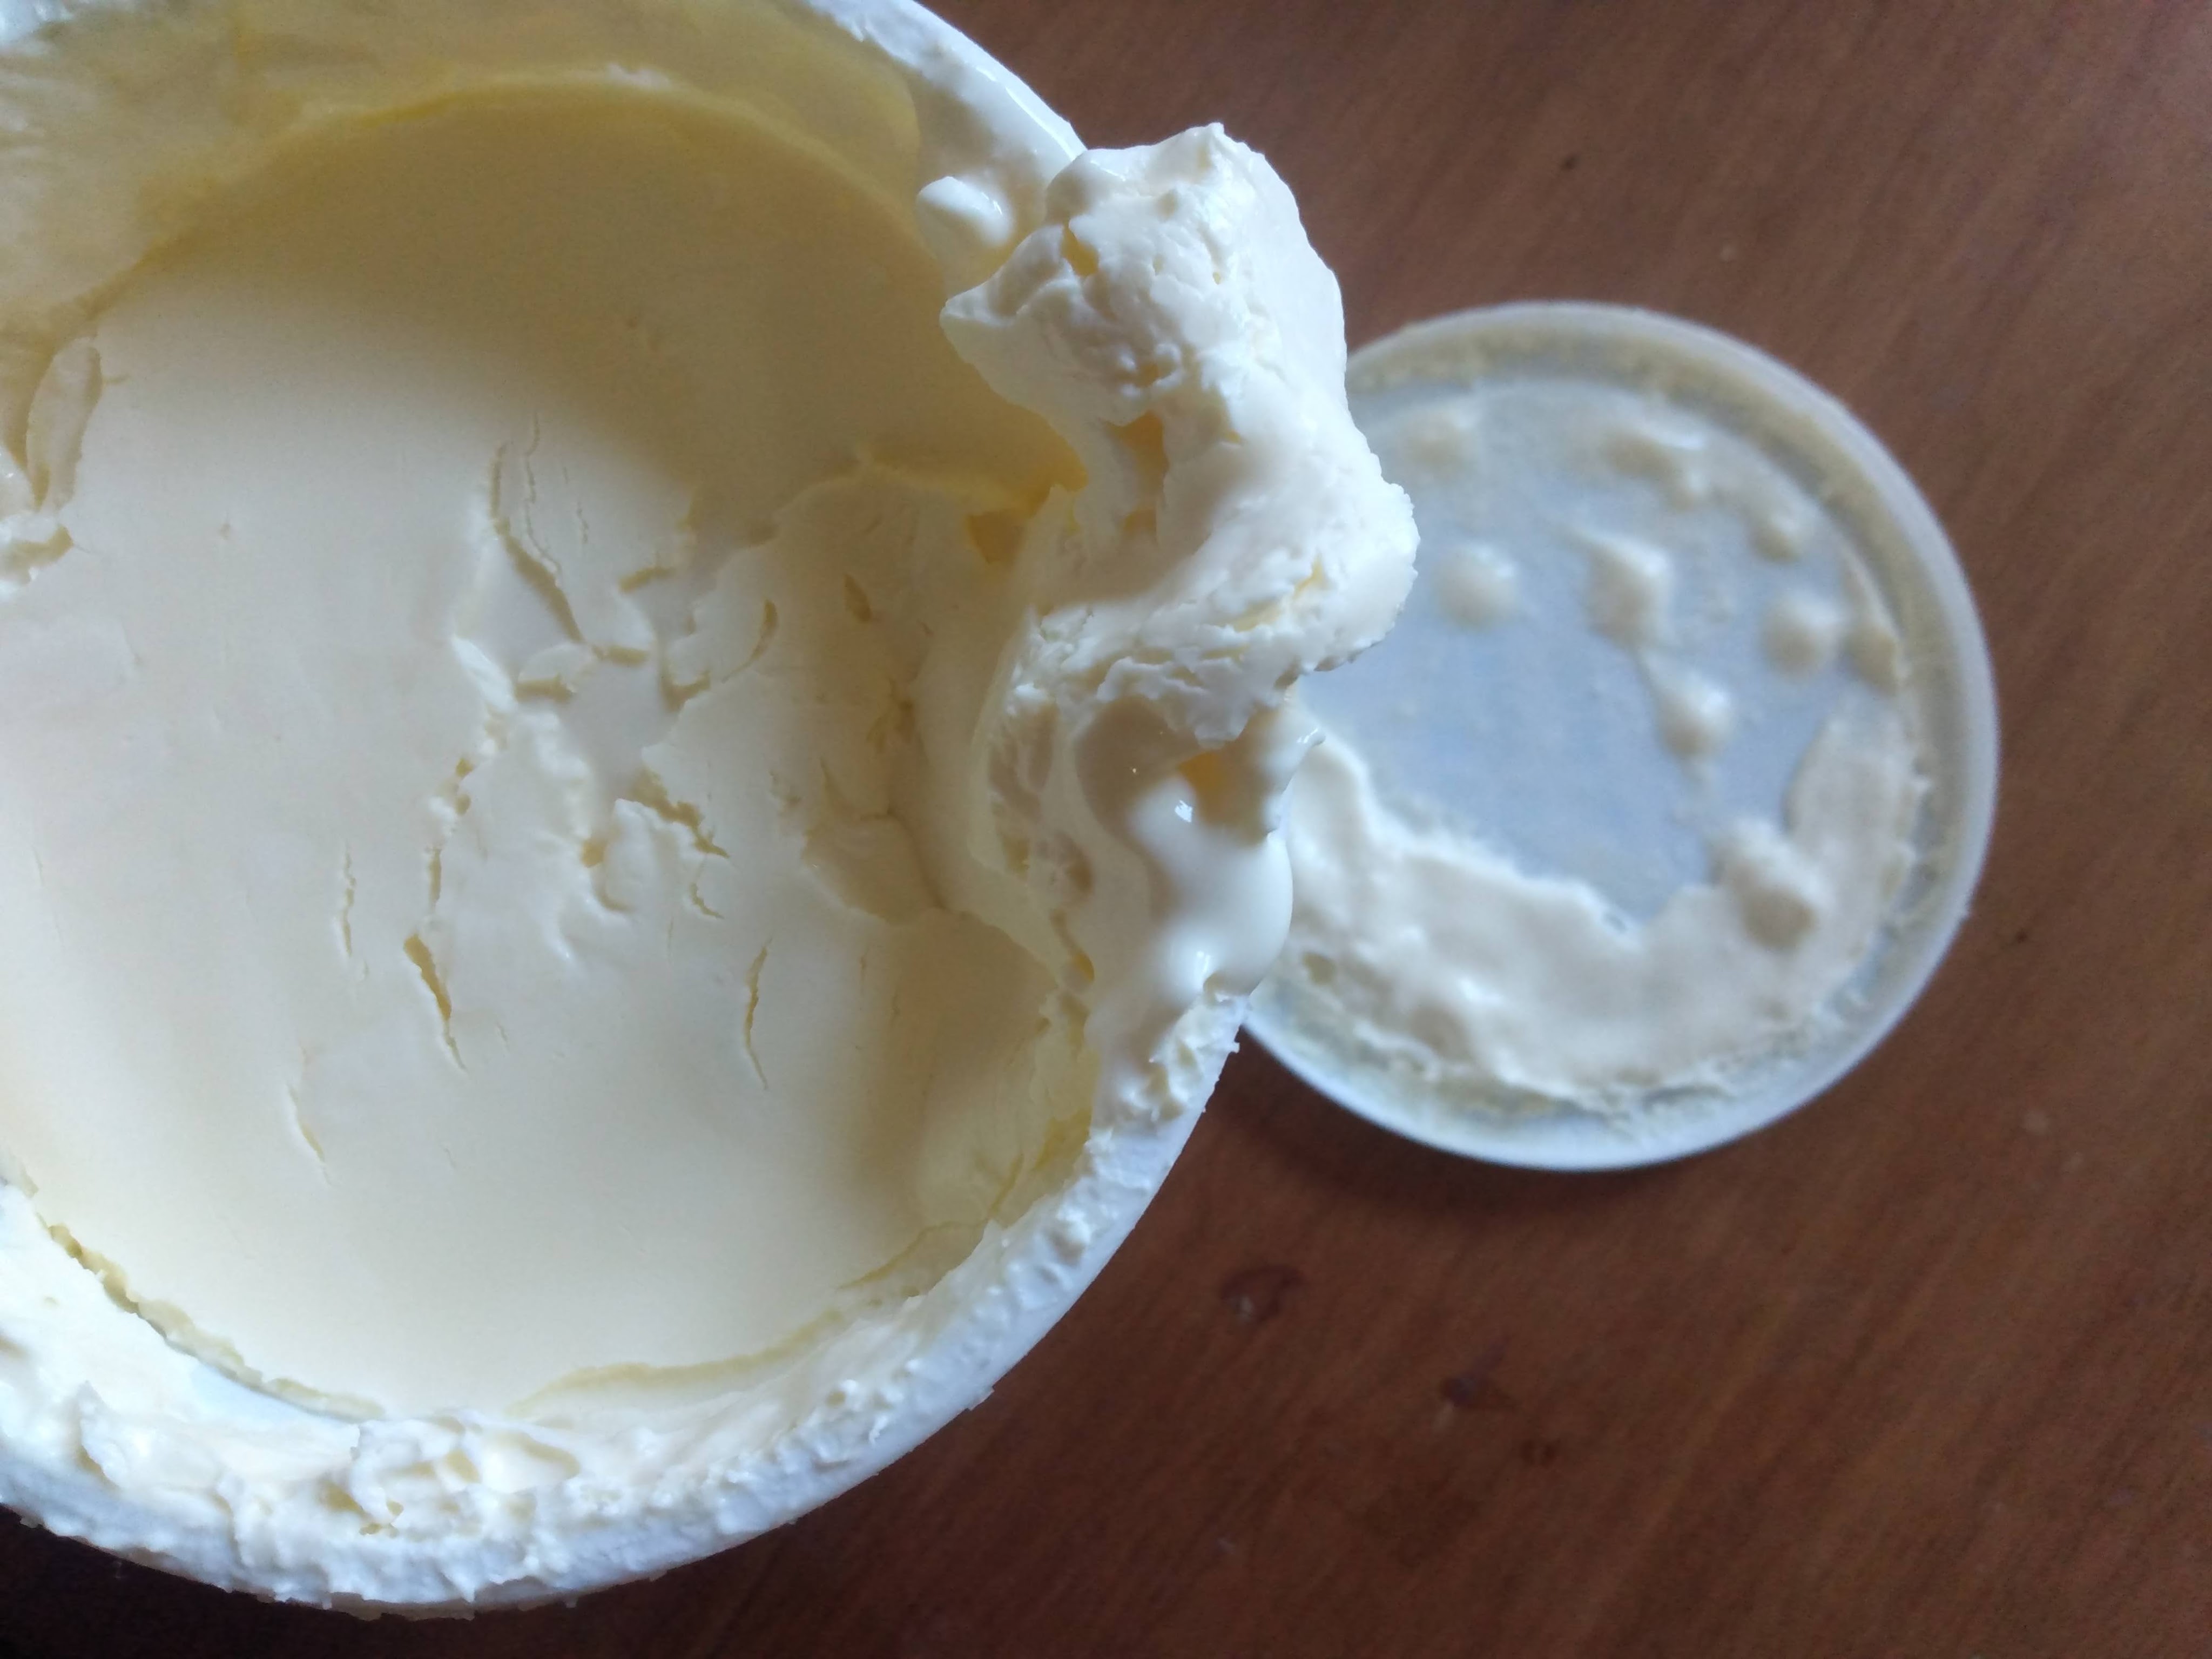
With the suddenness of a lightning bolt rushing fully charged through the sky, churning tares the old body to bits until a murky new shape slides out with better preservability. After enough agitating violence, whether in a butterchurn, shaking in a lidded jar, or mangled mechanically with a food processor or mixer, cream is taken beyond that glorious beauty of fluffy ethereal whippedness who will cling on to the very end until it can no longer and is finally broken. Given up, two separate parts spill out the other side, one blossomed into a new form solid and curiously floating in its old self, while the threshed buttermilk is spent and still.
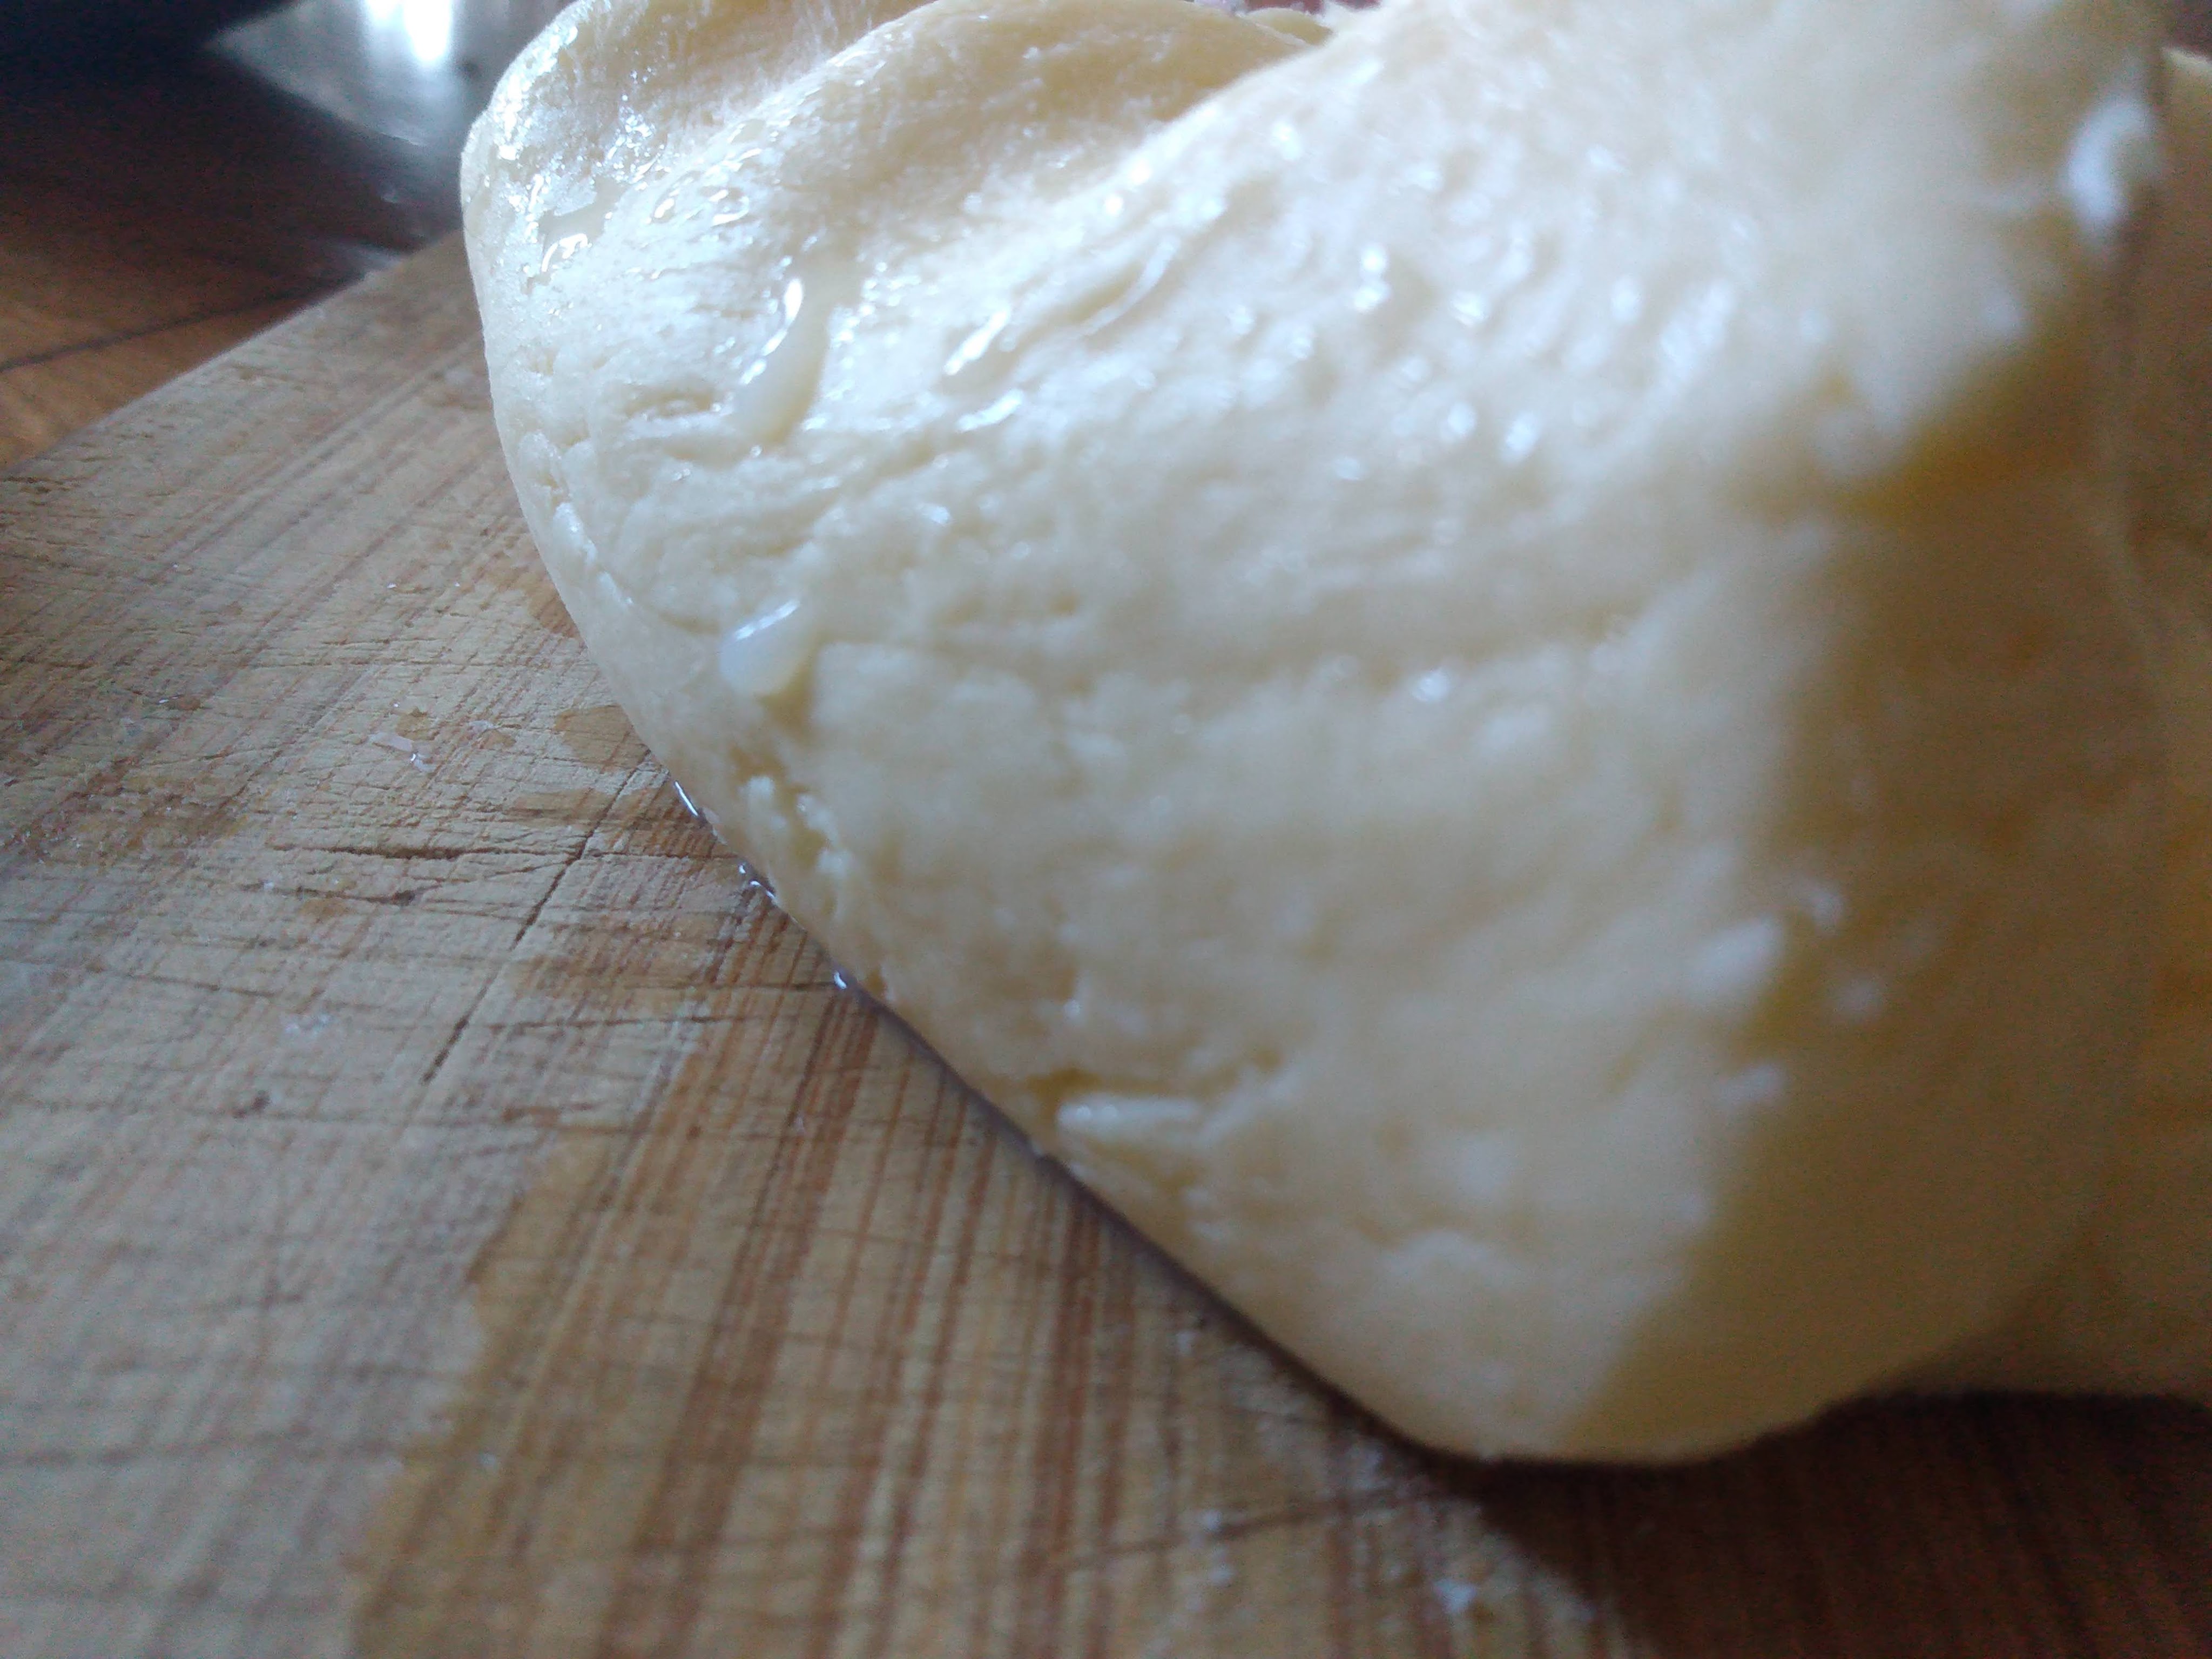
Then strained from its old excess the butterfat globs are mashed into a single mass and dunked into an icey baptismal bath to be fully purged of all of the residue of the life it once knew. It’s massaged in changes of cold water until it runs clear and fresh, standing on the ruins of the past a soft butter has emerged.
In a final act of cleansing the butter is kneaded on a board, perhaps with a sprinkle of salt, as the last tears of buttermilk are drawn off and its new form is complete, ready to look forward with renewed and matured grace to flavor the moments to come.
The beautiful truth that butter is, aged, rotted, and dismembered to be shed of its excess is only fully realized when that solid seeming glob then does what it is made it to, just like any heart that has ever been shook, broken, and separated to ultimately gather itself into a new form, it is remade to be melted once again. Butter, reborn love spilling back into delicious vulnerability.
***
The leftover buttermilk is alive and cultured and can be used to backslop into future buttermaking like an heirloom sourdough starter, or like the wisdom of the past culminating to push the future into existence.
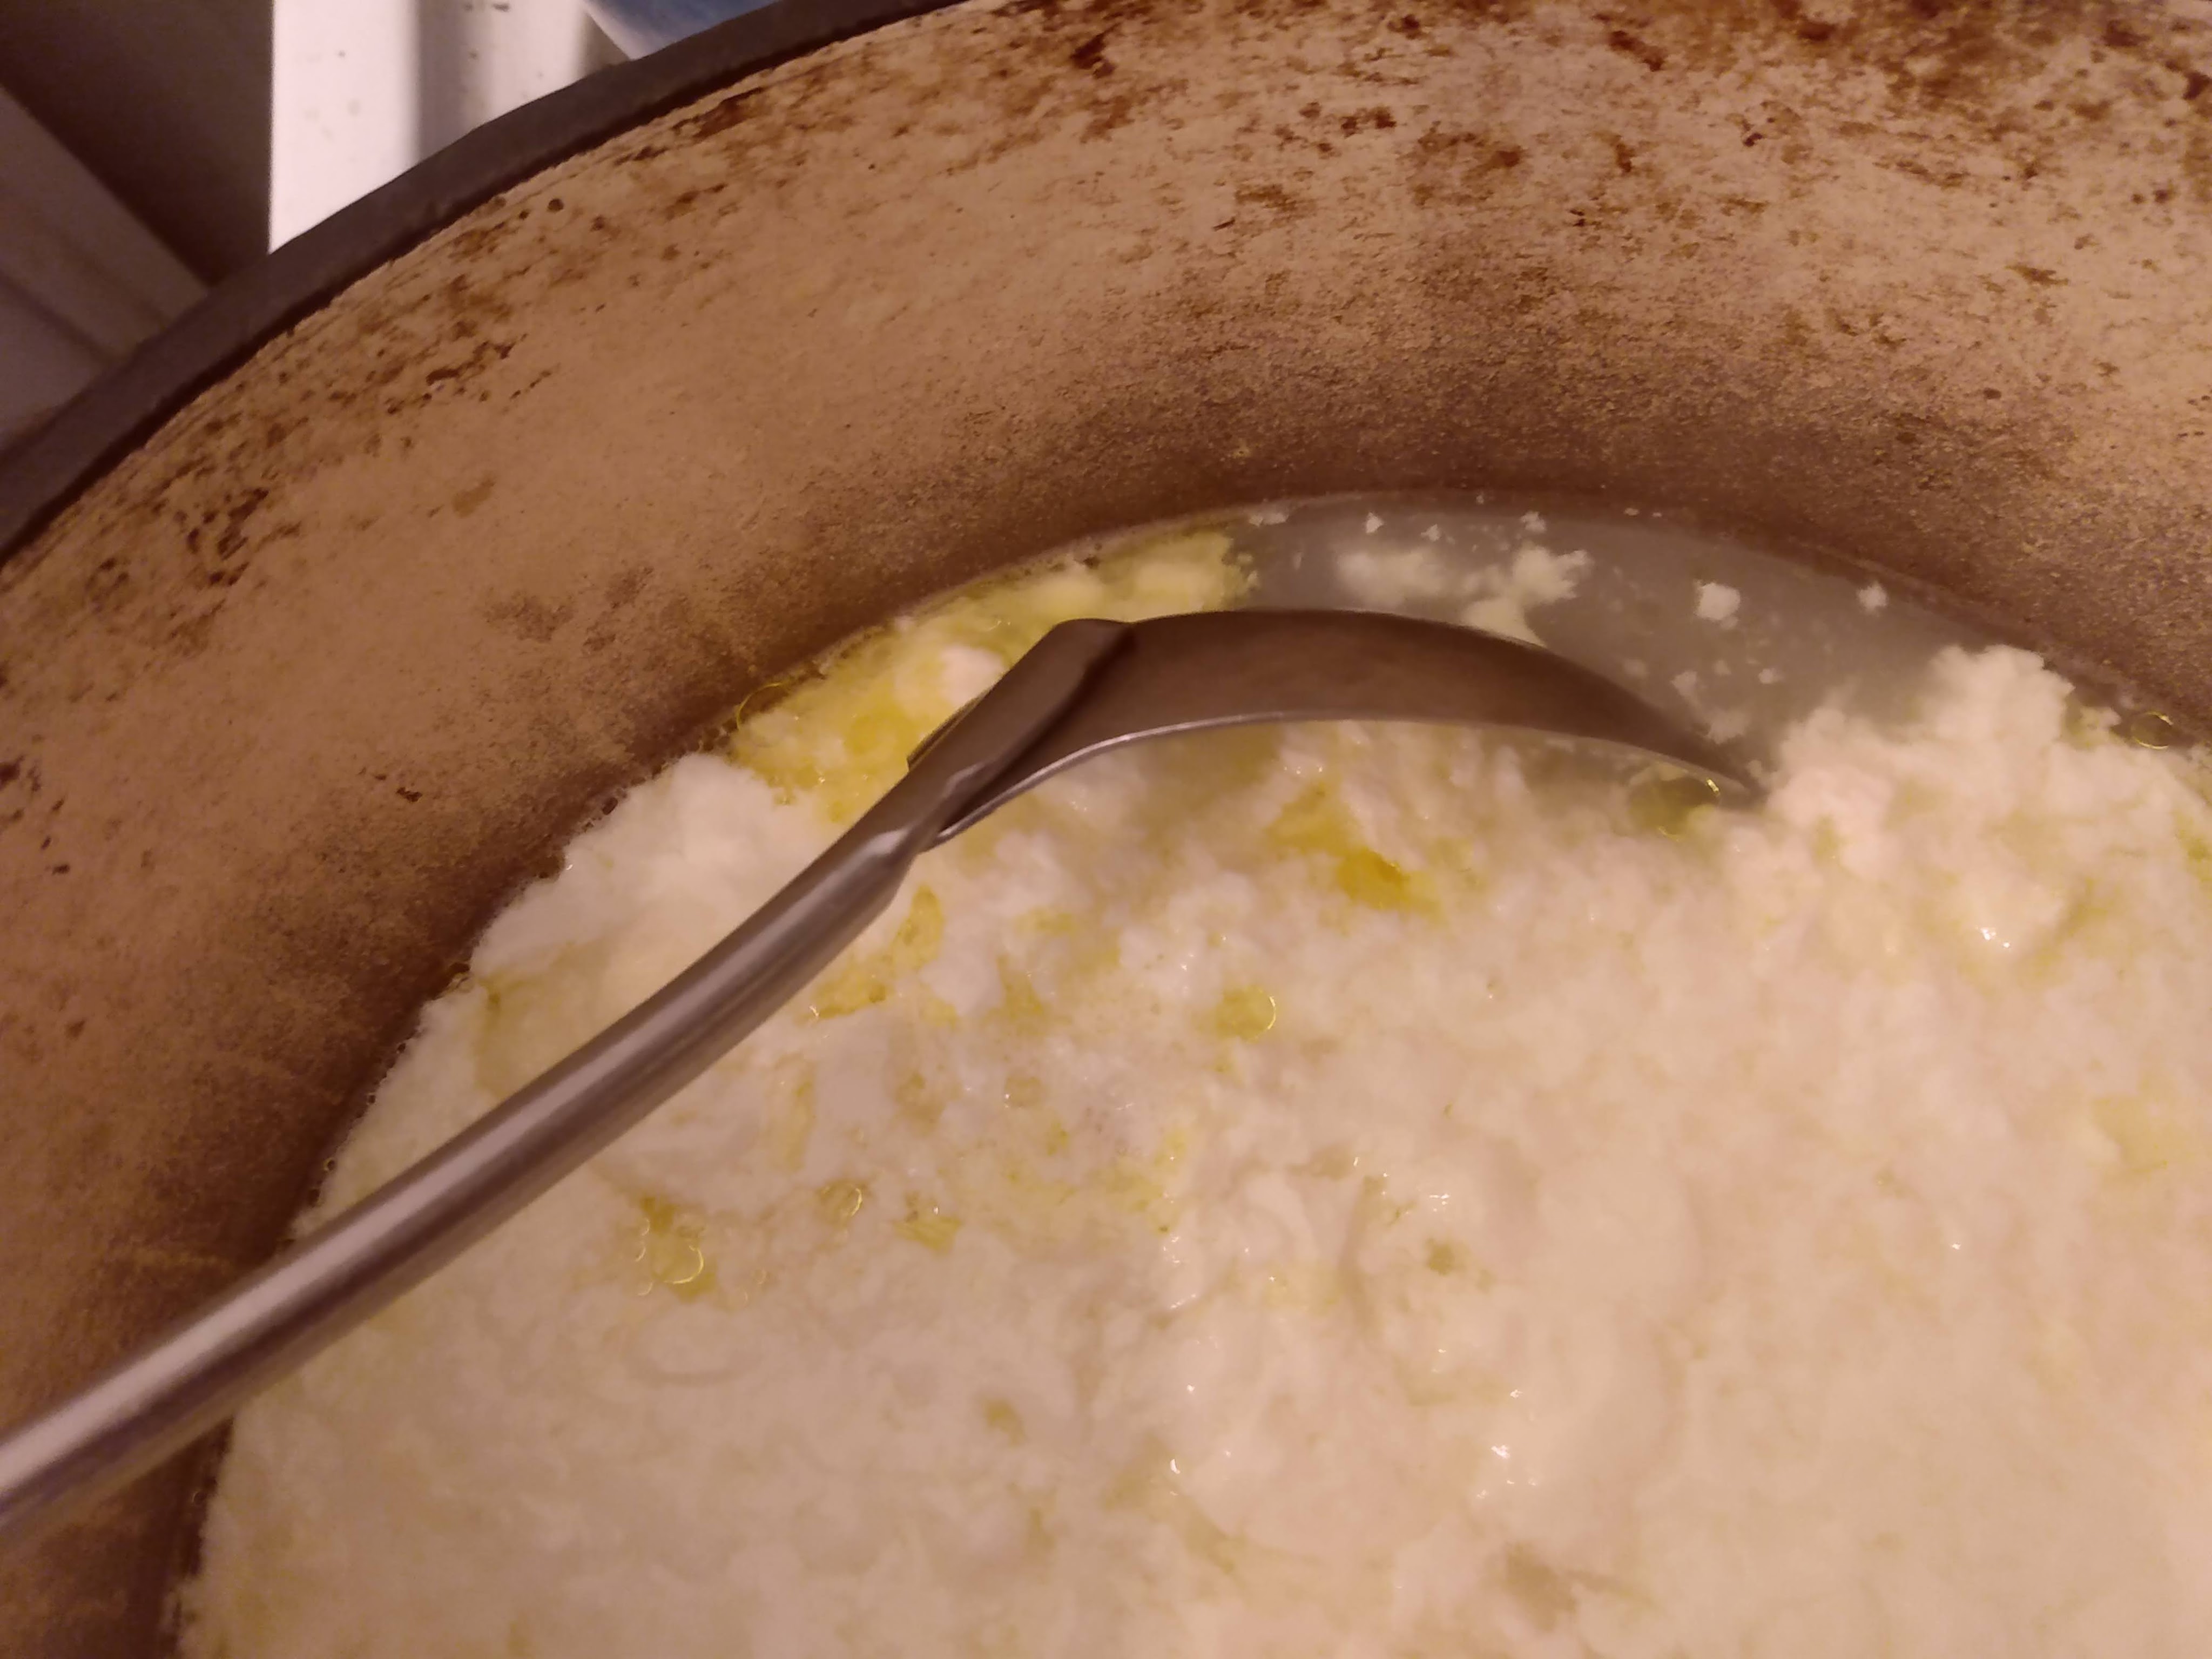
If starting the butter process with milk, which will need a hefty amount to yield much butter in the end, skim milk can be carried on to make cheese, such as this process for a naturally fermented ricotta cheese.
Ricotta is a very simple cheese to make that requires a little bit of heat and acidity to separate the curd. It’s common practice to add a splash of vinegar to achieve the necessary acidity however with a little more patience this can be done by just allowing the milk to ripen on its own.
Choose an unhomogenized milk, often in stores as “cream-top.” The process of homogenization is meant to destroy milk’s natural separating qualities which in turn hampers its curd quality. Leave the milk out to being souring. A starter of some sort is a great idea with pasturized milk and can ensure a more welcoming and interesting flavor. Anything from leftover buttermilk from a cultured buttermilk process or kefir would work great.
It’s a little intuitive at this point, but depending on weather should take a day or two or three. (The milk pictured above went a little long and while worked great, had a more pungent flavor.) As the lactic acid bacteria feed they will create a natural acidity. With a good soured milk all that needs done is to heat it up slowly to just about a boil, and when you see the curds begin to clearly separate, turn off the heat and let it finish the process for around 5-10 more minutes. High and longer heat will make a firmer curd, while the opposite is softer and more delicate.
Strain the curds out in either a cheese cloth, a fine strainer, or t-shirt even- though not necessarily letting it strain entirely. There is potential to decide the moisture content of the finished ricotta, which feels like the artful side of making this cheese. It’s better to strain less than more, and thoughtfully continue straining until it reaches an elegant and appropriate consistency for what you will be using it for.
Then sprinkle in salt to taste and enjoy fresh, with optional spices and herbs added.
All of us are born dyer right? We’re born with the ability to fumble our mug of tea onto our shirt in an uncontrolled moment. Any of us can make browns, as lots of plant materials oxidize into other shades like yellow too. However blue is a much more difficult one and rarer in nature to achieve.
The substance in plants that makes blue exists in many botanically unrelated plants. Examples from across the globe include: “True Indigo” – India (Legume), Anil- subtropics (Legume), Indigofera bracteolata (maybe Dugwa lala)- West Africa (Legume) , Woad- Middle East/ Britain (Brassica), and Japanese Indigo- (polygonaceae). Japanese Indigo is what the following information will specifically pertain to. Even as these plants grow geographically and culturally separated, the process for obtaining pigment is generally universal despite the techniques being discovered independently.
Growing
Japanese Indigo is sensitive to frost. The damage to the leaves from frost and insects are interesting ways of speculating how the pigment was discovered, as the damaged leaves show a curious blue hue. Start seeds indoors around the same time as tomatoes or direct sow after the frost date. They can be a little slow to germinate but will grow quickly thereafter.
Japanese Indigo requires no special growing conditions, good fertility gives more leafy growth, which is what we are after as the pigment is in the leaves. A rich soil and ample water will increase your yield.
Harvest the indigo before flowering by cutting the plant down to a couple inches above ground. Japanese Indigo will easily regrow after being cut and it is possible to get multiple cuts in a season depending on your situation. Do consider not cutting the best performing plants in order to let them go to seed. Harvest these just before the frost so they have a chance to mature. Also make sure to get a final harvest in right before the frost arrives.
Pigment Extraction
There are many different ways to process the harvested indigo from drying to composting, to using right away for fresh dyeing. The following process explains how to extract the pigment from the fresh leaves that can then be stored for later use. It is the preferred method for our farm as the first cutting usually comes in late July when time is more scarce and the harvest is the greatest.
Leaf cells contain indican and an enzyme that are kept separate until the cells are ruptured. Combined they make indoxyl. Indoxyl when exposed to oxygen becomes indigotin- blue. So first the cells must be destroyed to begin extraction of the pigment.
If you happen to have a protein based fiber you can pick the fresh leaves off the stems into a bowl, sprinkle a little salt, and massage the leaves into your cloth which will rupture the plant cells in a process that feels very much like making sauerkraut. The result is a teal color.
Fermentation Extraction
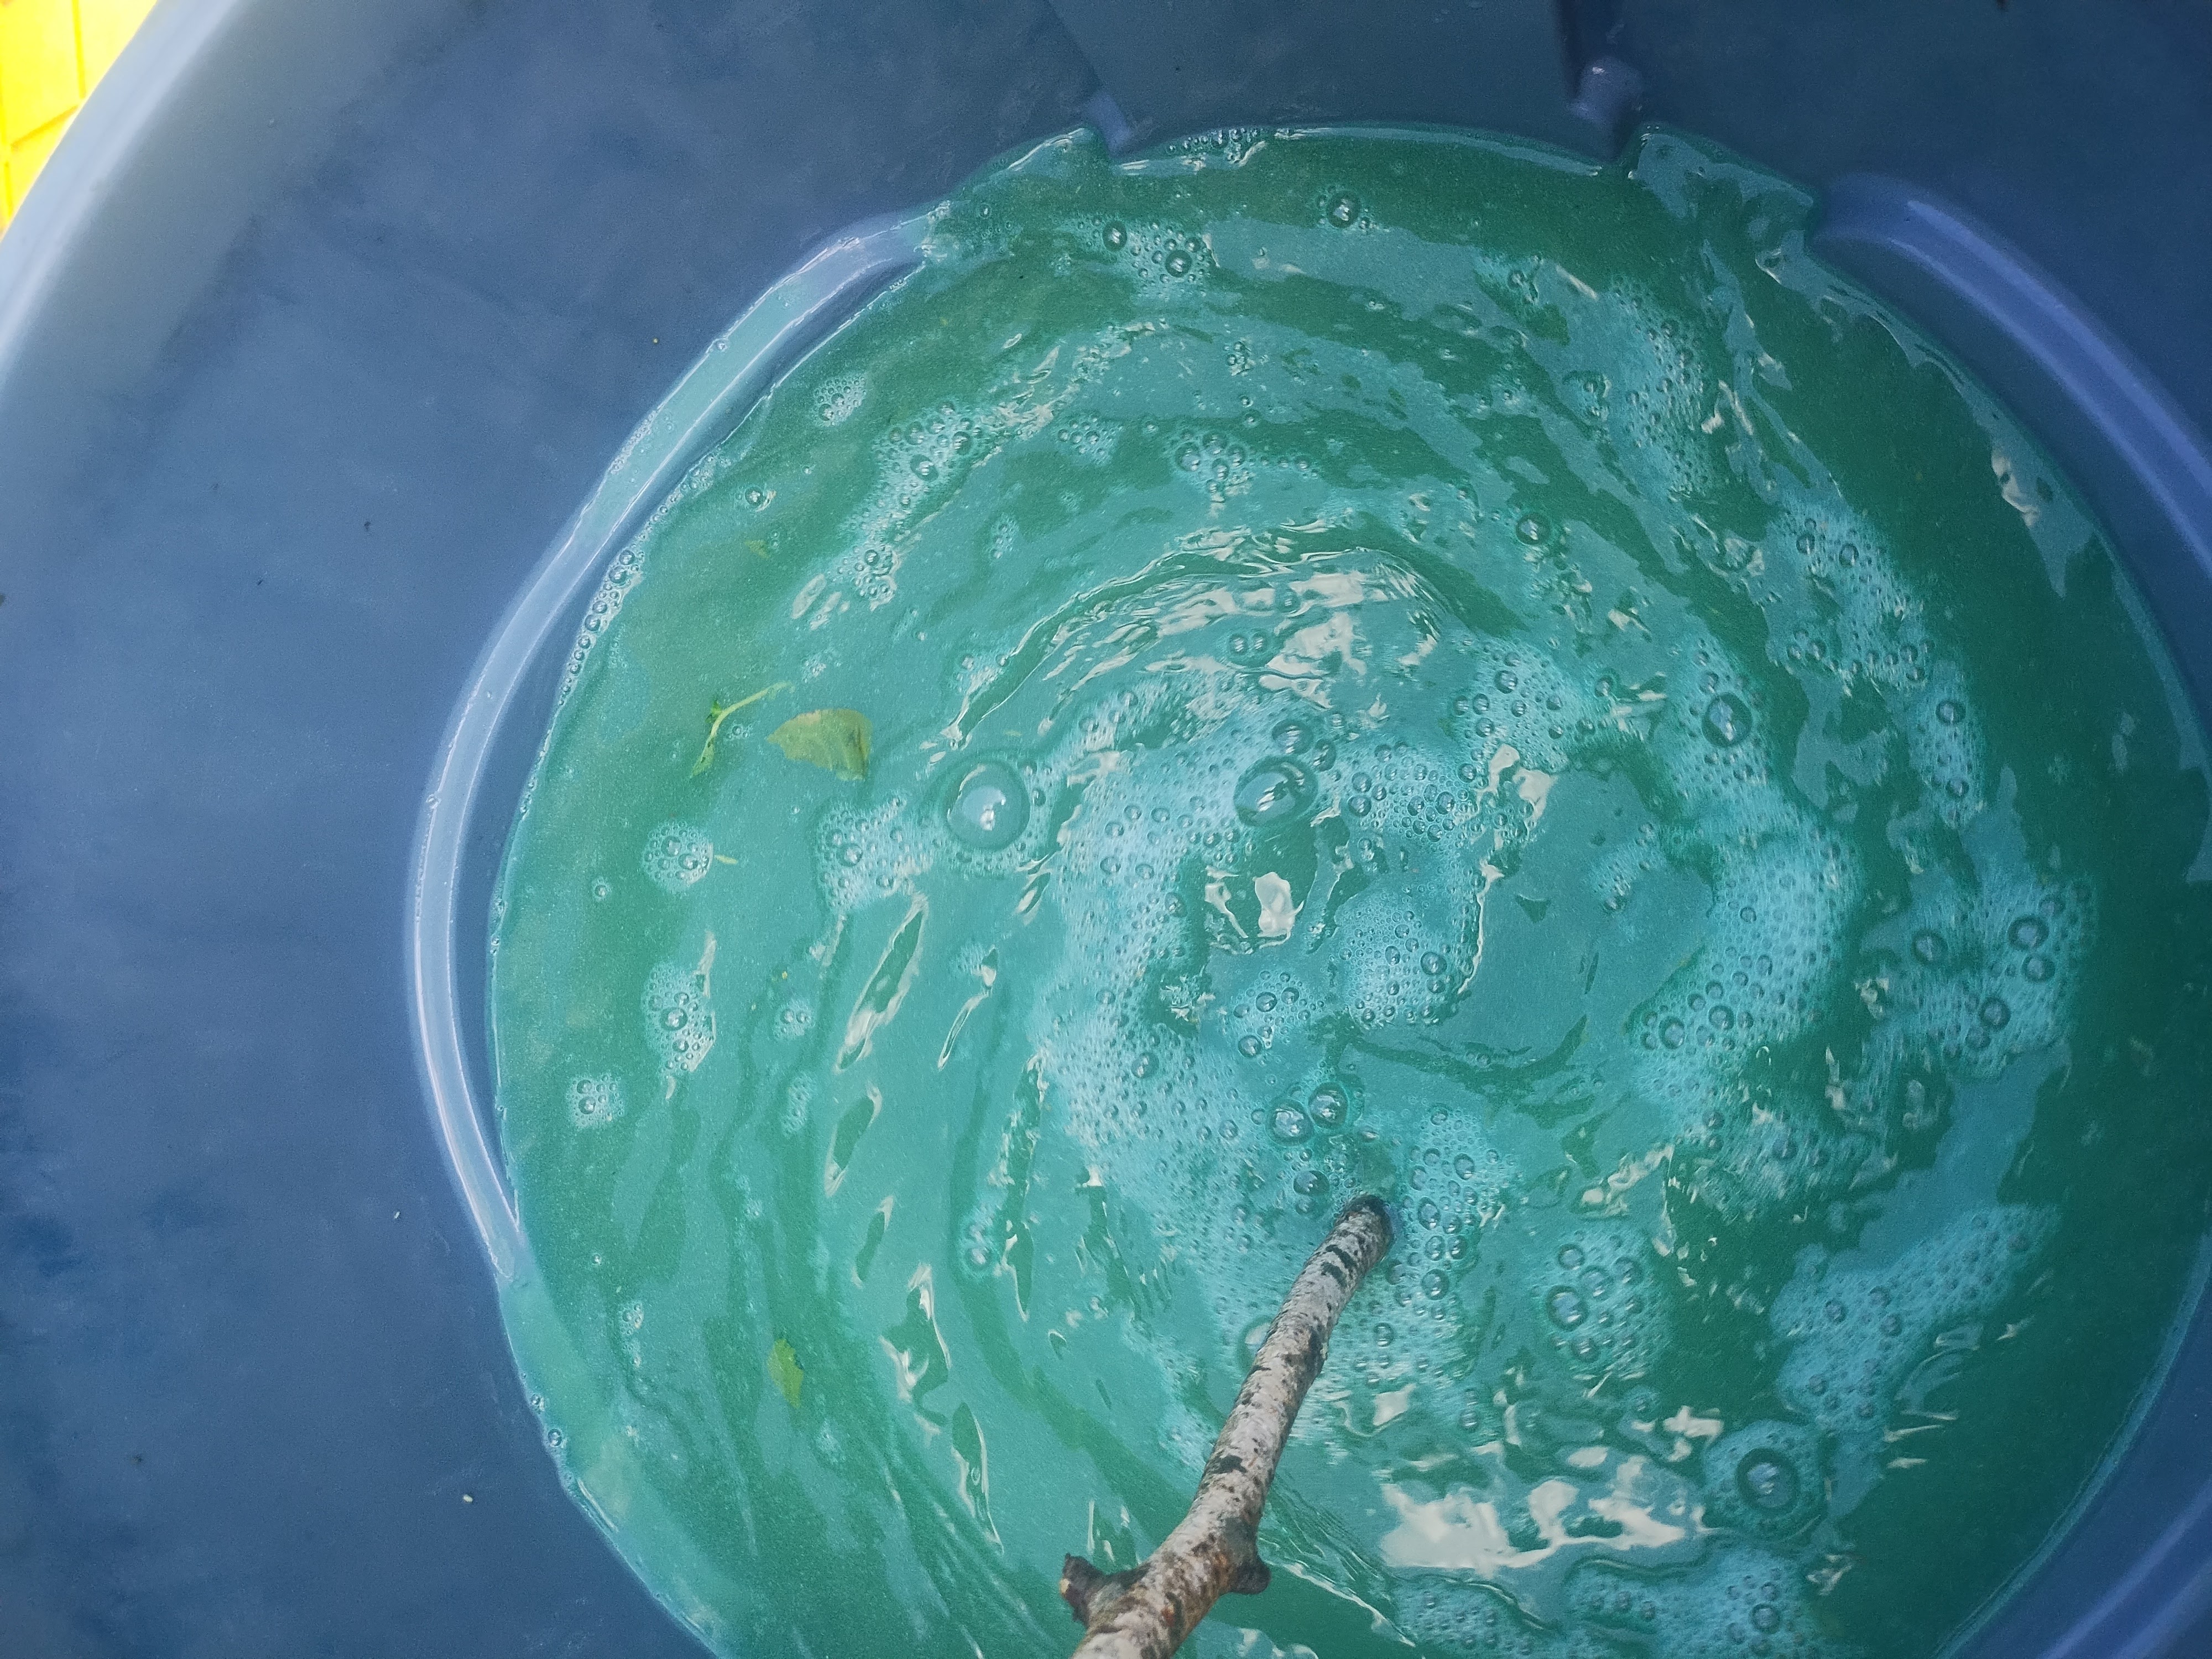
Immediately after harvest, plunge the whole cut plants into water weighted down. We use 44 gallon Brute garbage cans. Warm temps are ideal like 70° with a lid. Placing the container outside in the summer under some shade is great.
Let it ferment for 3-4 days or until the pigment is noticeably spent from the leaves. You should be able to notice the water having a greenish-blue hue. Discard the plant materials into the compost. Fermenting too long can decrease the amount of pigment.
Bring the remaining liquid to a pH between 11-12 with lye, hardwood ash, or Cal/lime. A pH measuring tool can be used or you can incrementally add your alkalizing agent, stirring vigorously, until the water reaches a hue of blue you want. Raising the pH will darken the blue color.
Stir and splash vigorously for as long as you can to introduce oxygen. Then let the mixture settle a couple hours or overnight. The top liquid should be clear of any blue with the pigment settled on the bottom. If there is still blue suspended in the water then go back to vigorous agitation and try again. If it still doesn’t separate try dropping a couple bags of ice in- this has worked for me in the past. When the pigment has precipitated, the top liquid, which will be yellow-hued should be poured off until all that remains is a blue sludge. The settled pigment goo can be dried down into a pigment powder or left as a paste. In this state it is usable to make paint or ink but needs an additional process to be able to adhere to fibers, specifically plant fibers.
The Dyeing Vat
The indigotin produced through the extraction process is insoluble in water. However when oxygen is removed and the pH elevated (+11) it converts into leucoindigo/ white indigo (it’s technically colorless now) and dissolves in liquid and can now adhere to cellulose fibers like cotton and linen. Fibers introduced to leucoindigo collect the pigment, then when removed from the liquid and reintroduced to oxygen returns the leucoindigo back to indigotin thus dyeing blue.
Two ways to remove oxygen is through an active fermentation or by chemicals such as Iron (II) Sulfate Heptahydrate.
In a bucket of clean water add lye/ hardwood ash/ or cal to reach a pH of between 11-12, then add processed indigo pigment.
For a chemical reduction add Iron (II) Sulfate Heptahydrate, something like 60g per 5 gallons. It can be helpful to dissolve it in hot water first. Stir everything then let it rest before using the vat.
For a fermentation reduction add a sugar, preferably from a fruit source, but it can also be as unassuming as bran. Add a starter like unpasteurized vinegar/ wine/ sourdough starter. Leave the vat in a warm place to ferment until it is vigorously bubbling. At it’s peak activity the vat is ready for dyeing. This vat can be reactivated much like keeping sourdough starter, though all of the vats can be used indefinitely as long as the pigment gets replenished, the pH stays within range, and the reduction is reinstituted.
Dyeing
Presoak clean cellulose fabric in clean water and wring out. Dip carefully to not disturb the vat and introduce any oxygen. Leave the fabric in the vat for 30-60 seconds and carefully pull it out, gently wrigging out the fabric, then rinse and squeeze out in cold water.
Repeat the dipping steps to get the blue color you want. The more dips will create darker colors as opposed to longer dips. Keep in mind how the blue color will lighten as when it dries.
When you’re finished, rinse your fabric in cold water with a splash of vinegar to reset pH.
There are so many different techniques for dyeing with resists, folds, and ties that will be a final layer of excitement to your home grown and processed indigo.
The full potential of shio-koji, a mixture of koji, salt, and water hadn’t set in until a few days into the pandemic lockdown when a box of random food found it’s way into my home. Inside it was a curious array of items that provoked varying degrees intrigue and whatever the opposite of intrigue is. Tucked away with the mystery foods was a huge bag of blended rubbery meat peices, complete with fake grill markings called “fajita style” chicken strips. Considering the present circumstances, figuring heck- having something to eat is always a blessing, whatever it is, I drowned the pretend chicken into a pool of shio koji and after a few days cooked it up and was impressed- not with the “chicken,” but with the incredible and dynamic flavor imparted by the shio-koji.
Real quick to be clear, koji fried chicken likely has some origins that we can trace back fairly recently to a fella in Ohio. I mention that because the “repost” internet culture of regurgitating other people’s great ideas can feel disingenuous and deceptive. While my own connection to this style of meal I often eat nowa-days stemmed from the aforementioned story, the idea was something I’d heard of before and so gave a whirl in my kitchen and now post online primarily in support of our Pittsburgh-based monthly fermentation-inspiraton newsletter.
That asid, here is how I’ve been doing it:
Making Shio koji marinade
Shio koji is a slurry using koji rice, water, and salt that is left to ferment. The mixture matures with time into a sweet, salty, umami porridge that is perfect for using as a marinade as the enzymes in the koji asssist in breaking down the ingredients and infusing flavor. If you’re not familiar with koji, it is a fungus, usually grown on a grain with certain enzymes that are responsible for the unique flavors in products like miso, sake, and shoyu. Shio is great for almost any meat, including all poultry or even different vegetables to add another dimension to your cooking.
Making shio is very easy. Combine a koji inoculated grain to water at a 1:2 ratio. Add 1 tbs salt per 2 cups of mixture, or to your preference. Pop it all in a mason jar with lid fixed snug, give it a shake, and let it do its thing fermenting at room temperature.
If you’d like to get well acquainted with it, taste it every couple of days and note how it changes. After about 2 weeks you should be at a decent spot of maturity to do some marinating. However feel free to go as long as you wish. You can also put it in the fridge to mature slowly for a long time.
Marinating the Chicken
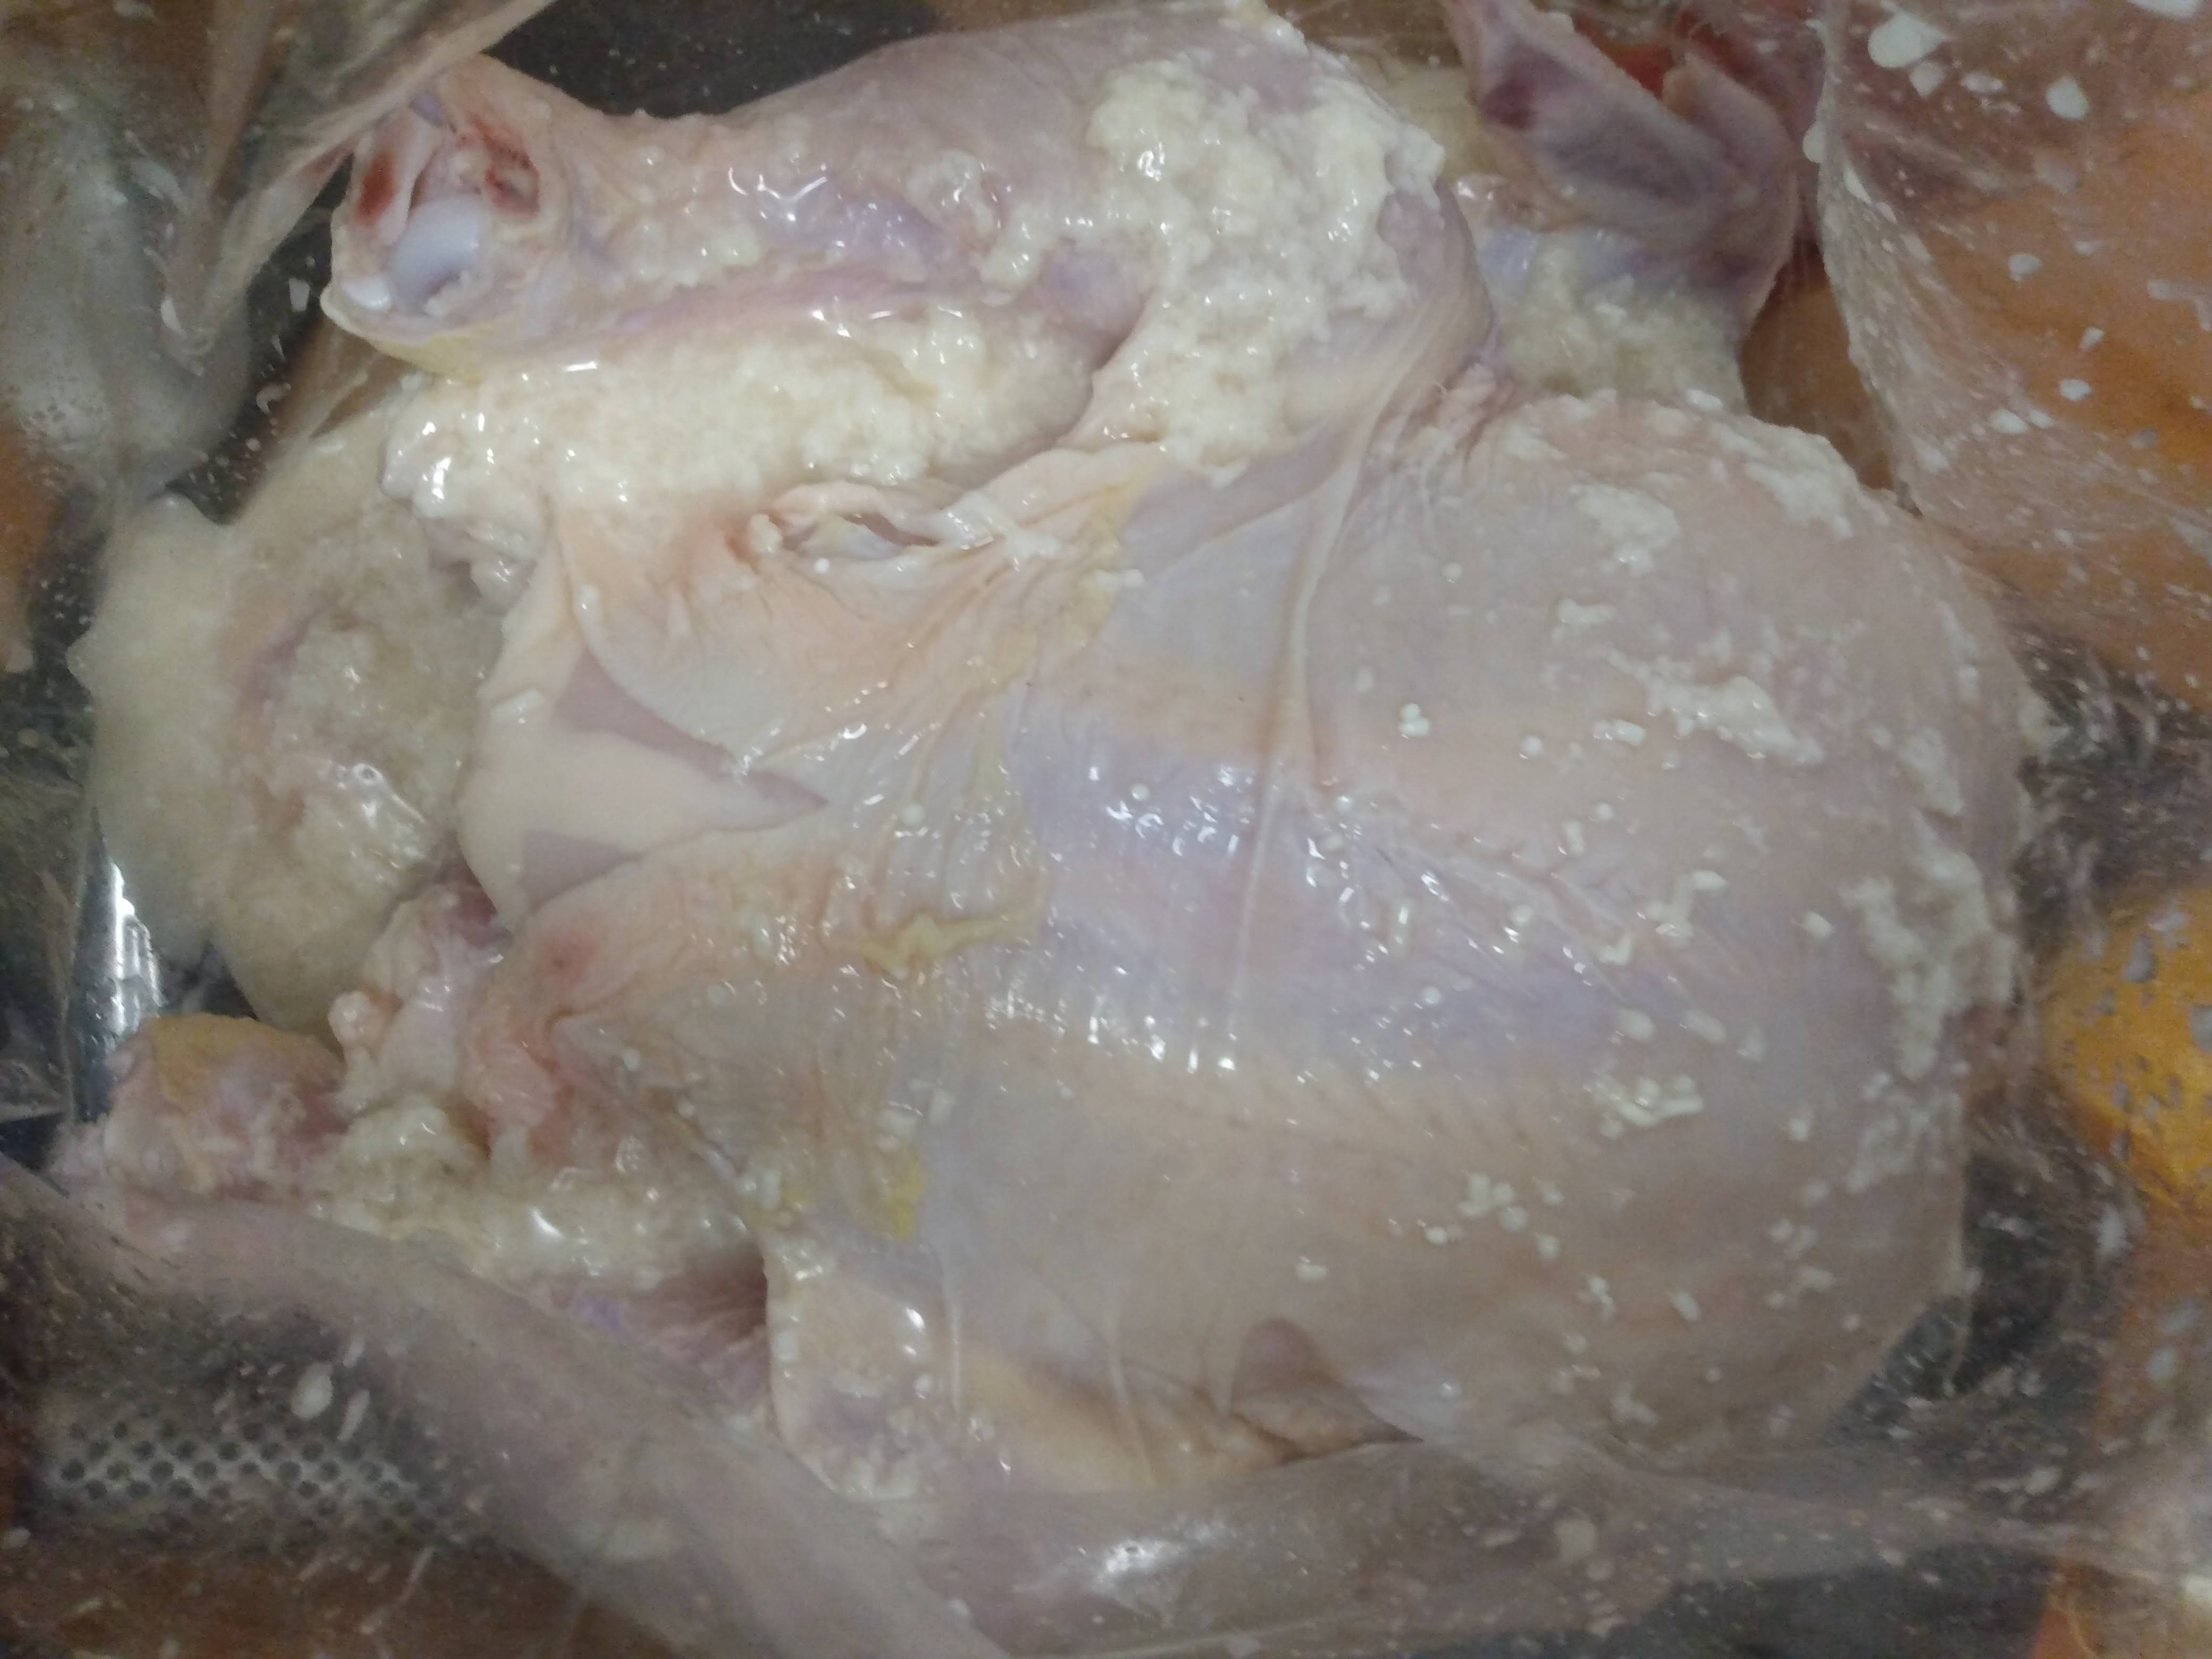
I’ll use about a quart of shio for a whole chicken, roughly without being exact, that’s about 1 1/2ish cups or two grabby handfuls in a quart mason jar, then topped off with water. Then add 1- 1 1/2tbs of salt depending on how salty of a person you are. Shake it up and let it ferment at room temp. You can make 2 or 3 of these at a time so you’ll have another one ready whenever you make your next chicken.
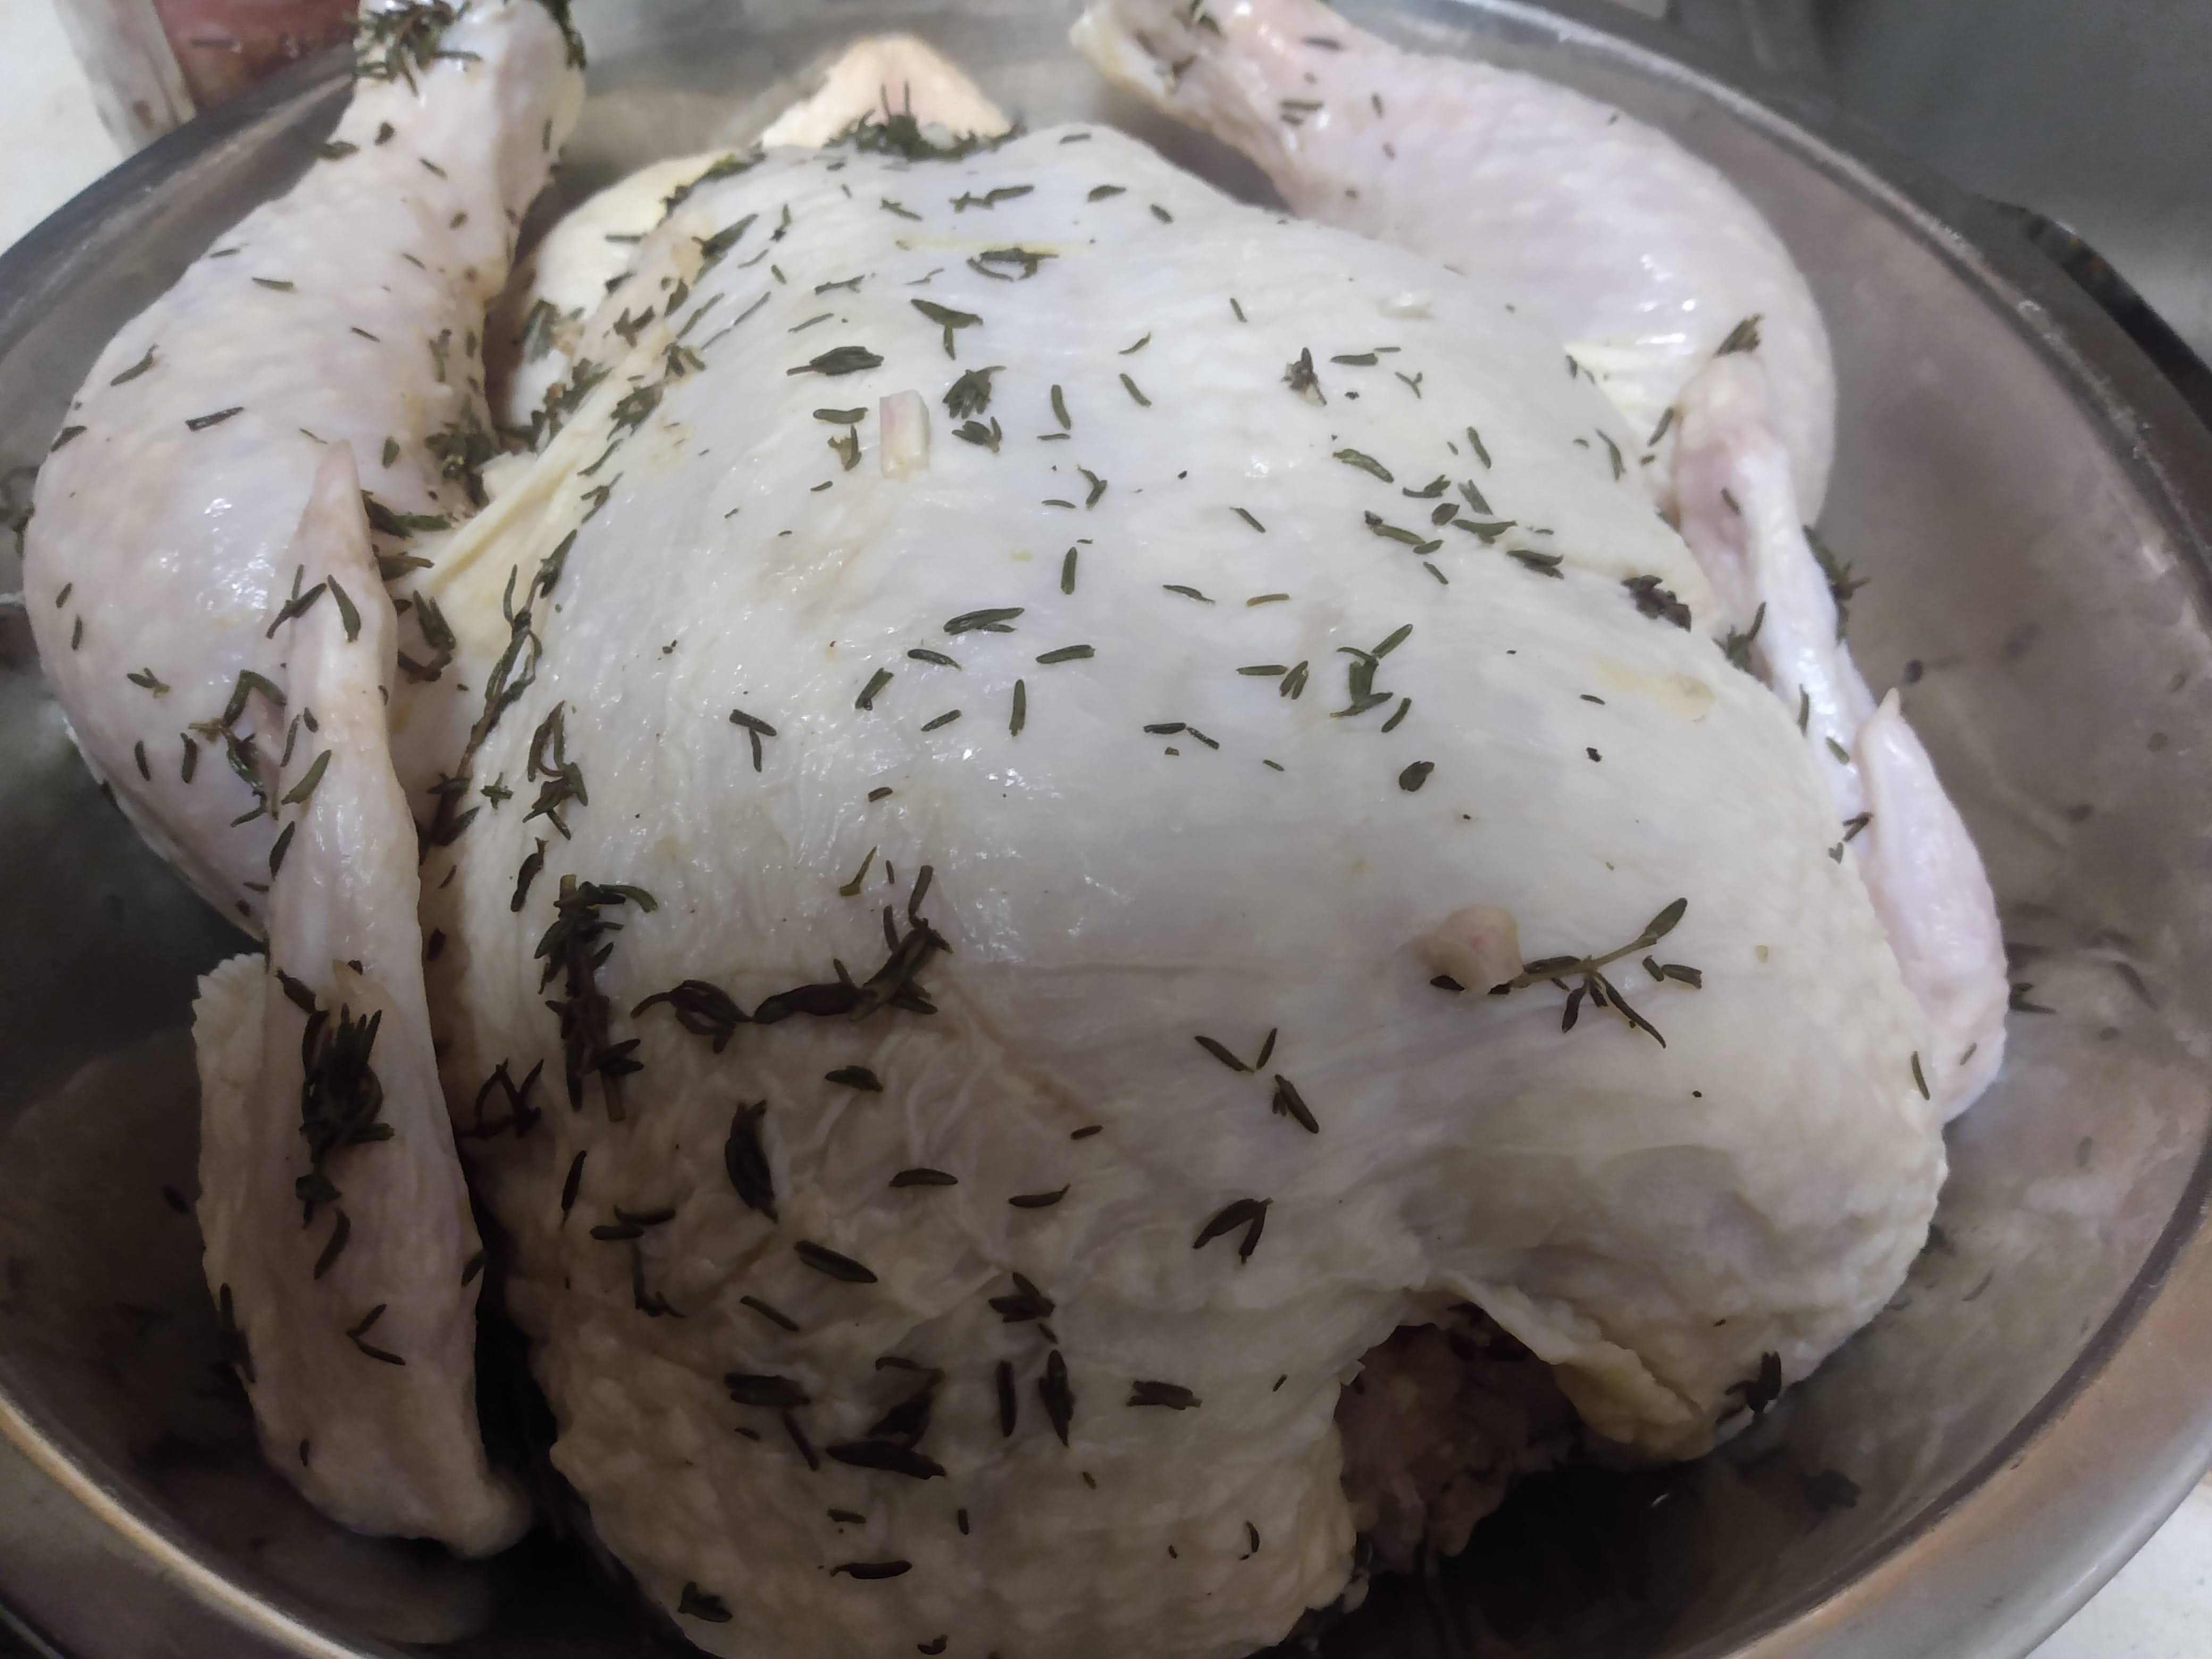
After at least a week, but more better to be three, take a leak-proof bag and empty the shio into it. Then add a couple cloves of minced garlic, a handful of thyme, some cracked pepper or pepper flakes, a couple slices of lemon, then plop in your whole chicken and tie the bag shut. Through the outside of the bag mix and massage the marinade into the chicken coating the whole thing and put it in the fridge.
Every 12 hours or so flip the bag over so the marinade is getting to the top and bottom. Marinate at least overnight, but a day or two is good too. When it’s getting near time for the meal, take the bird out of the marinade, give it a light rinse to get the koji goop off and dry it off. Drying can happen two ways depending on how much time you have. The long way is to place the bird in a colander with a liquid catch underneath and leave it openly exposed in the fridge for ideally a full day. The short way is to do the same thing except not in the fridge, but in the middle of the room with a fan blowing on it, turning every so often for a uniform dry skin. The second way is how we do it about 90% of the times.
Frying
Pre-heat your prefered frying oil to 375 degrees.
Meanwhile break down the chicken.
For the fried breading use flour as a base and season to heck out of it with your favorite seasonings or mix. Things like paprika, mustard, black pepper, thyme, onion powder, garlic powder, etc, etc. Or go whatever route excites you- 5 spice powder? We’ll add a handful of cornmeal too for texture. Don’t forget to add salt as well. Often we’ll mix everything together and cook a little test peice to check the salt level because there are a lot of variables at play here, like how long and strong your marinade was.
When the oil is ready, coat your chicken peices in the flour mixture, then plunge them thoroughly into a bowl of buttermilk, then bring them back to for a full coat of the flour mixture and drop in the frying oil. Fry for 10 minutes.
This recipe is a continuation of a ditty about the early days of grains and the gradual “rise” of bread. The first step to this process is making some fermented porridge, which is described in aforementioned ditty. I love the variability of a process where the same porridge can be cooked for your breakfast, and any leftover can become bread for scooping up your lunch and dinner. The more active the ferment obviously the better, so if your porridge has been sitting for a long time, scoop the scum off the top and make some flatbreads!
In modern days like we’re in where just about every aspect of a food and its production are able to be controlled for really specific outcomes, this recipe is a refreshing throwback to times when intuition and experience were more valuable than control, and “perfection” was likely defined in a less homogenous way.
Process
There are no precise measurements that make sense to give. However much fermented porridge you have to use is what you have, and obviously the water to grain ratio will be all over the place. Yet, none of that business should be much of a hurdle here.
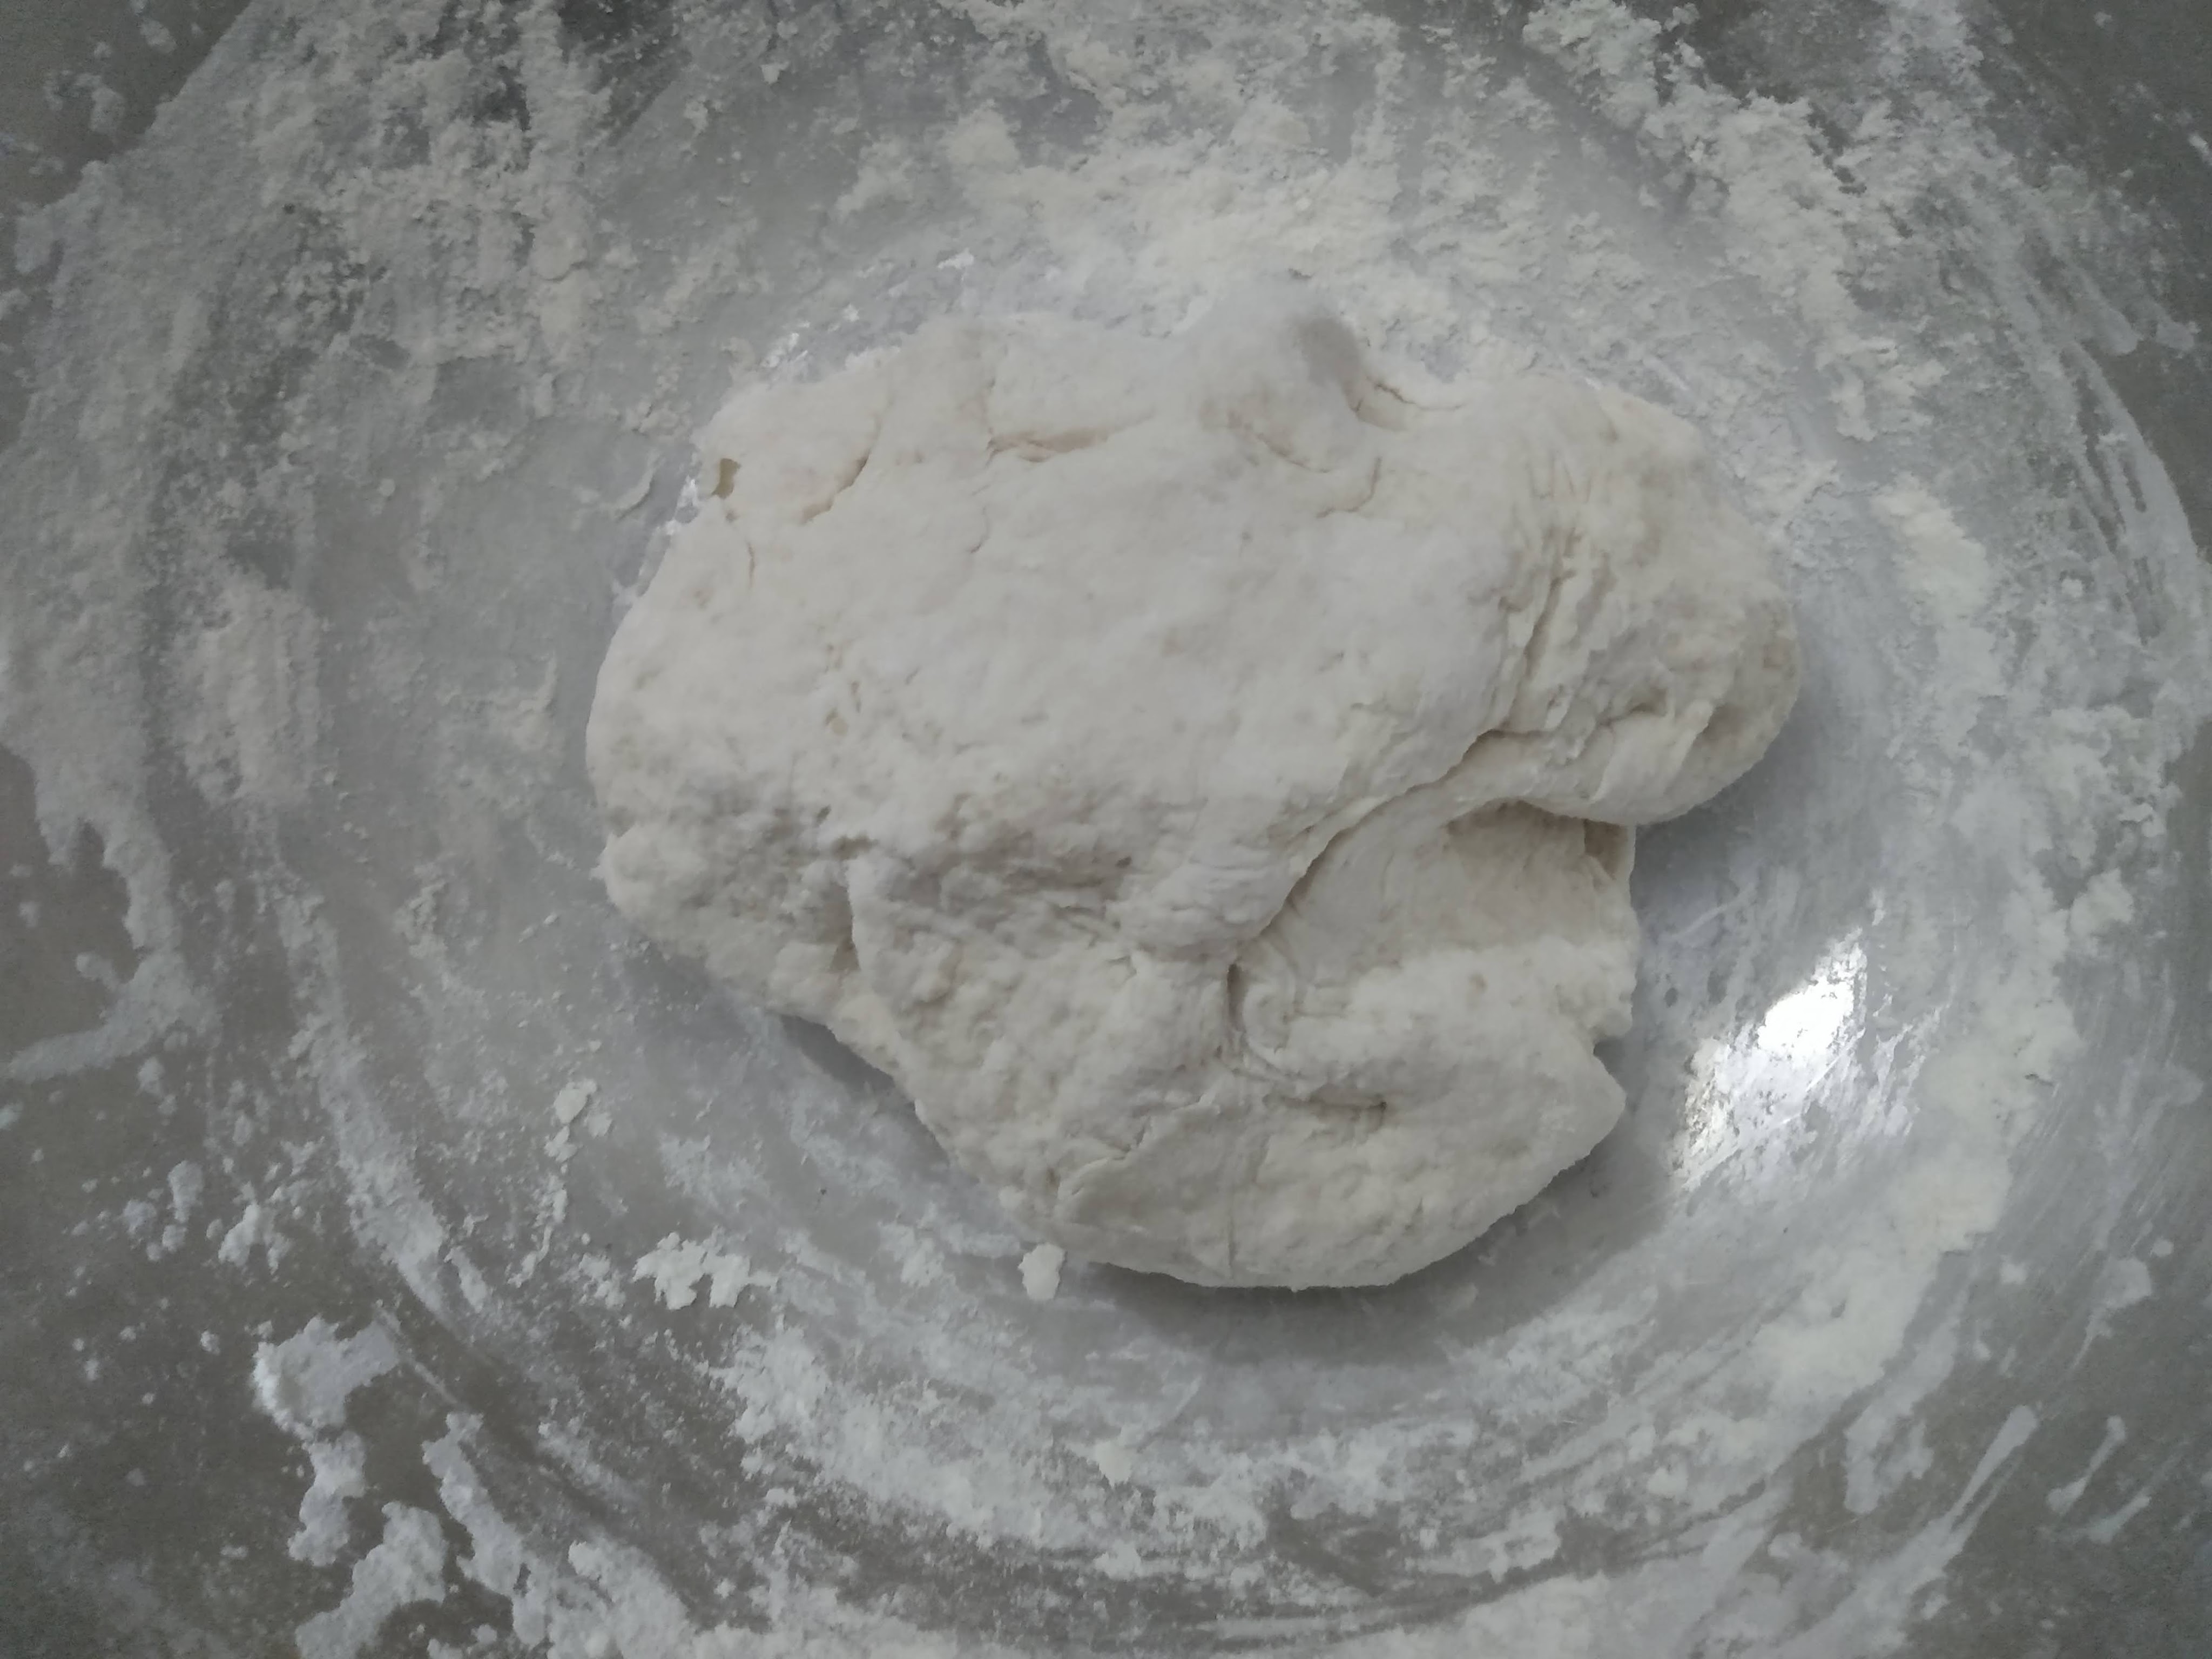
Pour your porridge into a bowl. Add a sprinkle of salt. If you are doing this on a scale something like 16 grams of salt per 500 grams of final dough is good. If your breads are undersalted you can always sprinkle some finishing salt over them straight out of the oven. Always be careful to not over salt!
Start adding in flour that has good gluten building qualities. Store bought “Bread” flour is the ticket. Add gradually, mixing it into the porridge slurry until a dough gets formed. You’d want enough flour so it’s not a sticky dough but not so much that it’s super firm either. Intuition and experience right? Getting things right the first time is boring, you learn nothing. A recipe worth making is one that you earn a relationship with, right?
Give the dough a few kneads and let it rest. The goal is to have everything mixed and incorporated but being mindful to not overmix. Giving it a covered over night or long day rest is great. The dough can be stored in a container the fridge and used here and there if not needed right away.
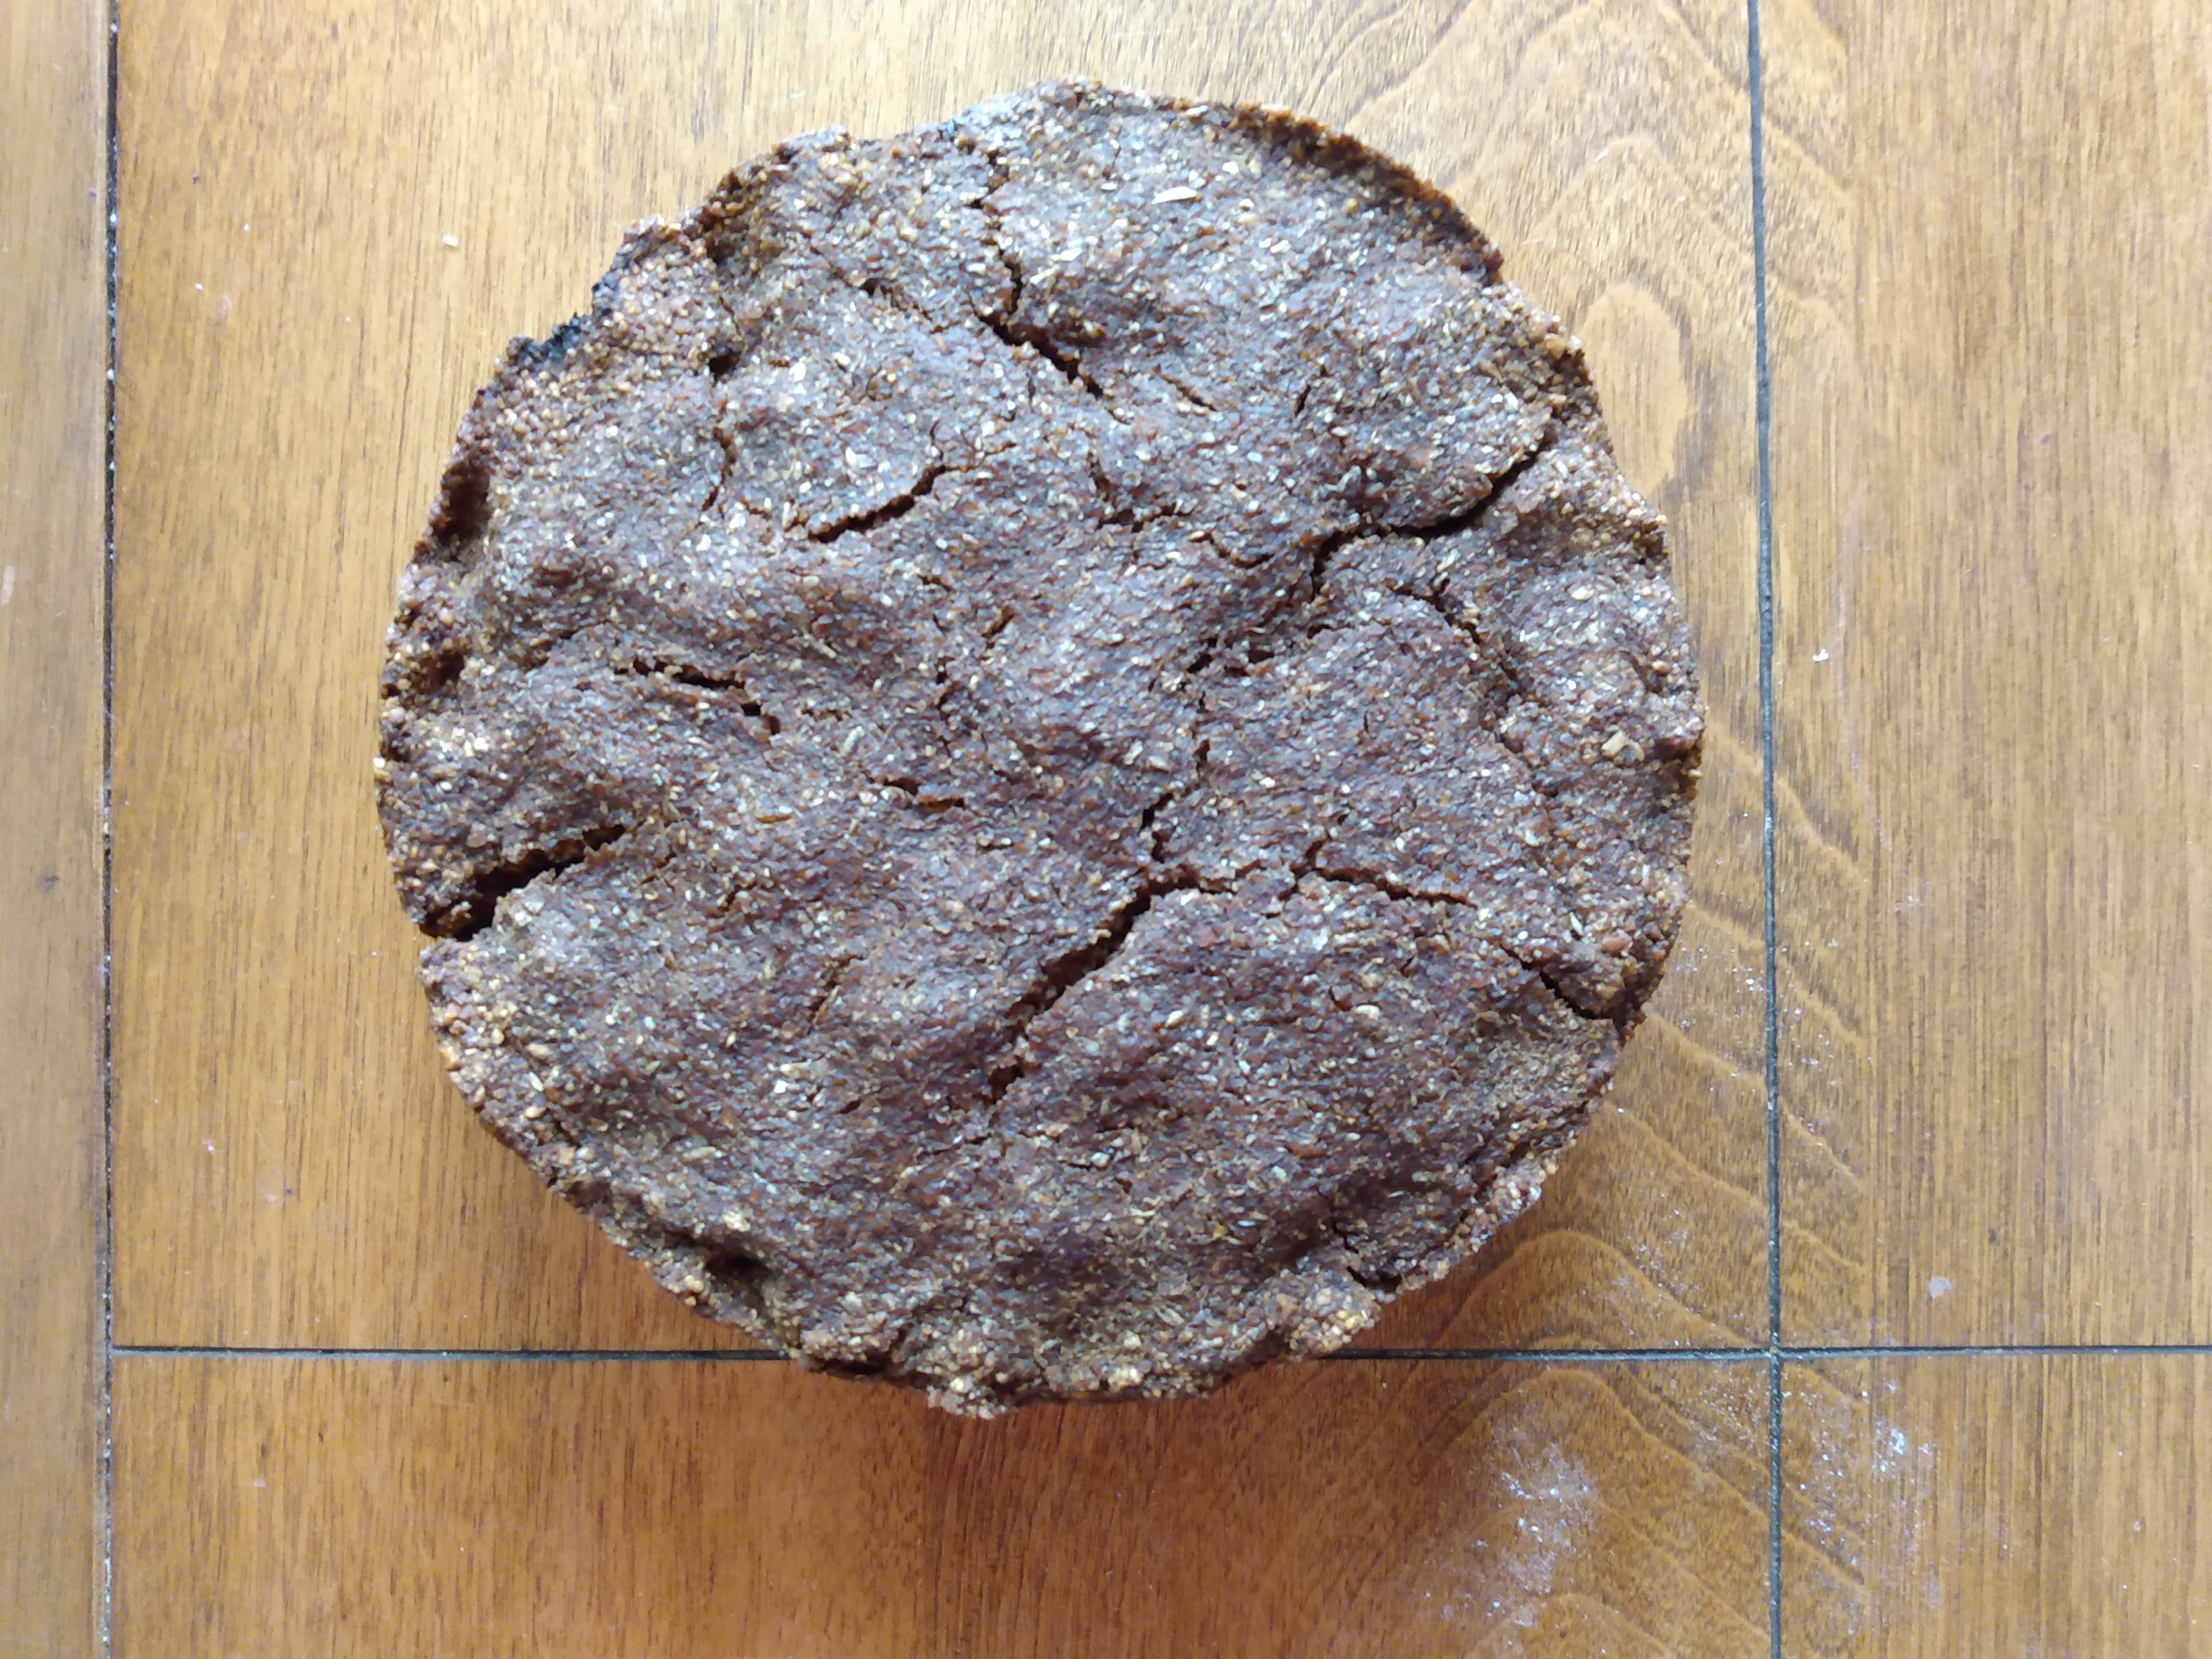
When it’s time to make the bread, on a lightly floured surface cut the dough into whatever size your after, perhaps the size of a doubled golf ball? And then roll them into a ball. Let the balls rest for 20 or so min and in the meantime warm up a skillet on the stovetop to medium high.
After a little rest period, using as much flour as needed, roll out the balls into flat disks. You can press them first with your fingers, and toss them like a pizza or come in with your rolling pin. Play around with the thickness and size (which will also be factors in how hot your skillet should be) until you found what you like.
Cook the flatbread, flipping as needed until both sides are lightly browned and the bread is cooked all the way through. Breads can be dressed up with a drizzle of oil and a sprinkle of seasonings if that’s your bag. Then fill em up with delights!
Sometimes the grandeur of bread makes the grains feel unrecognizable from the labored summer months caring for it, processing it, and cleaning it. Porridge makes me feel closest to my grains. Tortilla retains an intimate connection too. I remember reading a long time ago somewhere that a bread baker was the first specialized profession. It’s easy to understand for anyone who’s tried to consistently integrate the time intensive task into their daily life. Before bread “technology” became widely accessible, porridge was the primary way people consumed their staple grains.
It’s believable to say that porridge is the rough stone that was smoothened into bread by the running waters of time, fermented porridge actually! Before porridge maybe there were handgathered kernels chewed between your teeth. Actually doing this yourself is a jolting time warp worth doing to reset your racing clock. It’s become an annual moment after harvest for us to hand thresh a small bowlful of kernels and eat them as is, just to remember. Next I’d imagine was progressing to crushing kernels between stones, earth’s teeth, and maybe add some earth tears like water, and there you’d have a porridge. Uncooked it would be a chewy mush. With enough time it would ferment and soften more, maybe making it easier to eat and introducing humans to their first versions of a sourdough starter. With a little added flour, cook a fermented porridge into a flatbread and there’s a leavened bread. Add a little more ground grain for an even firmer dough and with more time and a cook, you got yourself a loaf.
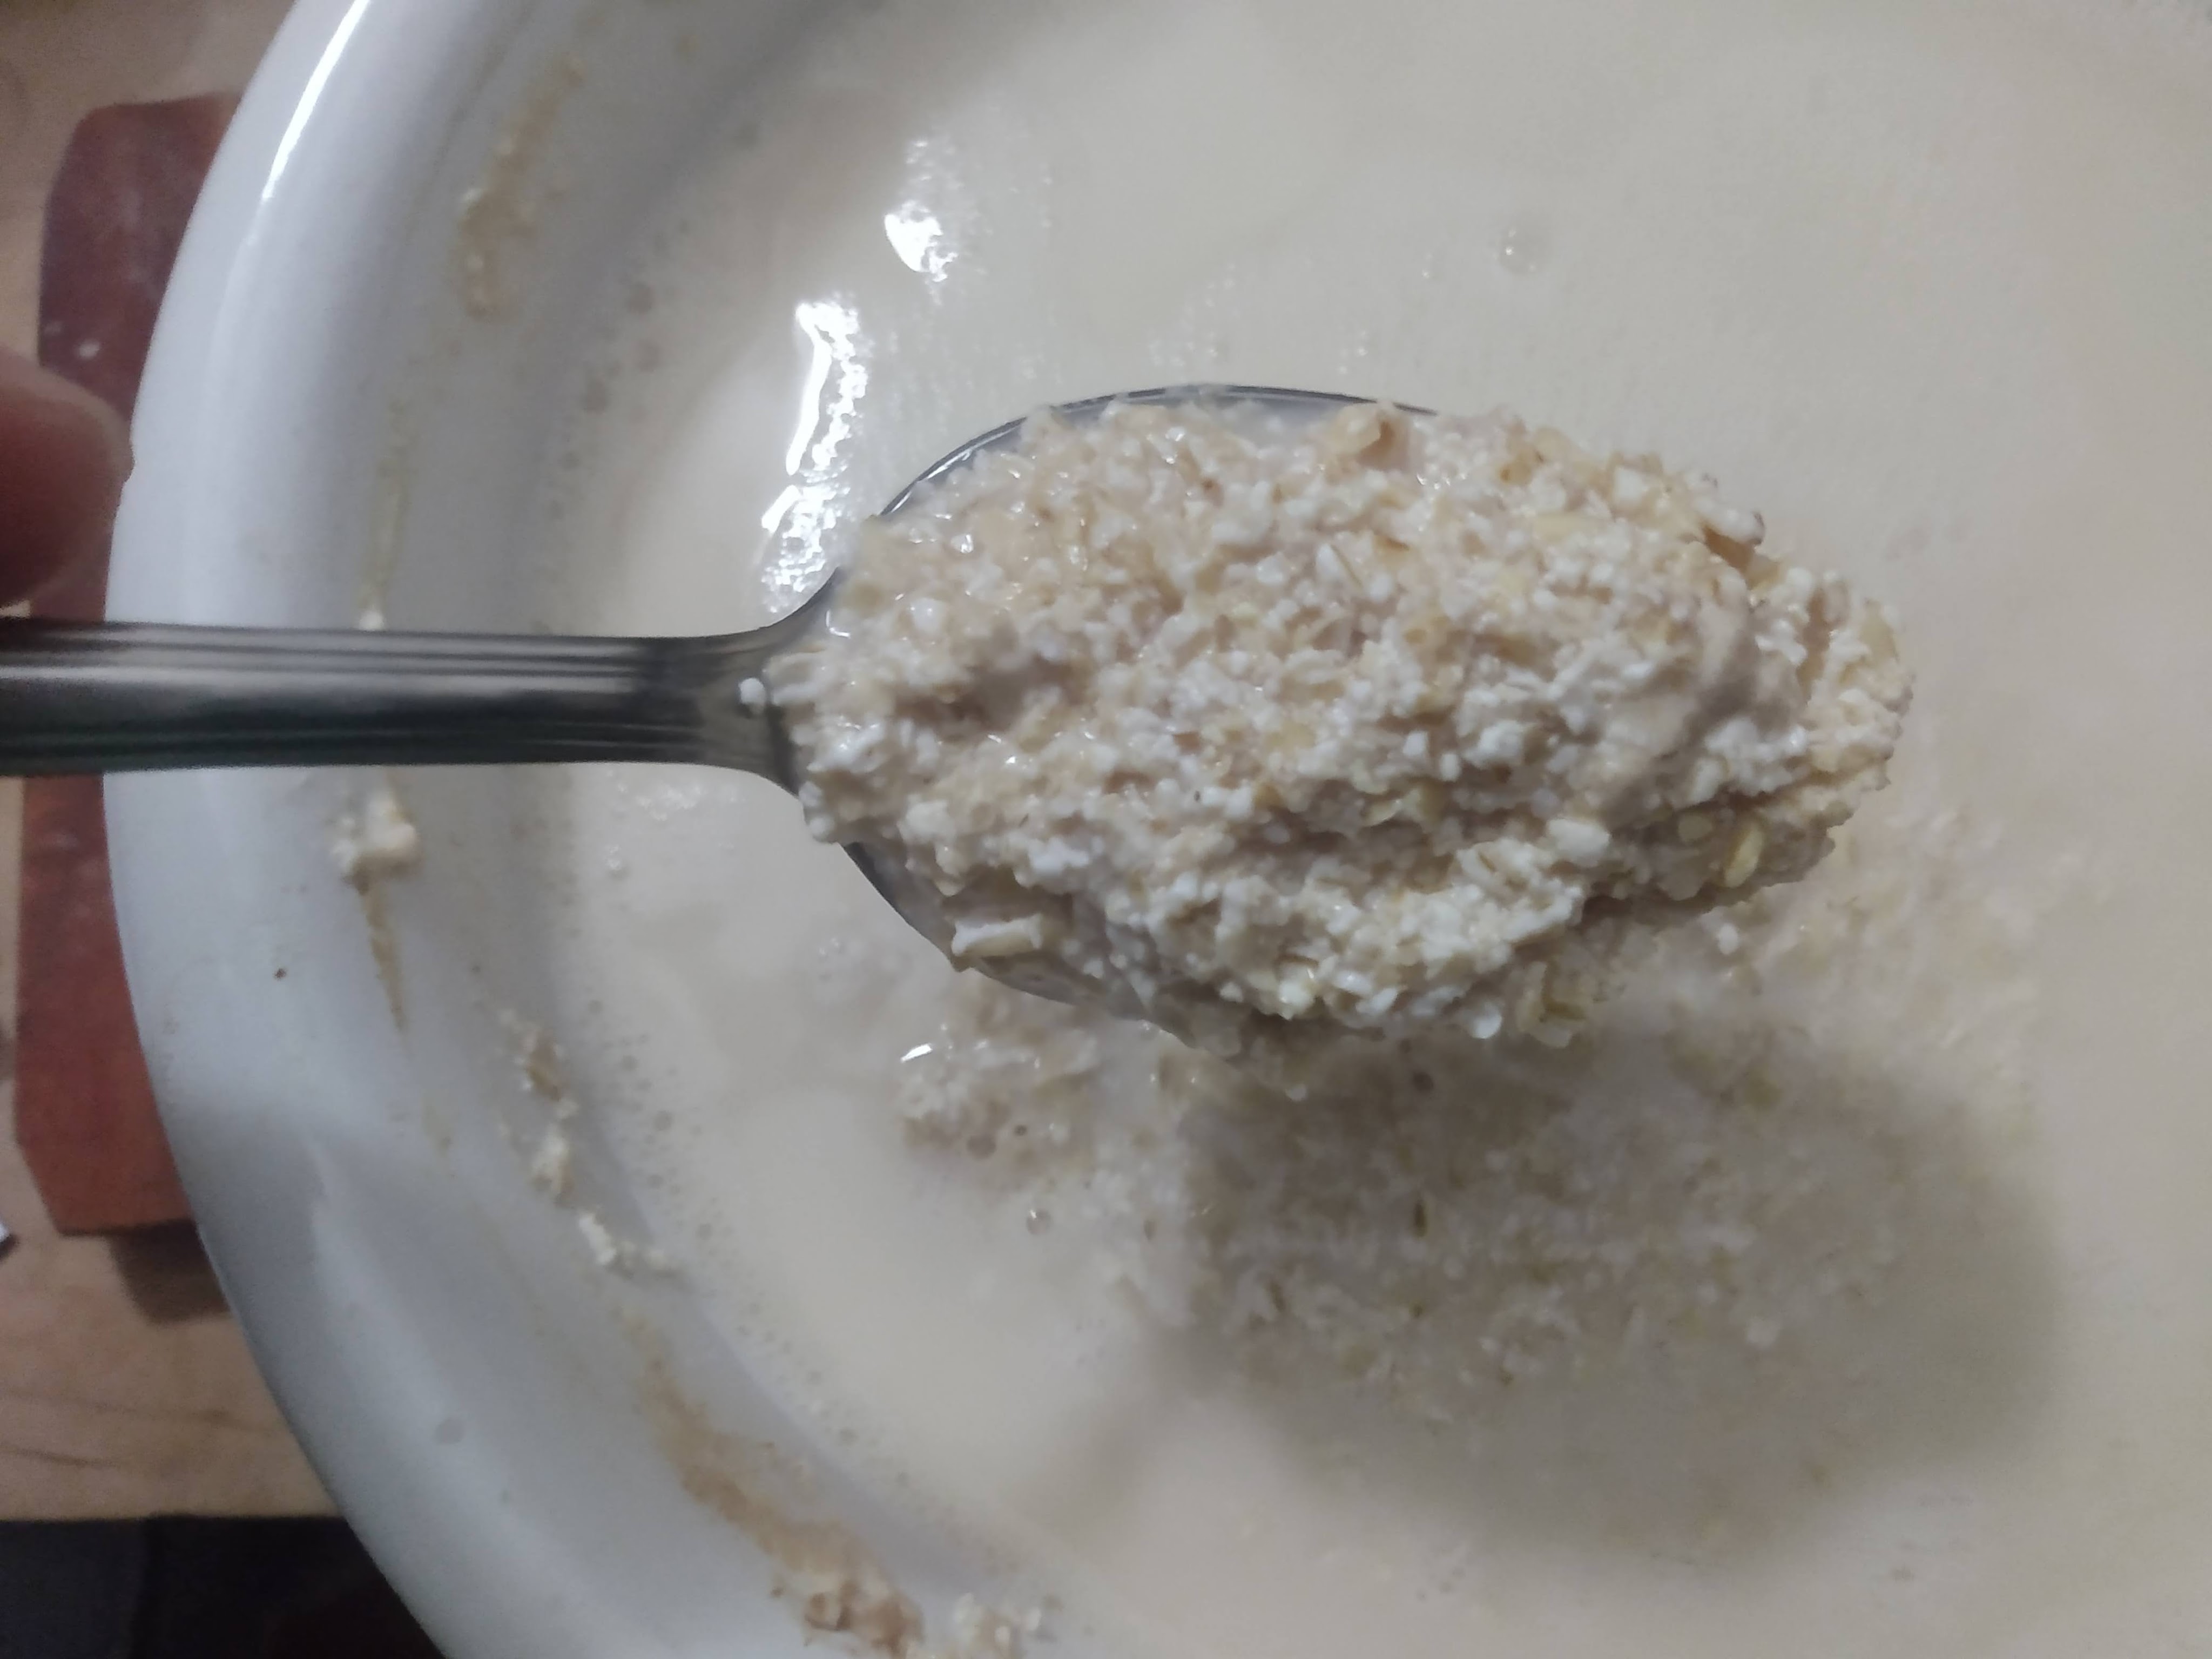
Fermented porridge can be made from any grain: wheat, rye, corn, oats, rice, and so-on. It can be cracked, ground, whole, or even just sifted bran. A hand cranked meat grinder works great for cracked grain and often pop up in the tool sections of thrift stores for a couple bucks. It’s possible to crack them too by laying the grains on a hard flat surface, draping a towel over them, and pressing hard on them with bottom of a jar, a rolling pin, or maybe a rock.
The prep work is easy, just covering your prepared grain with a generous amount of water or milk or nut/ seed “milk” to keep it submerged for a prolonged soak- a couple hours or a couple days or weeks at room temp depending how funky you’re feeling. The fermentation will help breakdown grain characteristics that inhibit digestion. In the morning, heat it in a pot until boiling, then lowering it to a short simmer, keep an eye on it all the while in case some extra liquid needs added along the way. The final consistency is up to you. Depending on where you’re trying to take your day, add a splash or nob of fat (buddder/ oil/ maybe bacon), pinch o salt, and any seasonings and delights (like those summer time berries you dehydrated or a potato) before cooking. For a quicker fermentation turn around you can backslop today’s porridge into a new one just like splashing in a starter. What an easy vehicle for any adventure.
Remember the rye bread recipe for traditional style pumpernickel from a few months ago? This one? The recipe used “scalding” which was heating a porridge situation until it was at least 160 degrees at which point the flour released its starches and gelatinized. In pumpernickel, this is what gave the gluten-lacking rye bread some bonding to help it hold its shape. This is the same process that occurs when cooking the porridge, transforming it into a lovely cohesive mush rather than water and grain that sit separately in a bowl like oil and water. It’s also the same process used for making injera which is a mixing of “fermented porridge” and scalded porridge to help the thin batter hold together.
Kvass
The same grains- whether cracked, ground, whole, or bran, but this time also adding old baked bread to the list, when covered with water and left to ferment is the beverage associated with Eastern European origin called kvass. There are a million variations to this beverage (including versions without grain), with many adding some kind of additional sugar whether it be cane, fruit, berries, vegetables, juice, honey, sorghum, or maple in order to get a spritely effervescent and maybe alcoholic beverage. Where’s the line between fermented porridge and kvass? Doesn’t seem like there is much of one, just don’t boil your kvass or you’ll lose the fire in that firewater. What’s the difference between beer and kvass? Beer gets most of its sugar out of its grains by sprouting them first (aka malting) and steeping them at a specific temperature (mashing), kvass is a little lazier and ferments things as they are with no special processes (although malt still may be used). It almost feels like kvass is a brew made of collected leftovers.
Winter is a good time to perch a brew of kvass on your radiators as if it were your hearth. To make it add cracked grains, old bread, and as much sweetener of choice as suits you. Dress it up with any other flavors and seasonings that inspire you. Don’t forget a little splash of sourdough starter to help get everything rolling (not required). Let the wild yeast ferment it at room temperature till it’s actively bubbling. Remember it’s winter so be patient. Then strain out the contents and enjoy.
(I suppose you can also not strain out the contents and warm it up into a nice porridge! Boom.)
Horseradish easy to grow. It’s a vigorous plant that can thrive in many conditions. Deep lose soil is best for straight taproots that otherwise would be fine but a little gangly. (You’ll see the piece used in the pictures here must have hit a rock and took at hard left.)
Plant pieces in full sun a couple inches deep and for fuller roots cut away new green shoots as they sprout above ground leaving only around 2-4. If planting multiple plants spacing of 30 inches recommended. Mulching is also a good idea. Feed with a high phosphorous, low nitrogen fertilizer to promote root growth. Harvest after the leaves wilt from frost making sure to leave some behind for the plant to continue growing. Aim for new growth as the root will become woody after enough time.
Fermenting
Wash and peel your horseradish root.
Cutting up the root is a tricky endeavour because the heat of the horseradish will fill the air. I like using a fine grater over a food processor because in my experience the food processor created a spicy plume that overwhelmed the room. Either way hand and mouth protection isn’t the worst idea if you have it.
Once the root is grated you can add a pinch of salt and any water if it seems too dry. You could also add a splash of vinegar with or instead of water- the vinegar neutralizes the enzymic reaction that makes the horseradish spicy, so adding some asap will lessen the spiciness of your condiment.
Lastly, pack your horseradish into jars to ferment at room temp. Use it as needed throughout winter to wake up your potatoes, sausages, and other comforting meals. If you want purple horseradish like seen in some stores, just mix in a little bit of grated beet before packing it into jars.
Don’t forget to save some nubs if you need to plant more out in the spring. Roots will maintain in the fridge or cellar in a plastic bag for many months. You could also try your hand “forcing” the leaves for fresh horseradish greens in winter.
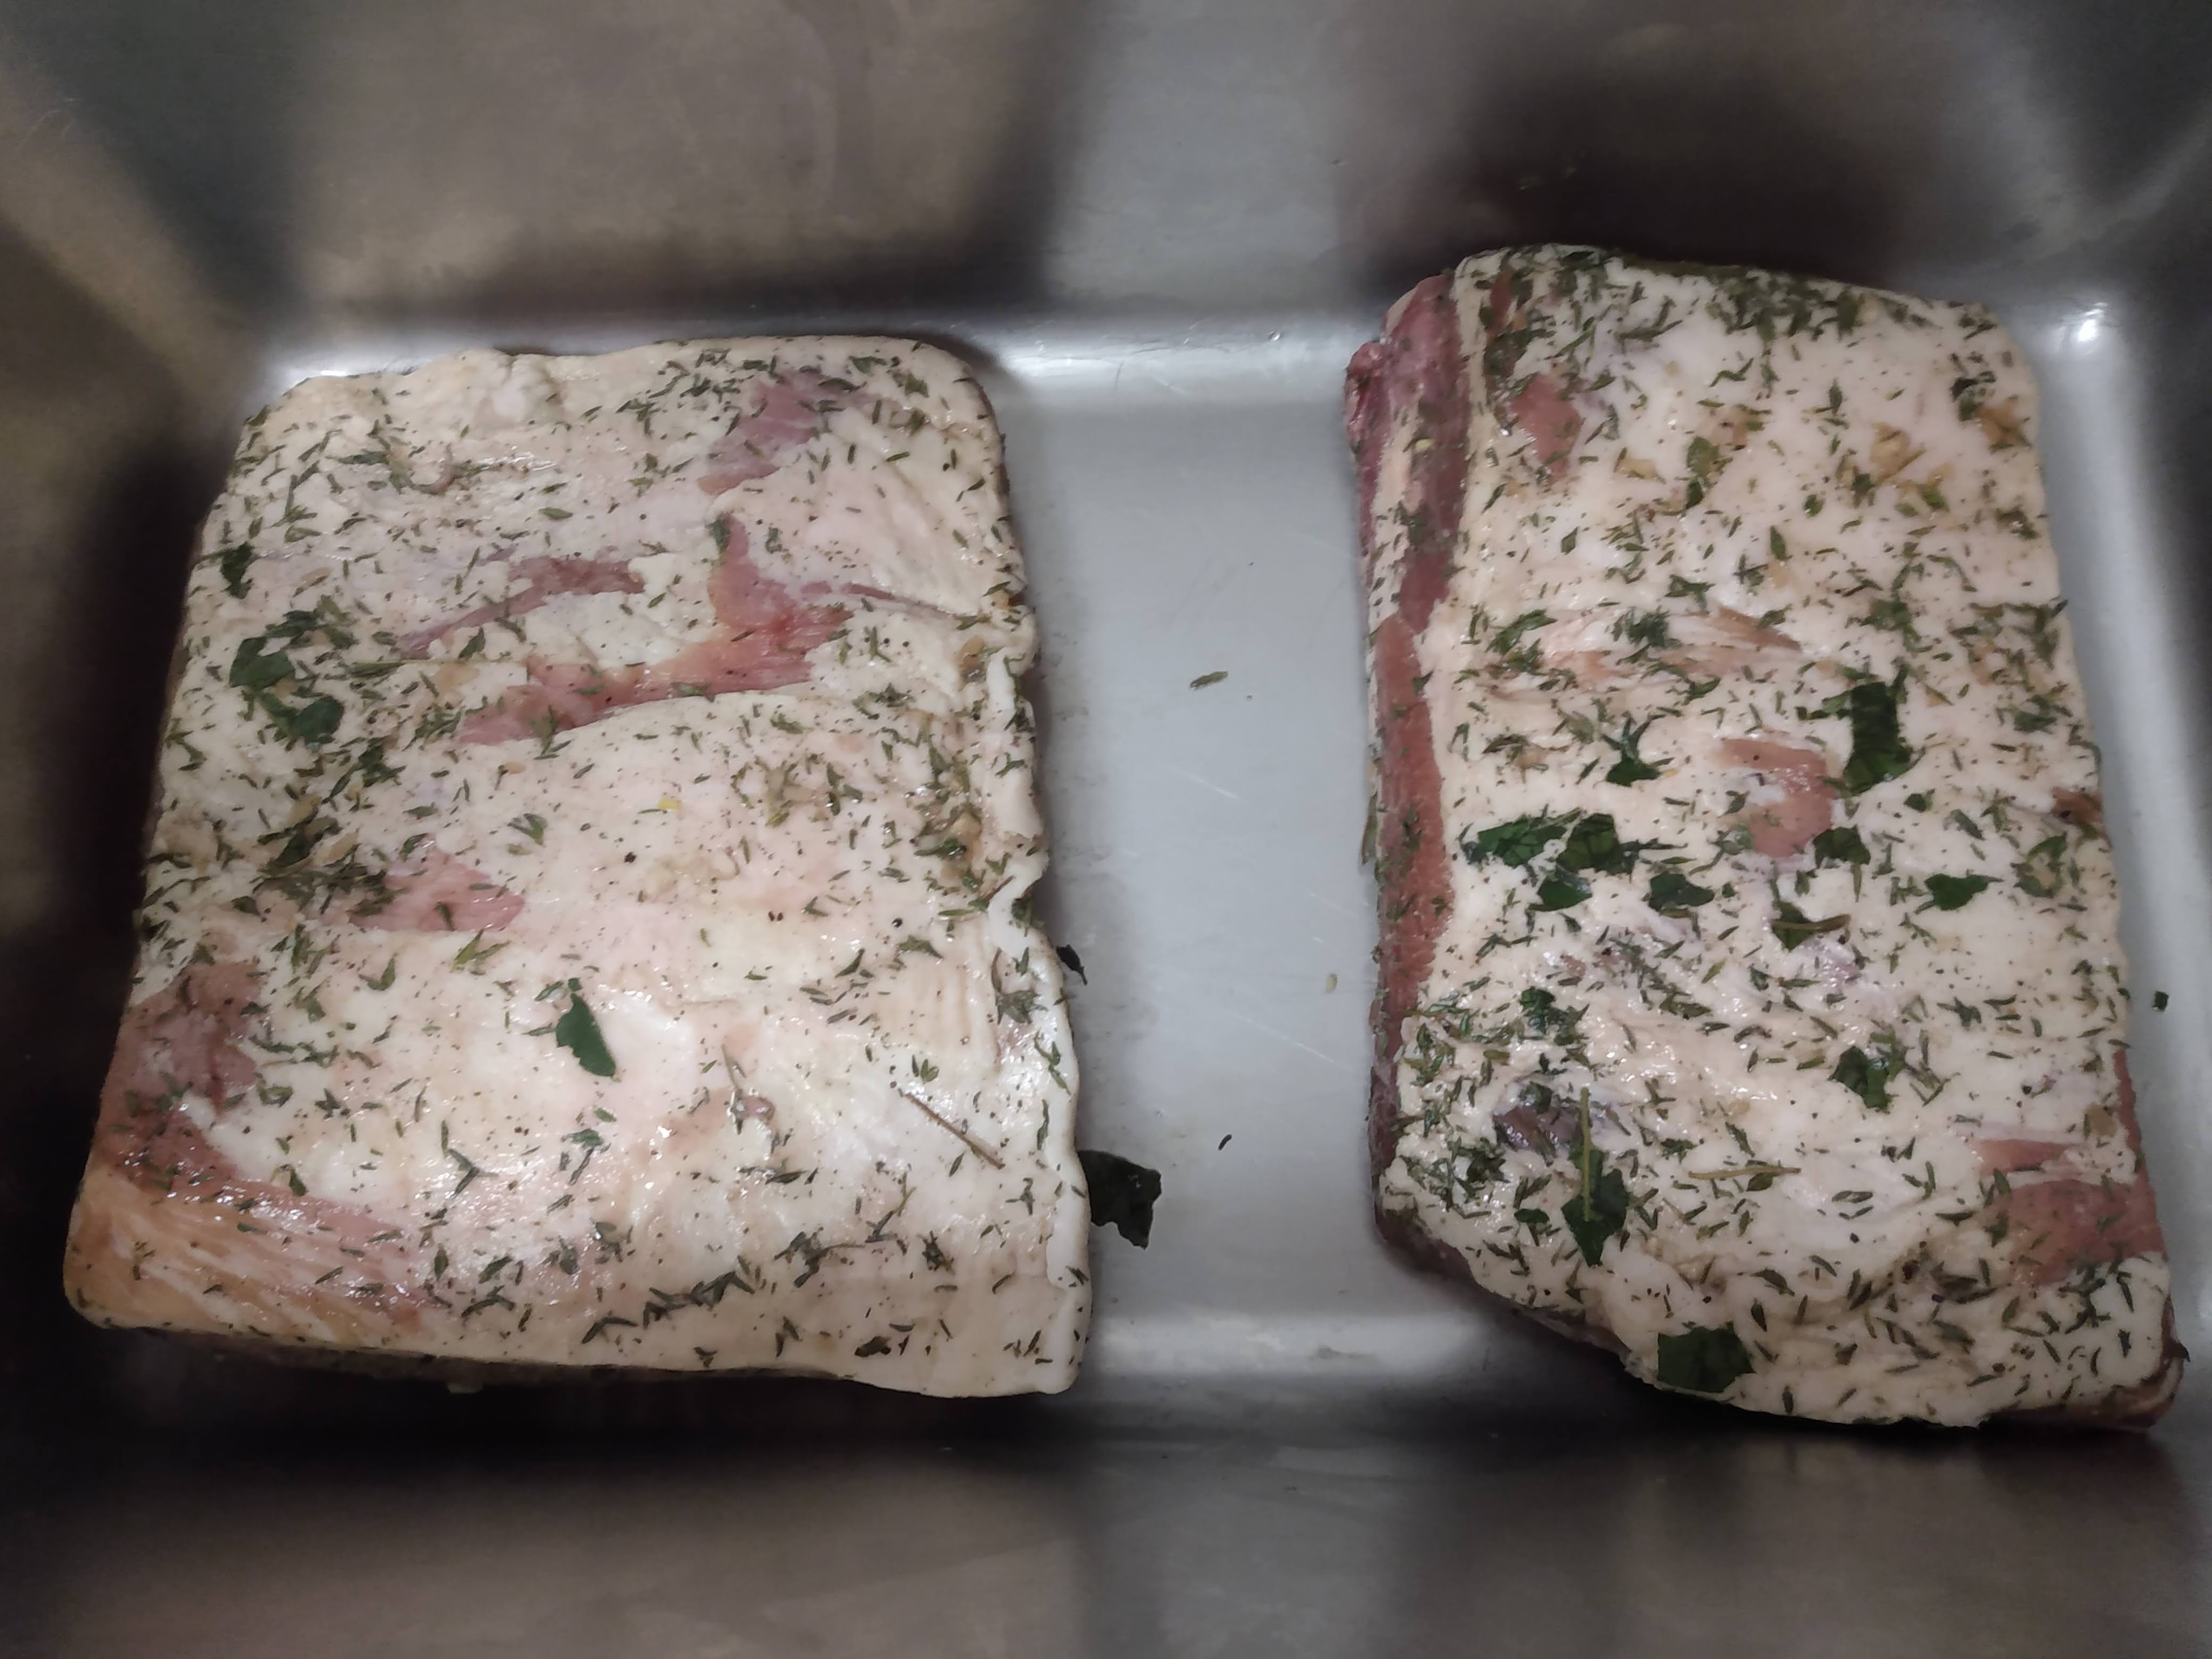
Late fall and early winter always stirs thoughts of the annual pig harvest as this cold post-farm moment invites the perfect time to stuff, smoke, and cure meat for the year- especially in accord with the season of holiday feasts that follows in tow.
For those who have always been curious about venturing into the world of preserving meat there is included in the monthly featured recipes the technique for making your own bacon. It’s a perfect first-go as it’s easy, safe, and as deliciously rewarding as a homemade treat should be. This recipe is the one I’ve used and tweaked for many years for well over a hundred batches of bacon I’m sure. For me this belly is destined to enliven this winter’s miso soups.
***
Get ahold of a slab of pork belly. Talk to your local pork farmers or head to your butcher shop. You can usually find them in ~5 pound sizes, with a full belly averaging around 12- 15 pounds.
As with most recipes your salt is the most important ingredient to be thoughtful about and then after that it’s all play. For salt you’re looking for about 2.8% of the belly weight. For a 5 pound slab that would be around 64 grams.
Now with bacon there is also a second salt called pink salt or curing salt (different than Himalayan). In Pittsburgh you can get this either at Penn Mac or The Pittsburgh Spice and Seasoning Company. Curing salt contains sodium nitrate which helps meat fend off dangerous microorganisms in processes where meat is held for significant periods of time in the “temperature danger zone” (which is a phrase used to describe temperatures that make microbes happy, like room temperature)- which is the case in curing meats. The curing salts also have an effect on flavor and color, helping meat retain a red color rather than gray and giving it that flavor that is synonymous with bacon. Making bacon without nitrates is possible but will produce a porky flavor rather than bacony, if that makes sense.
Typically your pink curing salt should provide a recommended amount which should be in the ballpark of 0.2 ounces per 5 pounds. Keep in mind that too much pink curing salt is a bad thing so do take care to measure this one out well.
After that the remaining seasoning is for you to decide. Some suggestions per a 5 pound belly are:
Sweet Stuff: add 55 grams brown sugar/ honey/ or maple syrup, or some blend of each
Garlic- mince 2-3 cloves
A Bay leaf
Go wild on the herbs, especially thyme. Gotta love when fresh is available.
Black peppercorns- teaspoon or two
The sky is the limit here. You can use gochujang to make a kimchi bacon, add a splash of whiskey, just as long as your salt and pink curing salt is consistent.
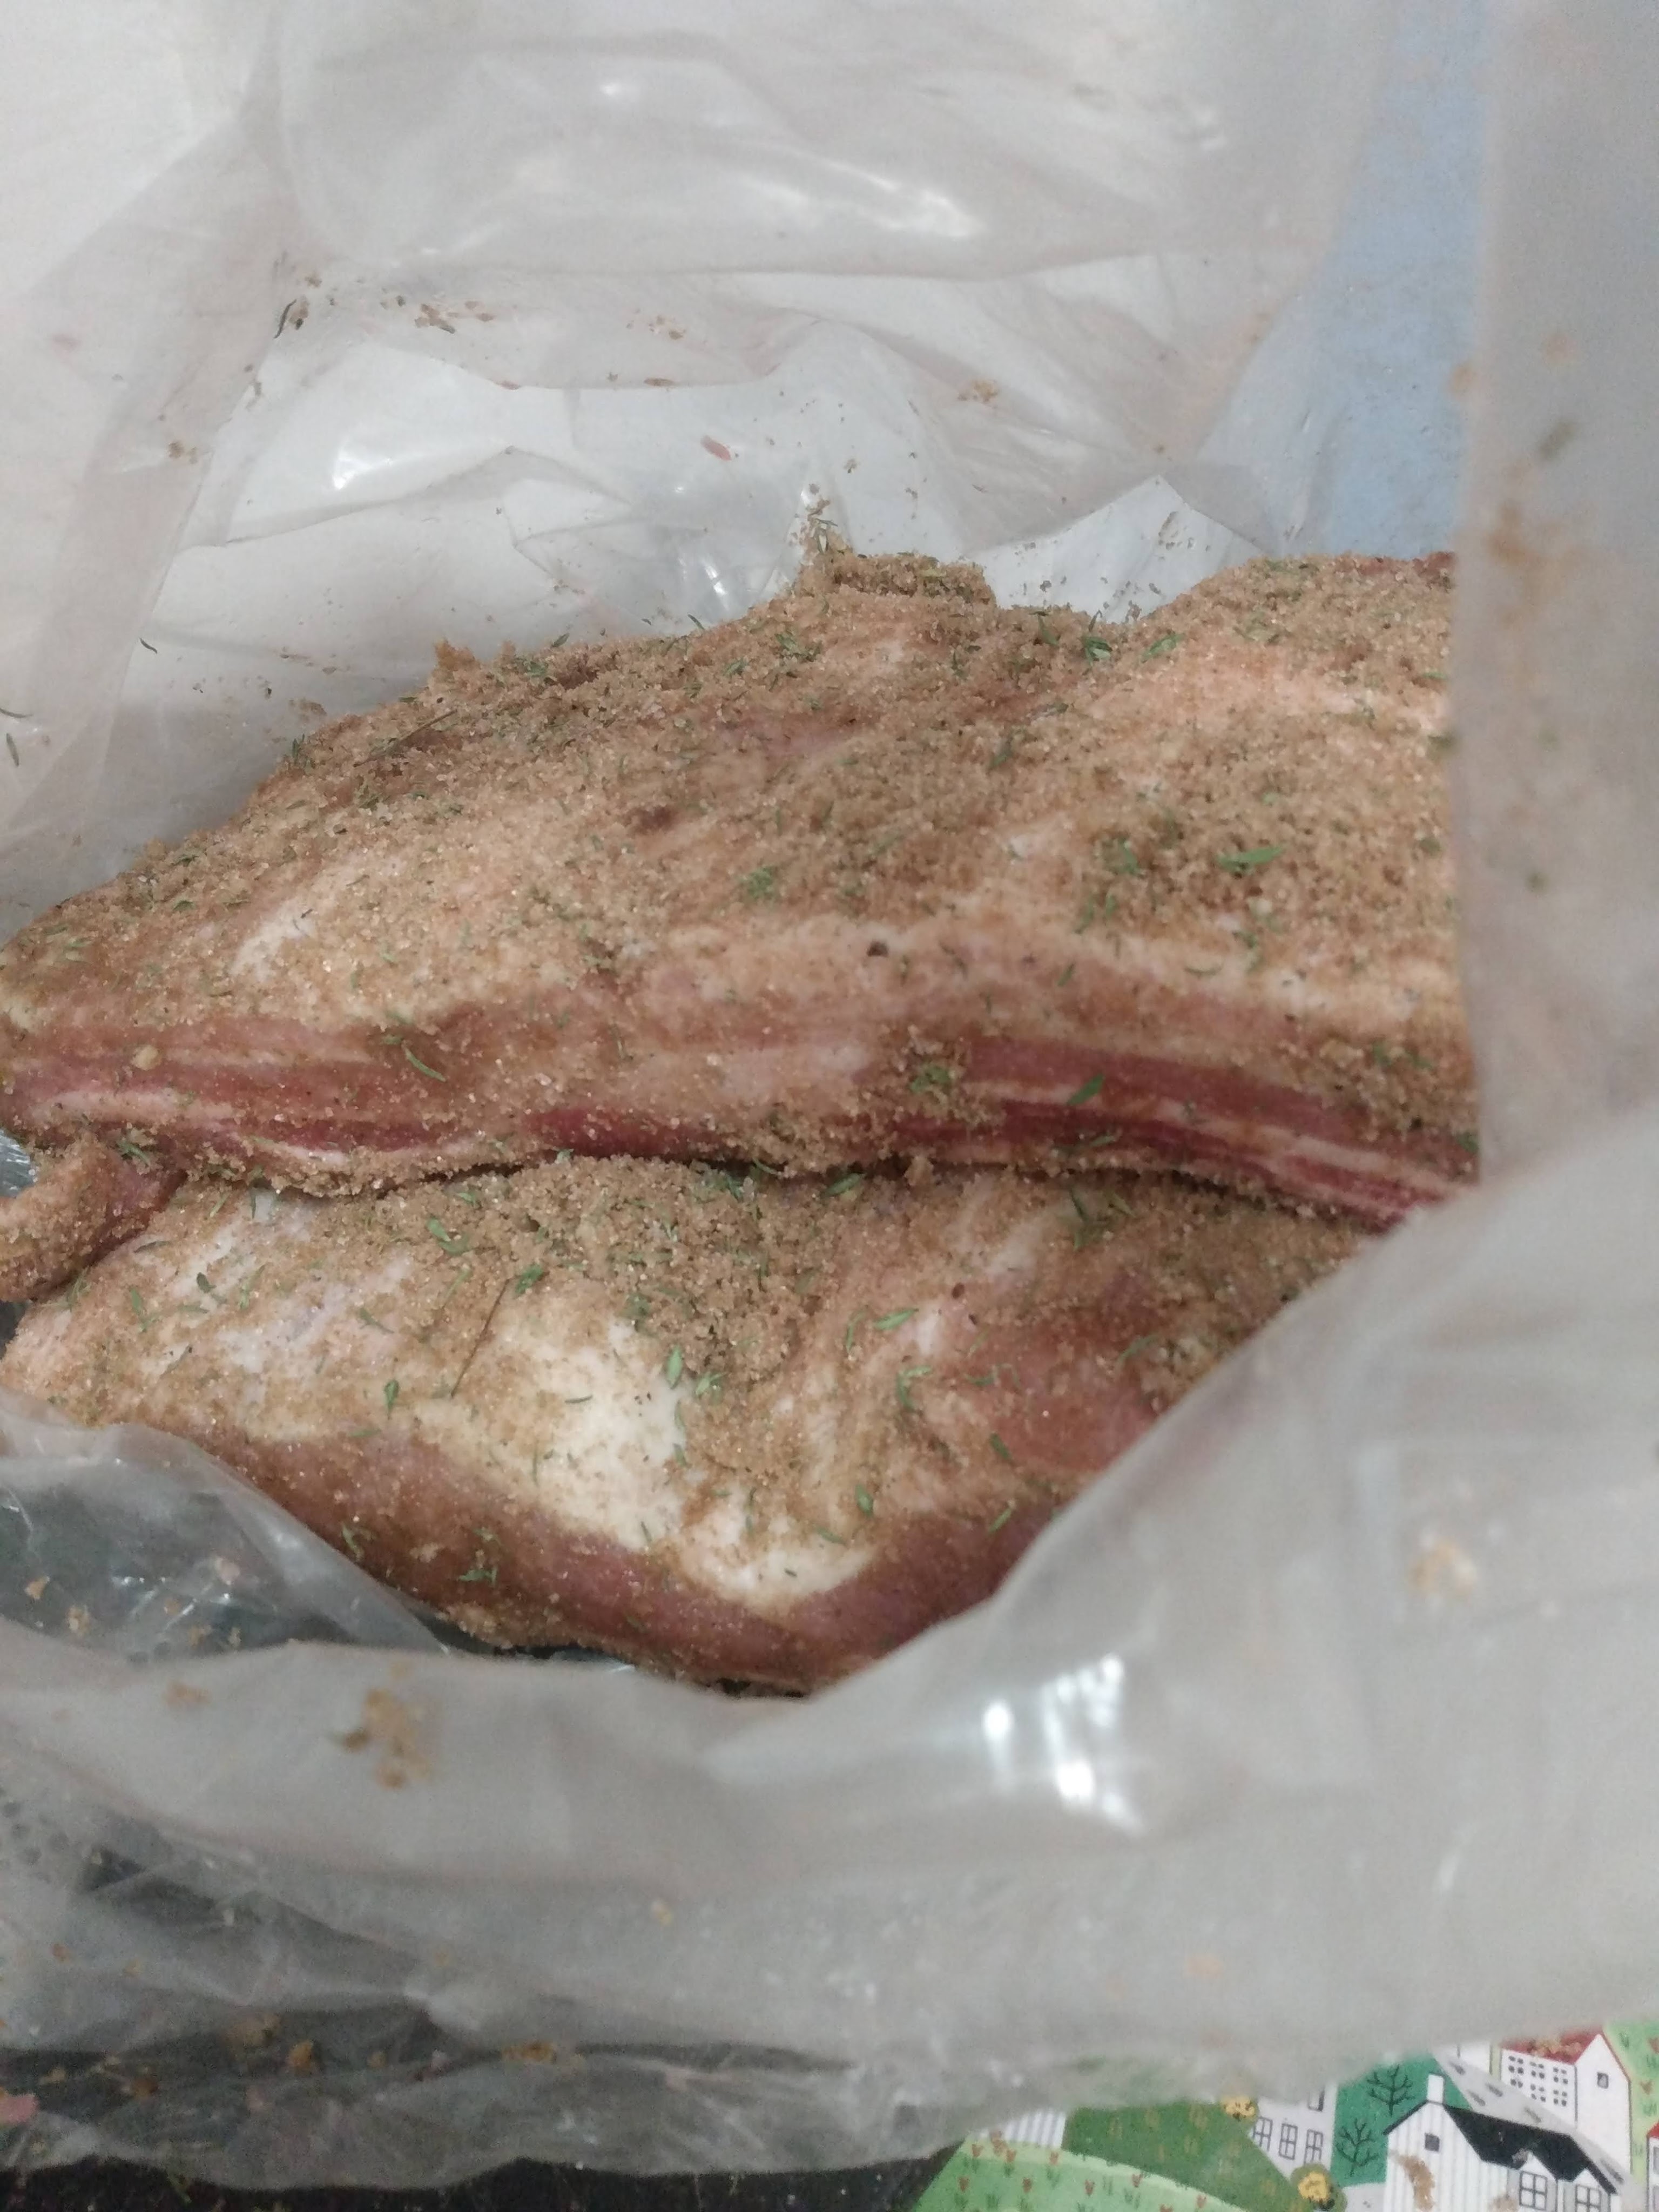
Mix everything together- both salts, sweet stuff, and seasonings, and rub it all over the pork belly to coat it. Put the belly and any seasoning that fell off in a bag, stacking them if you have multiple slabs, and place it in the fridge for 6 days. Flip and turn every day or so to keep the marinade even.
I usually aim for a 1 week process so on the 6th day take the belly out of the bag and place it on a rack with a tray beneath it to catch any falling juices and put it back into the fridge. A cookie sheet with a plate underneath works well. We are trying to dry off the belly. I do this primarily because I smoke my belly and smoke doesn’t stick to wet things well, but it also has a great effect on the roasting color by doing this step. Air drying meat before roasting is a great idea, like chickens for roasting. *Some recipes recommend rinsing the belly prior to drying, I presume to remove any excess marinate so maybe the herbs and sugars won’t burn during cooking. I used to do this but don’t anymore. I don’t have any problems and I like the way it looks more. Go with your heart.
The next day preheat your oven or smoker to 250 degrees and smoke or cook for around 90 minutes or until an internal temperature of 150 degrees. Feel free to add a little more time if it needs it to finish off the gorgeous color.
First thing after it’s done, eat a fresh hot bacon snack by working the odd nubs that hang around the edges. This is one of the highest moments of human experience, relish in it. Then let the belly cool and then refrigerate it. If you’d like to slice your bacon, whether by hand or if you’ve got your hands on a commercial meat slicer it’s best to toss the belly in the freezer until it’s about 1/3 frozen. This will give you a slab that is firm enough to make uniform cuts more easily.