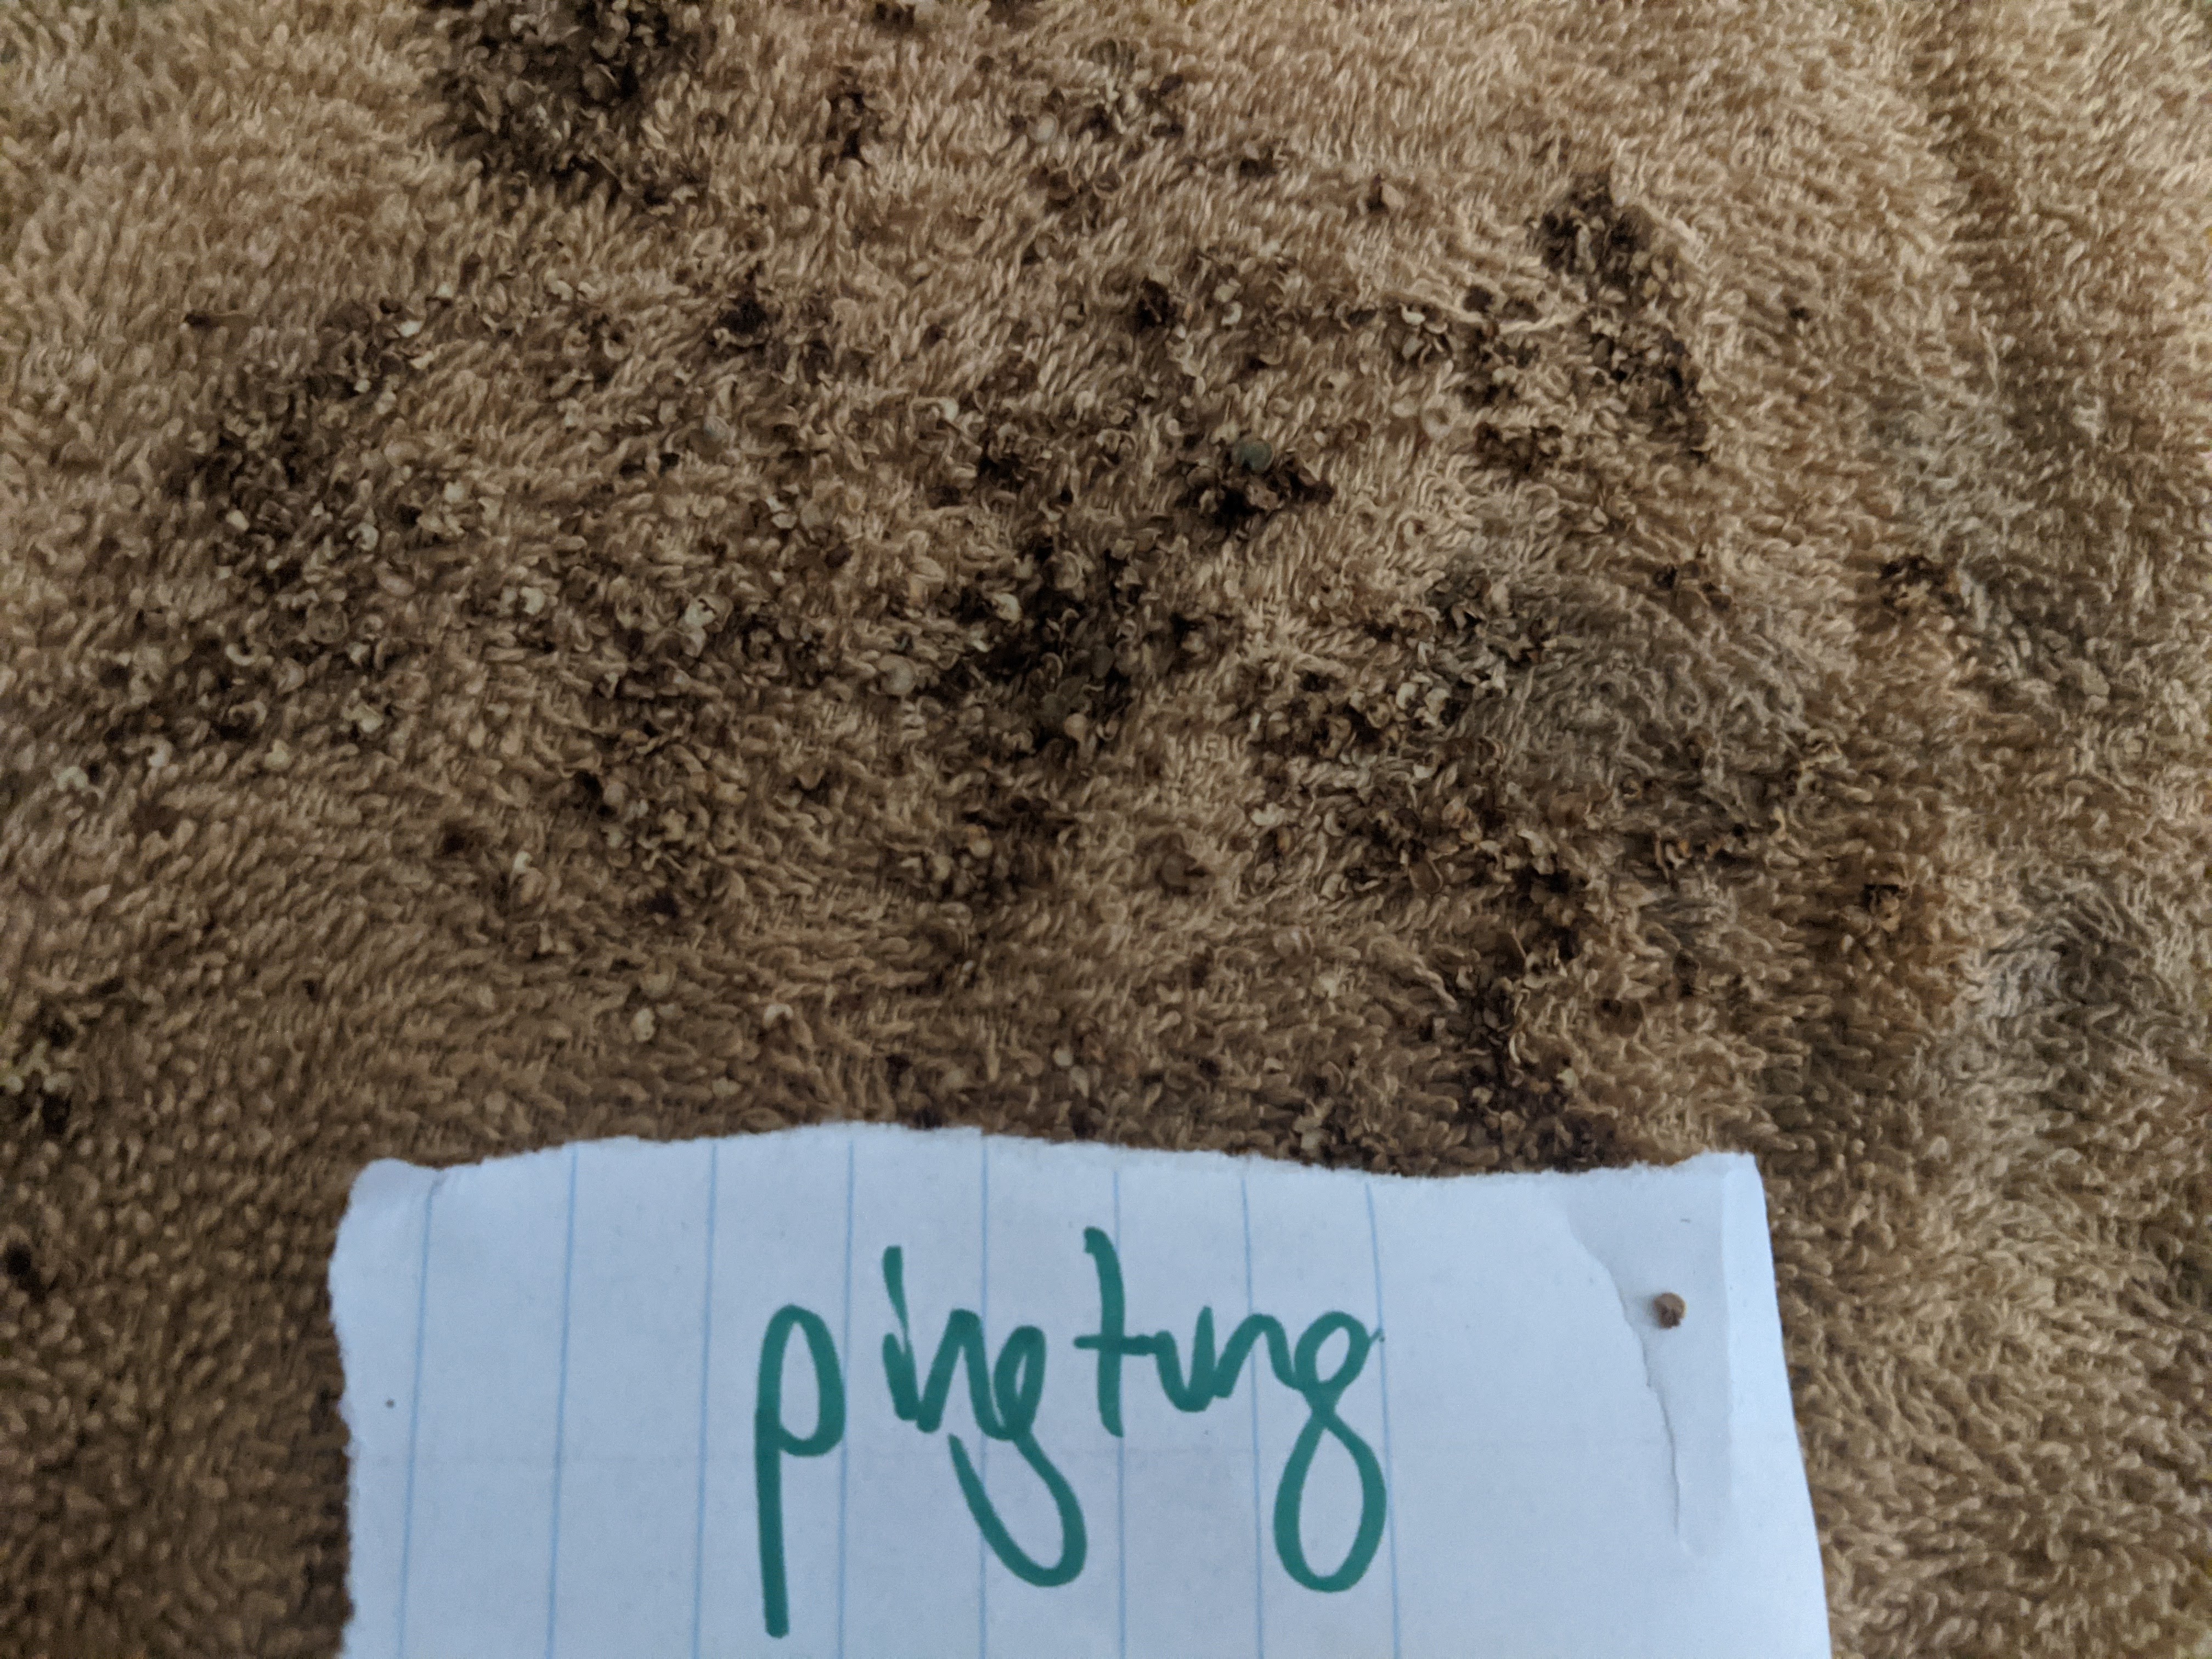
Horseradish easy to grow. It’s a vigorous plant that can thrive in many conditions. Deep lose soil is best for straight taproots that otherwise would be fine but a little gangly. (You’ll see the piece used in the pictures here must have hit a rock and took at hard left.)
Plant pieces in full sun a couple inches deep and for fuller roots cut away new green shoots as they sprout above ground leaving only around 2-4. If planting multiple plants spacing of 30 inches recommended. Mulching is also a good idea. Feed with a high phosphorous, low nitrogen fertilizer to promote root growth. Harvest after the leaves wilt from frost making sure to leave some behind for the plant to continue growing. Aim for new growth as the root will become woody after enough time.
Fermenting
Wash and peel your horseradish root.
Cutting up the root is a tricky endeavour because the heat of the horseradish will fill the air. I like using a fine grater over a food processor because in my experience the food processor created a spicy plume that overwhelmed the room. Either way hand and mouth protection isn’t the worst idea if you have it.
Once the root is grated you can add a pinch of salt and any water if it seems too dry. You could also add a splash of vinegar with or instead of water- the vinegar neutralizes the enzymic reaction that makes the horseradish spicy, so adding some asap will lessen the spiciness of your condiment.
Lastly, pack your horseradish into jars to ferment at room temp. Use it as needed throughout winter to wake up your potatoes, sausages, and other comforting meals. If you want purple horseradish like seen in some stores, just mix in a little bit of grated beet before packing it into jars.
Don’t forget to save some nubs if you need to plant more out in the spring. Roots will maintain in the fridge or cellar in a plastic bag for many months. You could also try your hand “forcing” the leaves for fresh horseradish greens in winter.
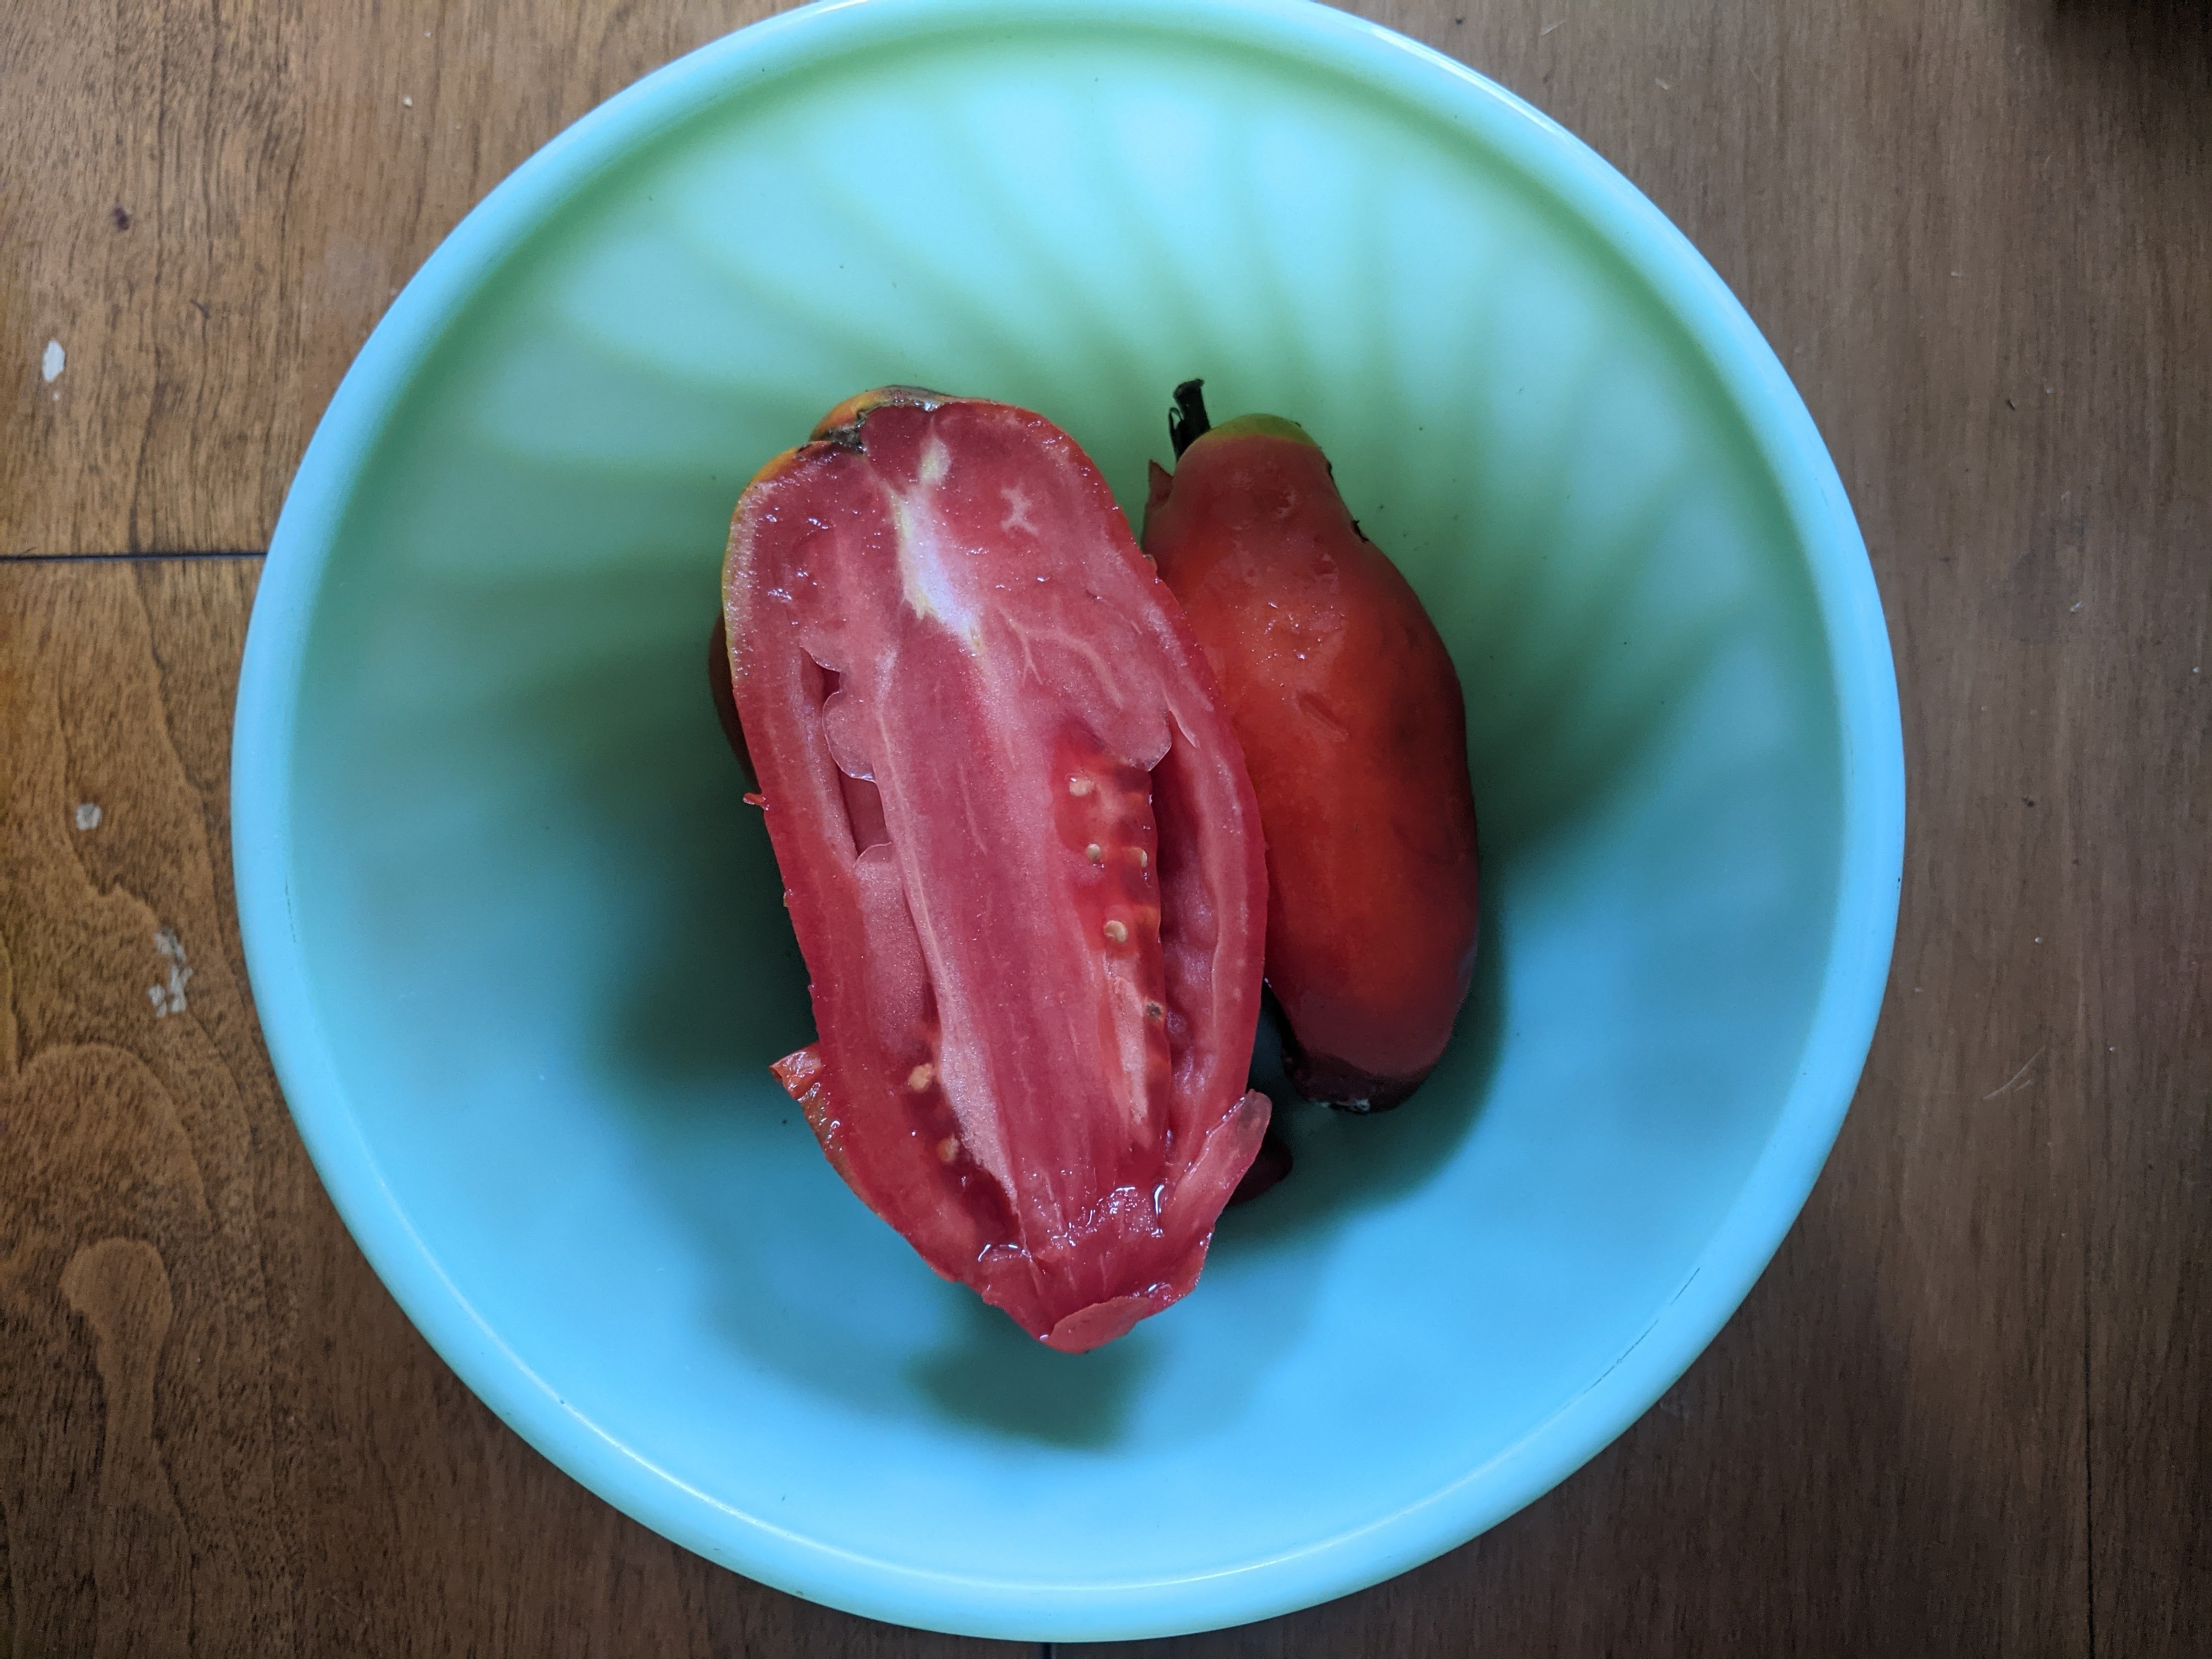
When venturing out to save tomato seeds look for the plants and fruits that are performing best- most beautiful, undamaged fruit, best disease resistance, excellent flavor, etc. A single tomato, depending on variety can yield perhaps enough seeds alone for the following year, making it a crop you can still continue to enjoy while simultaneously saving its seed. I like to pick ripe fruit throughout the year from the best plants while keeping detailed notes for each batch of seeds that gets saved.
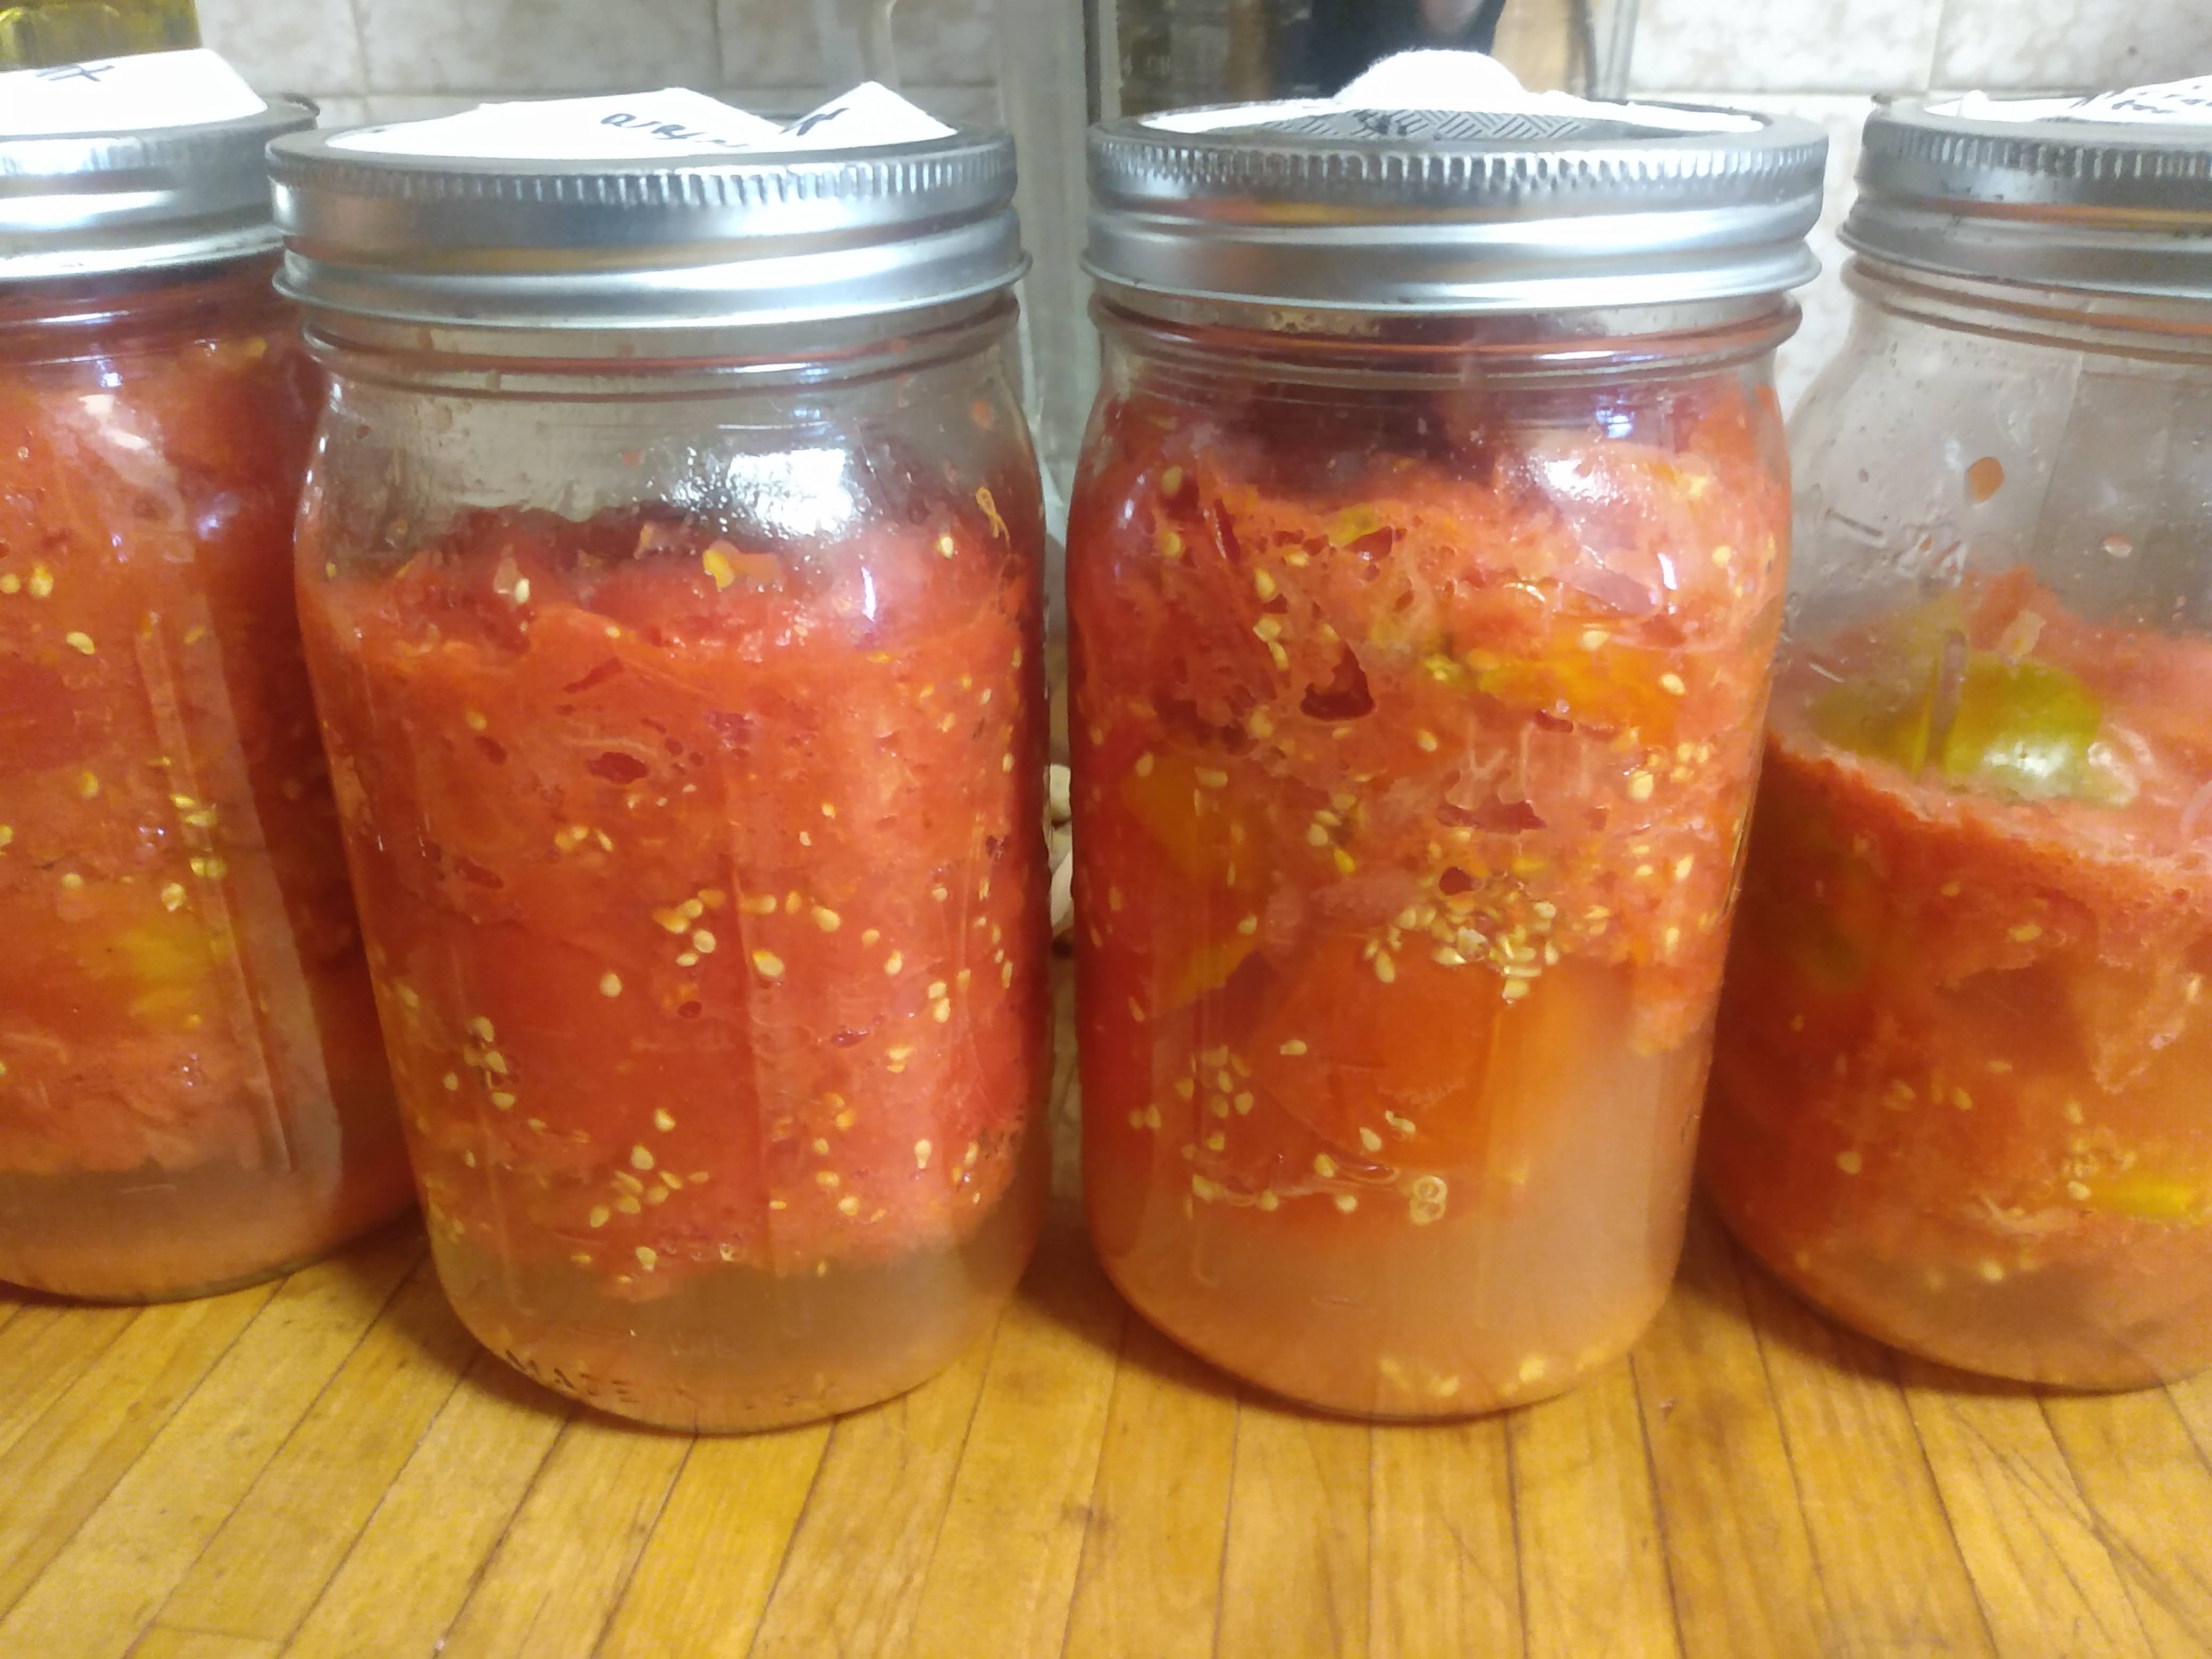
Tomatoes for seeds can be cut open or just smashed, then placed in a jar to let ferment for a day or two. The fermentation helps separate the seed from the tomato flesh and any membrane that might be clinging to it. Fermenting too long can possibly have an adverse effect on germination later on.
When you’re ready to strain, shake up the jar and let things settle. This will help get the viable seeds to collect at the bottom. Next I’ll pull out the tomato solids I can grab with my hands then top the jar off with water. Carefully pour off the water and the remaining tomato debris should pour out with it. Keep refilling the jar and pouring out until the water is clear and clean. Then you can strain out the seeds and lay them on a surface for drying.
Dry gradually, which I do by leaving either on my breezy porch or in a room with a ceiling fan on- caution that fruit flies will be looking for them. Mix up the seeds occasionally to ensure even drying as they can tend to clump up. After a lazy week or two pack them up in a jar or bag or elsewhere safely away until you’re ready to use them next season.
If you take the stinging nettle season very seriously- as I hope you do- we previously mentioned a couple of ways to preserve them, but now it’s high time to transition with the plant as it grows. Personally I’ll never pick anything taller than my knee and here in Pittsburgh stop right around May 1st. After this point the tender leaves and stems will become courser as the stem elongates and she prepares to flower and set seed. Let’s let that happen and let the seeds drop too, then we can cut down the tall stalks to use as an all-purpose fertilizer for our gardens. We’ll be trying out in earnest this year making some fiber from them too, which we hope using this technique will produce some good results.
Stinging nettles contain a wide span of nutrients leafy green plants love such as potassium, phosphorus, calcium, and magnesium. By doing a basic ferment those nutrients are released for easier access. The liquid can be dumped at the foot of a plant or sprayed on the leaves for foliar feeding. This fertilizer is best for leafy green plants or plants in their growth stage, that is, before showing any signs of transitioning to flowering.
The process is easy. Cut down the tall nettles and stuff em in a bucket. Cover them with water, with rainwater being best, and let get good and stinky (outside naturally). Use anytime really. Depending on conditions we tend to start using it once the plant looks good and broken down and use a sprayer to foliar feed a lot of crops. It’s really satisfying to leave the farm behind in a cloud of stink.
It’s said that the first automated spinning machine helped kick start the industrial revolution. The practice of spinning fibers itself came from a rudimentary toolset such as a stick and maybe a small weighty rock that was invented independently in different forms all over the world as separate cultures birthed their own thread spinning traditions. And this simple act of spinning, spinning, and spinning fibers, over and over made clothes, bags, and eventually sails for ships to launch out to sea which led to our now global world and using a non-automated spinning wheel would take around 4 and a half years just to spin. Flax is believed to be one of the first cultivated plants and used for its fiber. But in order for the world to hop on the back of flax to fully spin out of control it needed fermentation to carry it from plant to fiber, from flax to linen.
Growing
Flax is a cool weather loving plant so is often sown in the spring in Western Pennsylvania. It has thin strong stalks that reach maybe around 3’ or so. They can be broadcast but doesn’t compete well with weeds like thistle and bindweed. Flax grown for fibers are sown close together to discourage the plant from branching, and the closer they’re grown, the finer the fiber that can be made from them. Conversely if it’s the oil-rich seeds good for eating, paint, and finishing wood that are desired, give em a little more space to multiply with buds. After around 100 days the plant begins to yellow (round mid-July) and the plants are pulled, by hand, with root and all to maximize the fiber length.
Processing
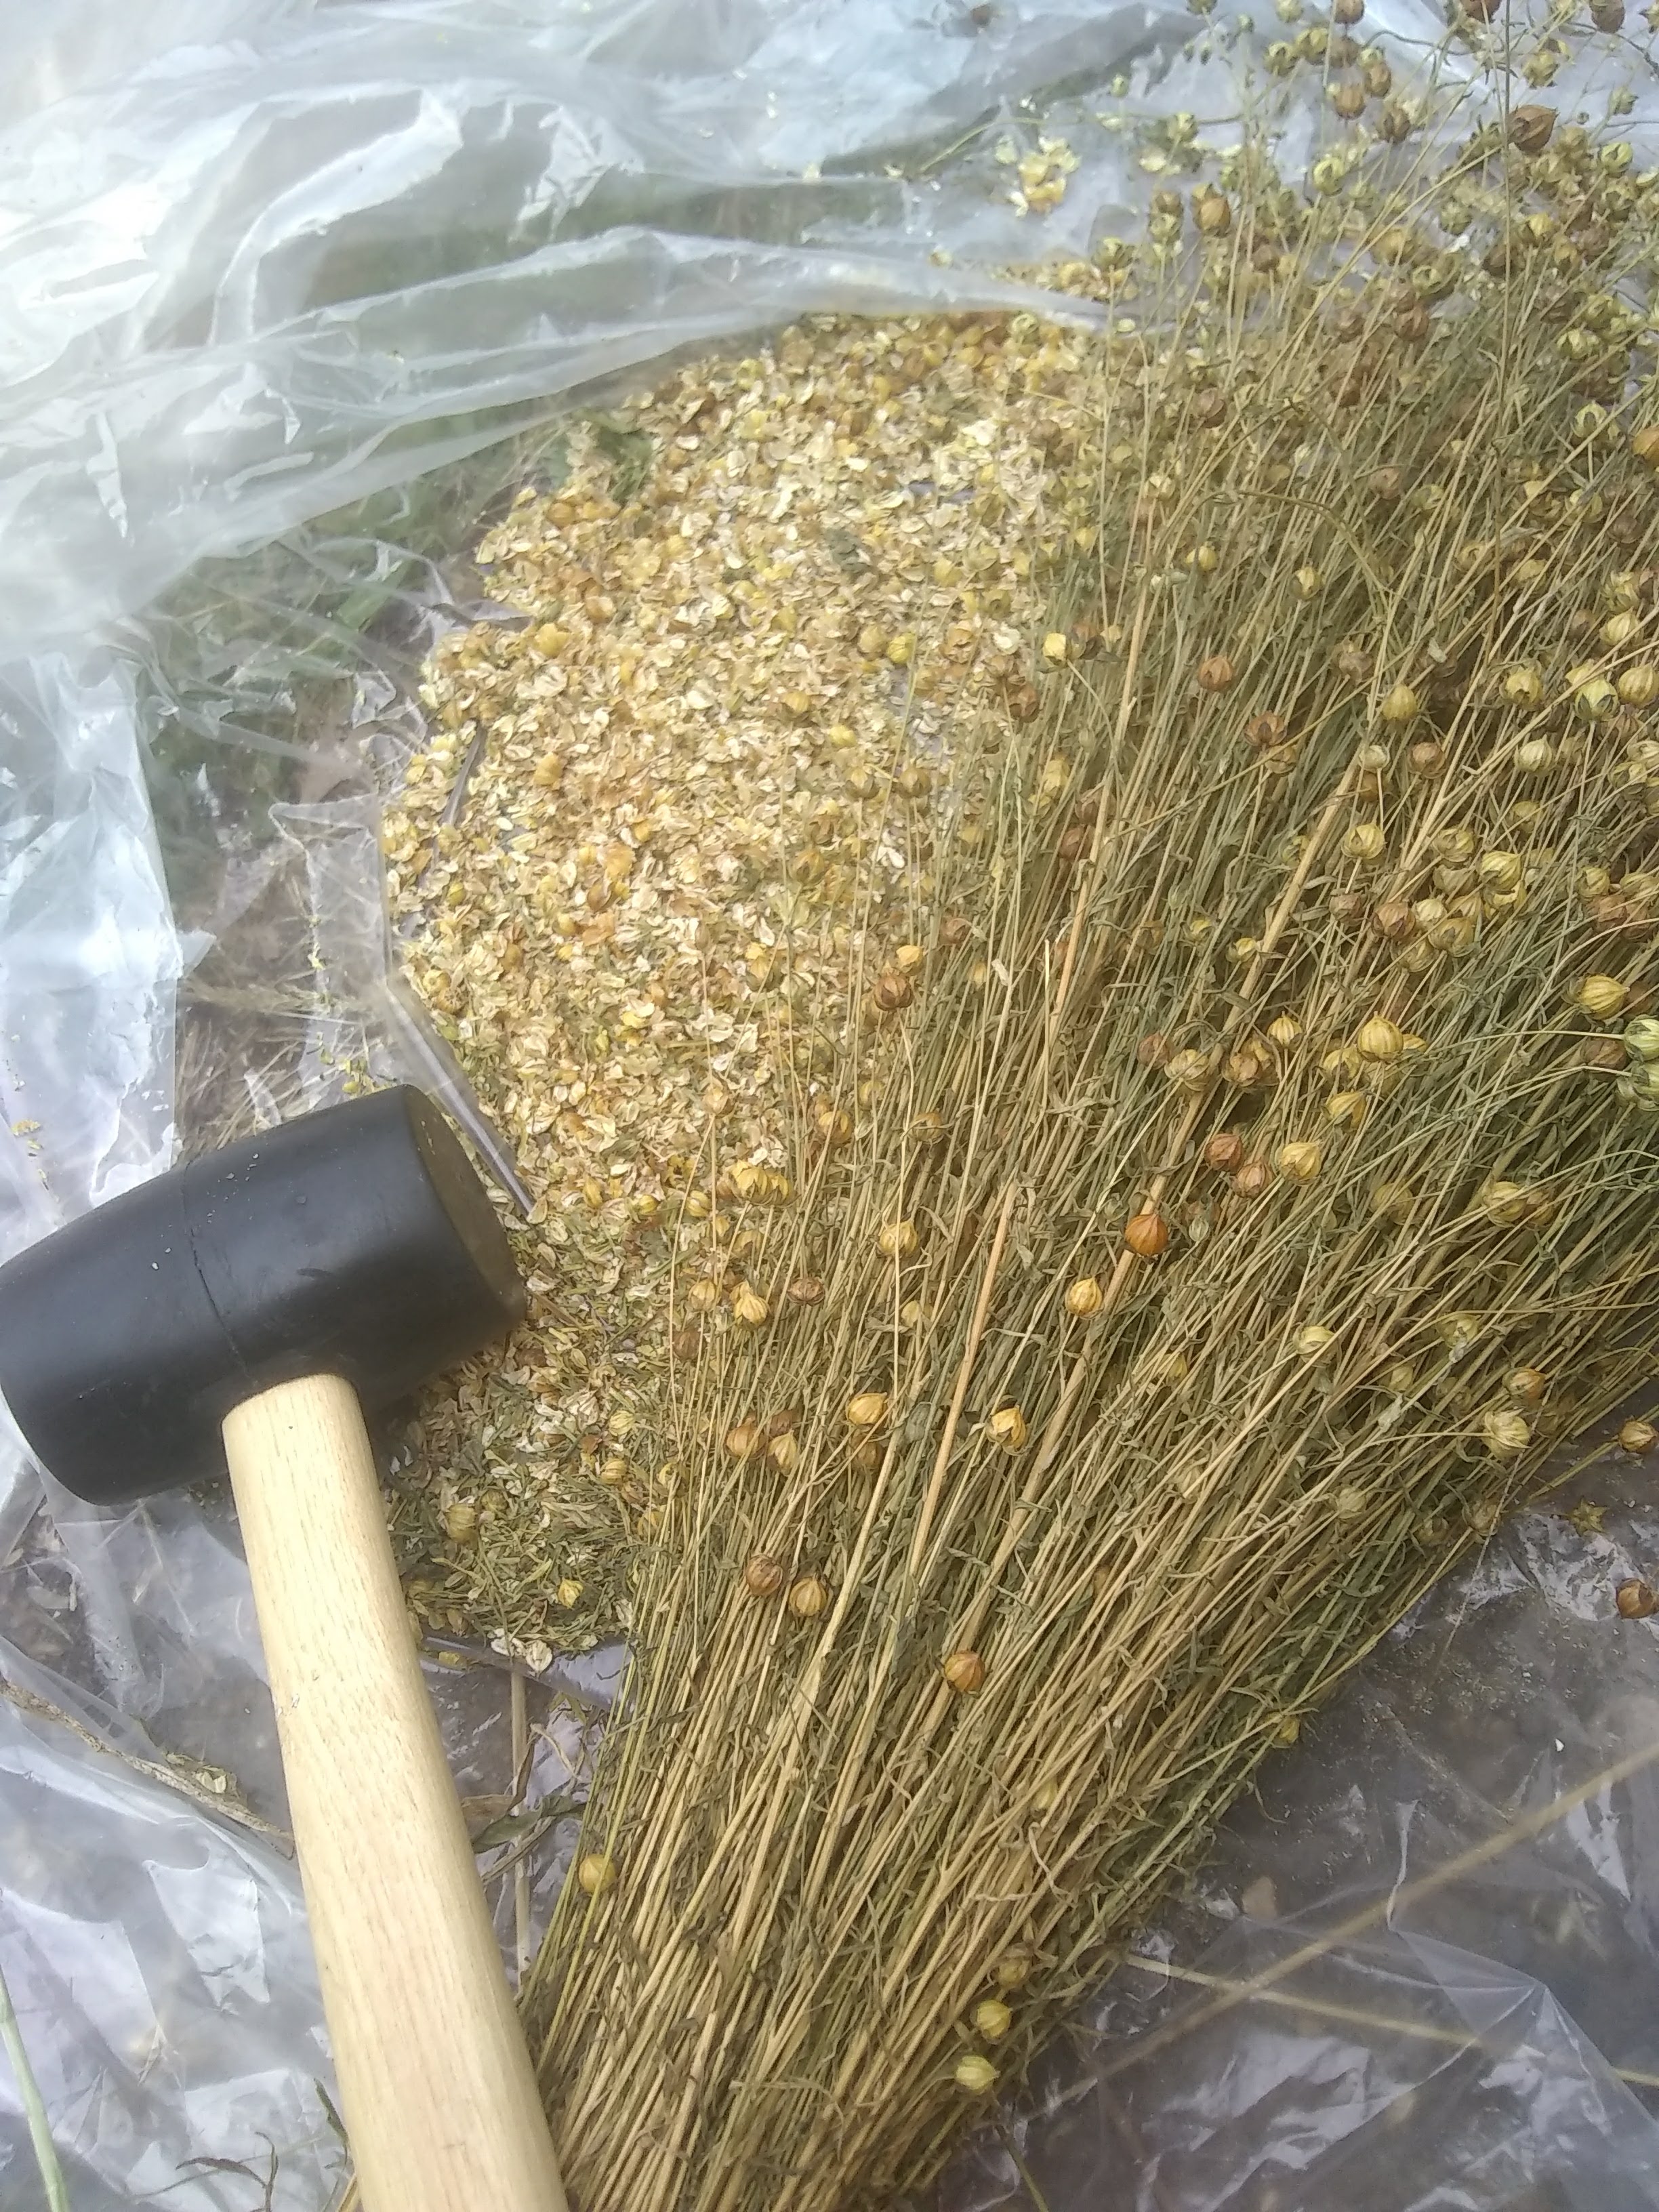
The stalks are laid out to dry for a few weeks (after which threshing can occur to save or obtain the little flax seeds by carefully whacking the stalks). And now things start getting good and rotten, next comes the retting stage.
Linen is a bast fiber meaning that the fibers are collected at the phloem, or inner bark, part of the stem. Incidentally the xylem (outer woody part) and phloem are bundled together by pectin which need broken down to separate out the desired fibers.
The word retting is thought to originate from rot, our dear friend to fermentation. A prolonged saturation of the plant causes the cells around the phloem to burst which in turn invites microbes to come and work on the carbohydrate-based pectin, and this action frees the cellulose fibers from its woody stalk.
Attention must be taken at this stage as under-retting won’t cause proper separation, and over-retting can disintegrate the fibers. Verifying success comes through testing to see if when you break the stalk you can see the fibers separated.
Retting
There are several methods to ret. The first is dew retting where the flax is simply laid in thin layers on the grass to rot with the accumulated morning dew, then dried out during the day (or not), and repeat. Depending on weather this can take a few days to a few weeks and produces a greyer-brown fiber.
Another way is to submerge the dried flax plants in a pond or stream weighed down possibly by rocks. On a large enough scale this method has been trouble for fish and has led to various bans of it overtime. It’s much quicker and produces a more blonde color.
By far the stinkiest is by submerging the fibers into a stagnant pool. This is done in a tub large enough to submerge the stalks. Hose water could work, but like a good starter culture, a cupful of pond water is great to get the microbial activity going. Place a lid on top to keep the water from evaporating in the summer sun, as well as the smell down and it takes about a week.
Once the stalks are tested and a good break of stalk and fiber is easily seen then they are moved to a dry place out of the weather.
Fibers Emerge
At this point the dried stalks are ready to be broken and shattered which should free the long thin fibers from the woody parts of the plant. It’s quite magical to watch the beautiful blonde fibers released from the confinement of their wooden cell. This is also a step we might save for another time, and instead shove the prepared stalks into the basement to await a winter day when there’s more free time to complete the process.
All the steps to processing hereafter involve cleaning the fibers from the stalks which include breaking (which can be done in a sugarcane press or simple cracking), a whacking to then shed the remaining pieces, and a combing to leave clean, straight, and untangled fibers ready to be spun and then woven.
Making lists is silly but we did it anyway here because we think there’s some real value in turning people’s attention to the foundations of feeding yourself in our geography where growing tomatoes in your garden is far more popular. Even if you don’t have the space to produce that much food you can still save the seed and pick up the rhythm.
All three of these crops provide a certain degree of simplicity and reliability. They also are generally low maintenance all the way from sowing to harvest, at a home scale require no special equipment to process, while also being straight-forward to store for the winter and having endless uses in the kitchen. Though if I had to pick a favorite crop it would be onions, which brings up another curious point for another day- should your favorite food take priority as your top subsistence food?
Beans
Beans are very easy to grow. Direct sow after the frost up until early June for most varieties. Seed in rows 8″ apart and cultivate once or twice until the bean canopy fills in. Watch out for groundhogs. Leave out until plants dry in the field, but not too long or the pods may mold or shatter. They produce a reliable seed. Bush are easiest to harvest, there is a node at their base you can use snips and clip them at, hauling out the whole plant. For larger plots I’ve taken to coming in with the scythe when the bean pods are about halfway to dry. It’s an efficient way to harvest big patches without shattering too many pods. Climbing beans are more work to harvest.
I’ve learned to finish drying out the beans under a cover in the open like an open barn, porch, or shed, in a pile turning it occasionally to prevent molding. I’ve noticed that the longer you wait to thresh them the easier it is. Most of my beans I’ll wait to thresh until a hot dry day in the spring. And when that time comes they are easy to break with your feet alone, and winnowing is a breeze. At that point they are ready for storage in buckets or other containers that seal out the moths.
Potatoes
Potatoes are wonderful because they can be grown lazily. Put a potato in the ground and get more potatoes. It can be as simple as kicking a little soil over them. Dig trenches if you’re a go-getter and drop them in every foot or so. Look for storage varieties to get through the winter. I use a poor storage type that I think is delicious, maybe the seeds are slowly adapting. When I plant those varieties I just say I’m planting pre-sprouted potatoes. Cultivating can be as easy as hilling them a couple times with a rake, or as many times as you can manage. Voles may gnaw on them but otherwise hopefully they’re left alone. It’s possible to get an abundant harvest in smaller space, around a pound per a potato seed. When the green arial parts die back it’s time for harvest. If the soil is loose enough it could even be done with hands, though a shovel works so long as you don’t slice into them. After harvesting make sure your potatoes are exposed to the least amount of sunlight as possible so they don’t turn green. Let them cure for a week at ambient room temperature, then move them to a cool, dark space.
Corn
I set out to grow wheat as my primary grain initially but ultimately fell in love with field corn which could be either flint or dent. I think the big difference is in harvesting and processing the grains. Corn requires much less labor to get to your plate, and no special equipment. Comparatively to wheat I love the ease of threshing corn. I like to nixtamalize my corn in huge batches and have it on hand as dried hominy. While wet in the nixtamalizing process it can be mashed up for easy masa without a mill. Field corn does require a minimum amount of plants to achieve pollination as its wind pollinated. Four rows at least 4′ long are recommended as a minimum. It also need a lot of nitrogen in the soil to be happy. Depending on your variety sow corn in rows 2- 4′ apart, around 8-12″ apart. Hill and feed with nitrogen as the plants reach your shins. Cultivate a round or two until the canopy fills in, then wait for the plants to die back. The corn is ready when the kernels can’t be dented with a fingernail. Then just pull them off the plants, husk them and give them a good ventilated place to dry. I’ll hang mine, tying them up by the husks, either indoors or outside under a pop tent. After a few weeks of drying they get either bagged up or threshed and stored in a bucket away from mice and moths.
With fall just starting to show, now is the perfect time to think about putting some seeds away for next year. While growing your own food invokes essential traditions with family and community each year, seed saving is a worthwhile practice that can carry those important traditions across generations. Here are a couple straight-forward veggies that are a good place to start saving.
When choosing a fruit to collect seeds from consider carefully as seed saving is akin to adopting a new family member. Once you’ve chosen the plants you want to work with, look for the general attributes of the fruit and the plant as they would be the parent of the future generations in your garden. Choose for characteristics you like, perhaps the plant’s performance, fruit size, disease resistance, etc.
Tomatoes
Some genetic crossing with other closeby tomato varieties are possible, so maybe consider spacing different varieties apart in your garden. Collect ripe fruits. Crush them in a container and stir twice daily. There is a pulp that surrounds the seeds that will be reduced by a light fermentation. The seeds should eventually sink to the bottom after about 2-4 days. Caution that over-fermentation can reduce germination.
When the seeds are ready add water, stir, and pour off the water with the tomato solids. Keep repeating until the seeds are left with some pretty clean water. Strain the seeds and lay out on a cloth to dry.
Peppers
Use ripe fruit. Remove the seeds from the flesh. No washing necessary. Allow to air dry. Varieties should be grown with some separation if genetic purity is desired, around 50′.
Eggplant
Use mature fruit whose flesh leaves an indent when pressed. Remove seeds by cutting and crushing the fruits. A knife will likely slice through some seeds so maybe just cut in half then tear the rest with your hands. Place in a bowl and add water and continue to crush, squeeze, or rub free the seeds. Wash out in a way similar to tomatoes but there’s no fermentation required. Lay out to dry. Varieties should be separated by around 50′ if you want genetic purity.
Beans, Grains, & Potatoes
Plants like beans, potatoes, and grains are quite simple as the harvest is the seed itself. Just let the plant reach full maturity, harvest, and store away as you would as if it were food. Beans and grains tend to be left on the plant until it fully dies back, they are further dried indoors for a few weeks just to be sure, then packed away. Potatoes are stored in the root cellar or a cool basement.
Note on Drying Seeds
Let the seeds dry on their own if your ambient temperatures allow them to do so without molding. Try not to use anything to speed up drying however a light fan for air-flow can be okay.
*Most of these posts are resources for Ferment Pittsburgh’s monthly newsletter that features seasonal ideas, techniques, and musings. Consider jumping aboard?
Processing…
Success! You're on the list.
Whoops! There was an error and we couldn't process your subscription. Please reload the page and try again.
If I had to choose only one grain to grow it would be corn. Of the great variety of products corn can become, hominy is essential. Whether dent or flint, these corns are perfectly edible and are eaten as polenta and grits, but their kernel’s hull bind up niacin which causes deficiencies that lead to health conditions like Pellegra. In comes the innovative technique called nixtamalization. It was eventually discovered that corn soaked in an alkaline brine dissolved the hemicellulose walls of the corn and freed the niacin for human to ingest. Additionally the process softened the kernels and in some cases dramatically increased the minerals available and greatly reduced mycotoxins.
So how’s it done? Two ways of creating a proper alkaline brine is through the addition of lime (from stone) and lye (wood ash). Lime, also known as Cal, is limestone baked at a really high temperature (converting the calcium carbonate to calcium oxide), then when treated with water (where it becomes calcium hydroxide), and dehydrated to a fine white powder as lime or Cal. It naturally increases the kernel’s minerals when used in processing as well as influencing the familiar aromas we associate with tortillas. Lye on the other hand, being more widely accessible, was used by people who might not have had access to limestone deposits, as it is produced by soaking wood ash in soft water. There is food grade lye you can buy which works the same as a wood ash solution but lacks the mineral contribution provided by natural wood ash.
How its done
Get yourself some field corn, whether flint or dent, either will do. Your best bet is to grow it yourself if you can. But if you can’t, research the Open-pollinated varieties grown in your area. Popular out our way is Wapsi Valley, which is a dent corn pictured above (note the dents on the tops of the kernels). We found it by researching OP corn for feed for sale locally and learned more about the varieties, such as how they are actually delicious heirlooms. If you tell the farmer you buy the seed from that your eating it they may think your crazy as lots of people think it’s just for livestock anymore.
Either way, when you have some corn, weigh the threshed kernels and put them in a pot and cover with water to about 2-3 extra inches above the kernels. Add Cal at about 1 gram per every 100 grams of corn. If you’re looking for Cal, check out a grocery store from Central and South America. For the lye method see below.
Bring the pot to a simmer and let it go until the kernels are a little tender. It could take around 45 minutes, or more or less. Caution that boiling with Cal can create bitter flavors.
Remove pot from heat and let it sit for 24 hours.
Strain the kernels and give them a rinse while also massaging them. You now should be seeing the hulls wash off like whispy, soggy paper. The job is done. Wash off as many hulls as you have the patience for. Less is better for making thin products like tortillas.
The hominy can now be stored a couple different ways. They can be frozen as they are, or dehydrated and stored dry, in which you would soak them like any other grain before cooking or grinding them into hominy grits. You can also grind them fresh to make tortillas for dinner tonight!
Lye Method
If you’re using food grade lye use roughly the same ratio as above 1 gram lye for 100 grams of kernels. For information on food grade lye and/ or using wood ash itself you can refer to this post regarding lye and bagels. Sodium hydroxide, which is what pure lye is, in the right quantities can burn you so use care in avoiding skin contact with the lye brine if you’re using this method.
Cover threshed corn with water, add lye granules or lye brine, and bring to a boil.
Simmer for 30 minutes, turn off heat and steep for another 30 minutes.
Drain the lye water and soak in clean water for 30 minutes.
Change the water once again and bring to a boil one more time, and simmer until kernels are tender. Wash hulls as you wish.
*Most of these posts are resources for Ferment Pittsburgh’s monthly newsletter that features seasonal ideas, techniques, and musings. Consider jumping aboard?
Processing…
Success! You're on the list.
Whoops! There was an error and we couldn't process your subscription. Please reload the page and try again.
It’s always exciting to add a new personality to your garden and many of us love to bake and eat bread. Growing wheat is one of those things that could seem daunting from afar, but the truth is it’s almost as easy as growing grass. Regardless of if you lack enough extra space, the value of the experience unravels the mystery of how bread and other flour products come to be. It’s an exciting crop with loads to teach so worth giving a shot.
Not too much space is necessary to get started. Similar to if you have a modest garden plot and only get some of this and that, you’ll probably need something like 20’x 20′ to grow enough for a loaf of bread. But much of the reward is gained through shining a hands-on light onto how grains live and grow, which I believe is worth experiencing no matter the space restrictions. And every year you grow it you’re adapting and building up your seedbank to boot.
Growing wheat is the simpler part while processing it is where it gets more tricky. There’s a bit of rhythm and experience that goes into it transitioning from plant to muffin, or cookie, or bread, but first let’s get into growing it.
Selecting seed
There are many different types of seed to choose from. Consider your ultimate purpose when choosing. And do make sure get your seeds from a good source so they may be free of odd diseases.
Hard Red Winter – High-protein used from bread and other baked goods, commonly used for all-purpose flour.
Hard Red Spring – Highest protein and thus best grain for bread and other leavened products.
Soft Red – Low-protein and often used for pastry flour to make cakes, pies, and other baked goods.
Soft White – Very low-protein used for pastry flours and unleavened baked goods.
Do some research on the seed before you buy it. Many winter varieties require a vernalization period, meaning they need to experience temperatures below ~40 degrees for up to 45 or so days in order to produce a seedhead that same year. Winter varieties tend to be planted in the fall to grow up a bit before winter halts them into dormancy until spring. Some winter varieties can be facultative, meaning they can be planted in either the fall or spring.
Generally speaking fall grains produce more tillers (seed-bearing stalks) and thus have a higher yield, while spring planted grain is higher in protein and thus higher in gluten and better bread bakeability.
When to plant
Winter wheat is planted in the northeast sometime between late September and early October. The goal is to give the grain enough time to sprout up and establish itself before winter settles in, however not so much time that it begins it’s upward growth stages. Then it will hang out in the field ready to take off at the first sign of warm weather.
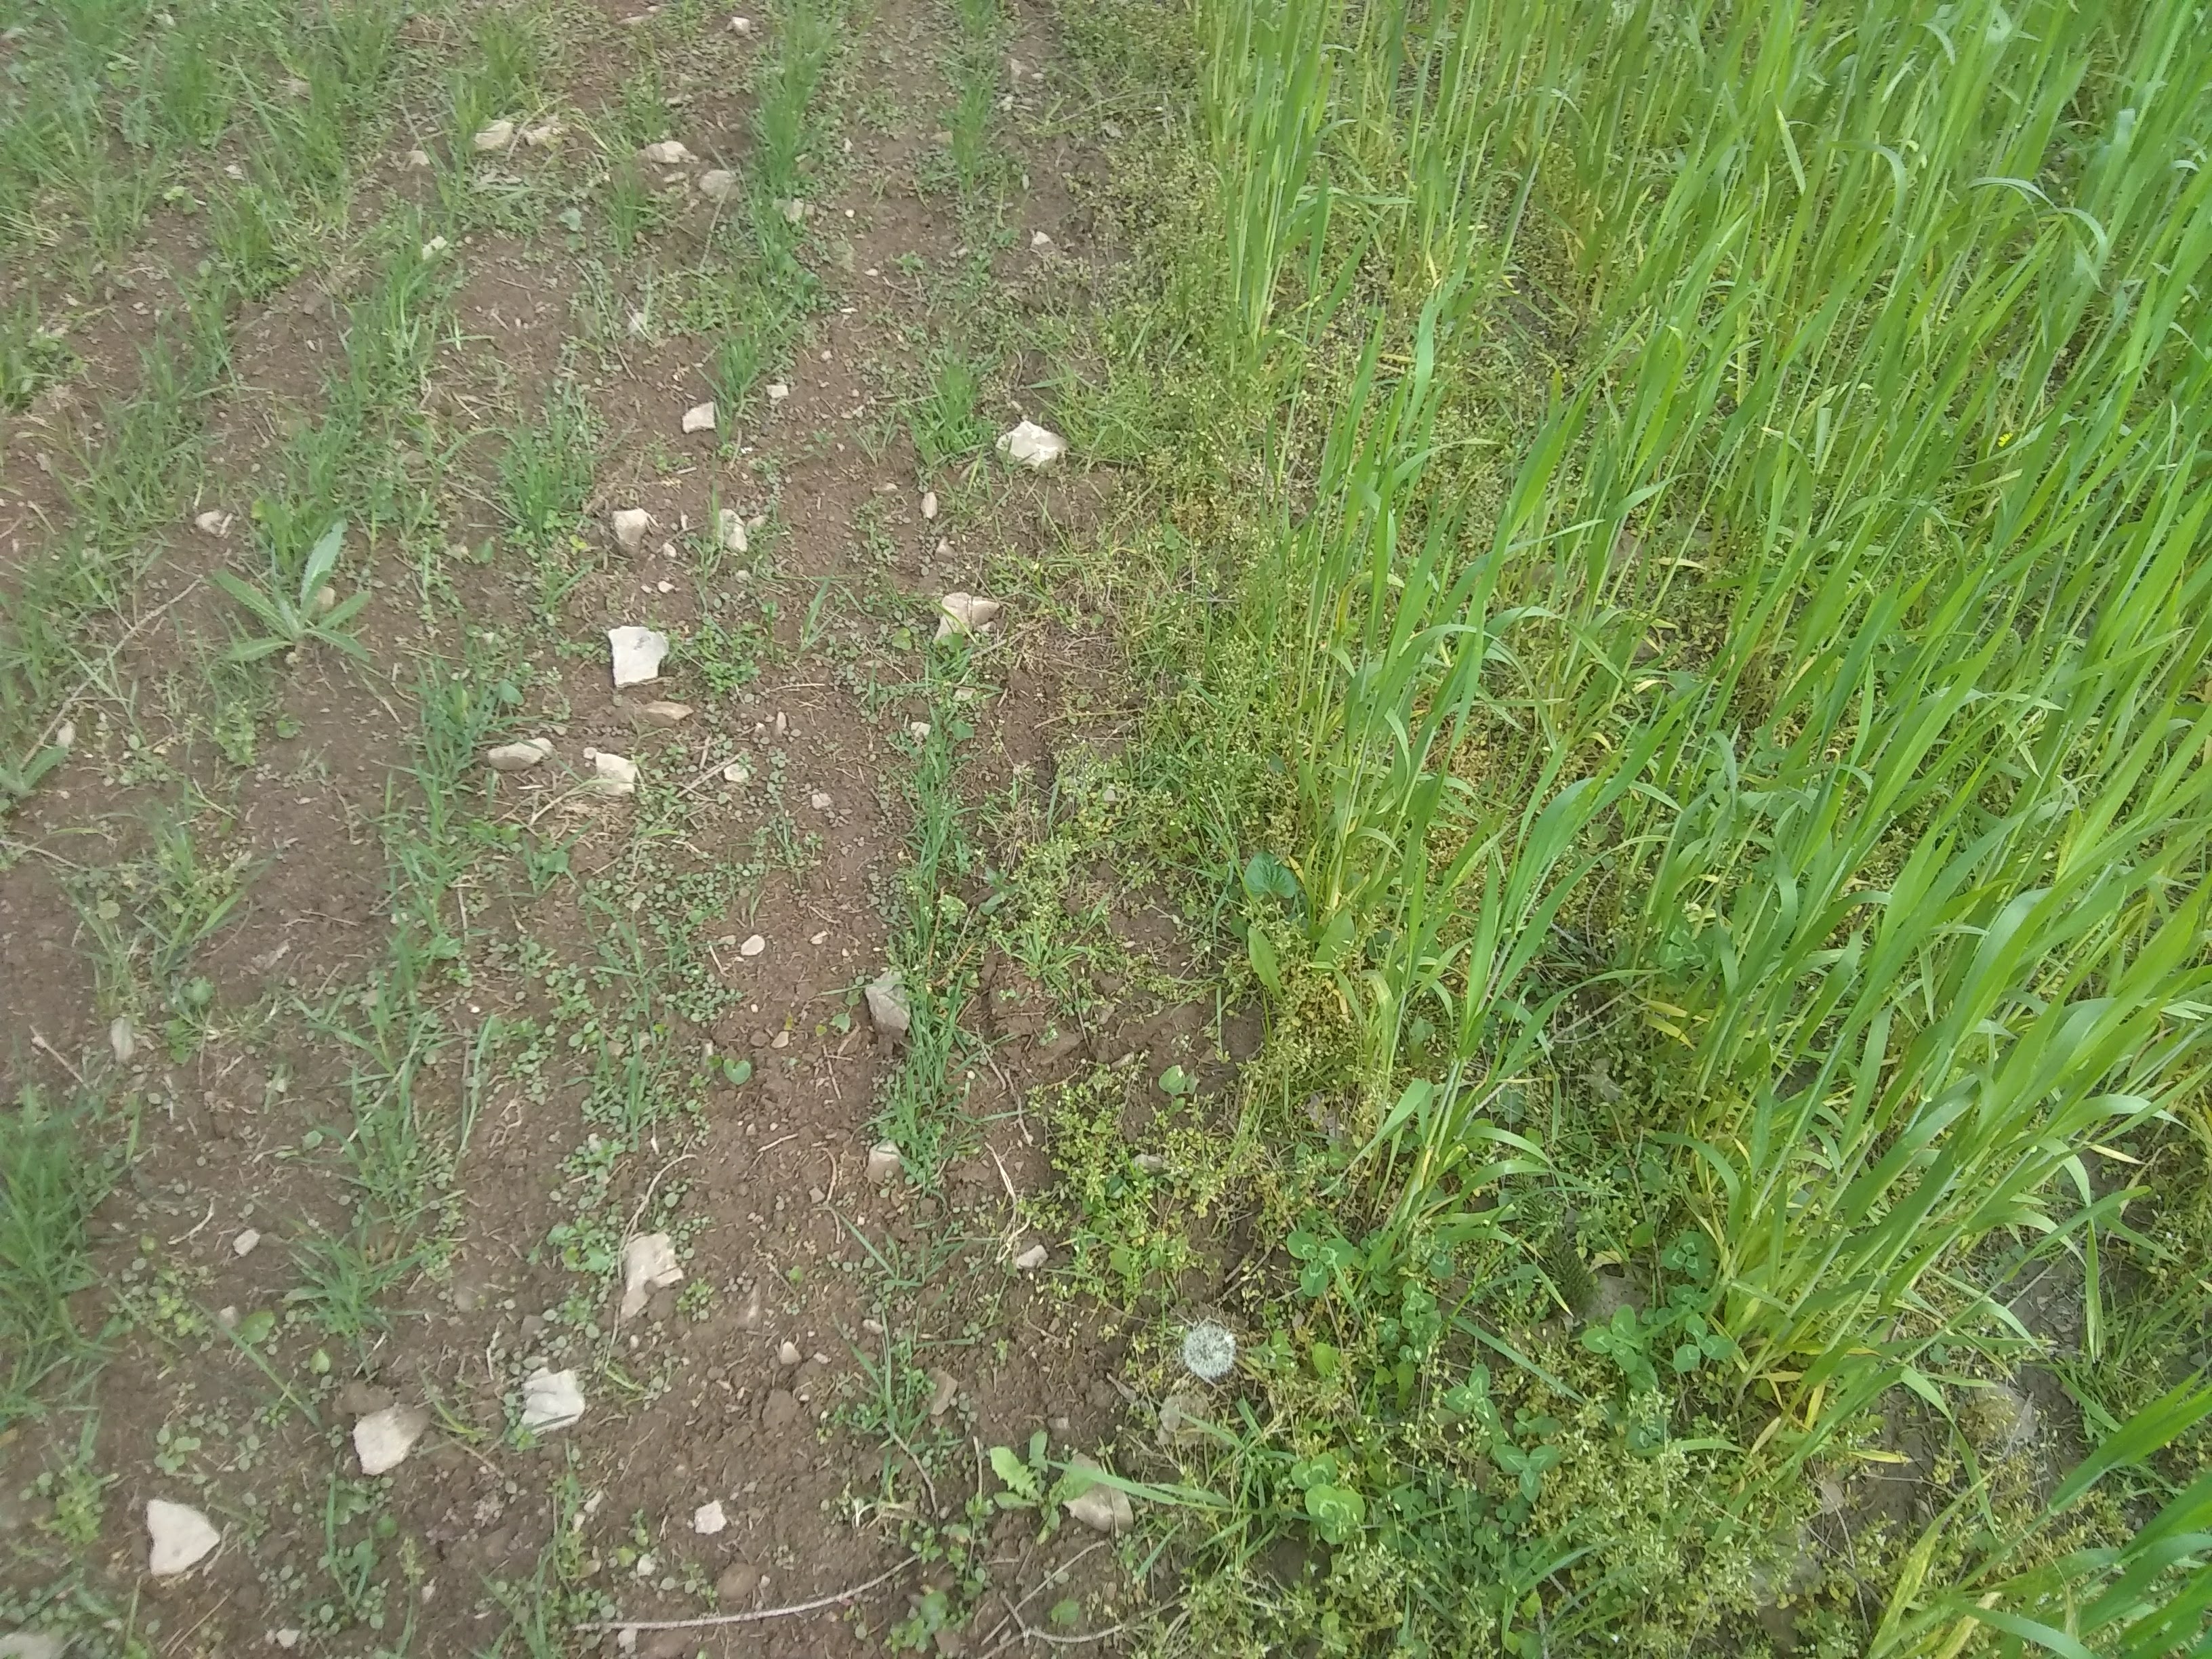
Spring wheat can be planted in early spring from March to April. In the picture below you’ll see them side-by-side. A benefit to planting in the fall is the jump the wheat gets on out-competing the weeds.
Side by side with Spring planted wheat on the left, and fall planted wheat on the right.
Wheat is a heavy feeder so you’ll want adequate fertility in your soil. Nitrogen is directly related to the protein in the kernel so if you’re trying to make a quality bread you’ll want to feed it well. We always grow a field of beans the season before wheat for their nitrogen fixing characteristics. A spring sown dry bean goes through its growth cycle just in time for winter wheat to be planted. We also broadcast red clover in late winter over our winter planted wheat. The goal is for after harvesting the wheat we’ll be left with a field of nitrogen-fixing clover.
We’ve learned that some ancient grains like einkorn and emmer thrive on lower fertility and in fact too high could cause them to grow up so big they just fall over, which is referred to as lodging, and isn’t ideal. Lodging can make for too much moisture on the seedheads inviting mold and disease, or it positions the grains low enough for critters to enjoy.
Seeding
Seed spacing really depends on your specific seed. We’ve grown a winter emmer that reaches 6′ tall and amasses a wide girth and can handle generous spacing of 10″ or so and still form a tight canopy. Conversely, our red fife wheat stays super compact. Finding a sweet spot that doesn’t overcrowd your grain but encourages a full cover when mature helps keep the competing weeds at bay and your yield at its best. Perhaps a good place to start is 6″ spacing in rows with 8″ between rows, or enough space to work your hoe between rows.
Broadcasting is fun to do but doesn’t provide you with an opportunity to control weeds. Perhaps in that case broadcasting is better suited for fall planting and with a plot that is free of any aggressive weed personalities.
Cultivation
Stay on top of those weeds as best you can. It’ll be competitive for spring grains which can easily get gobbled up by all the other eager seeds. Hoe persistently before the grain grows out and you’re no longer able to pass through the rows. Winter grain will help keeps weeds away due to its early jump in the spring. However a broadcasting of red clover in late winter may halt any future cultivation plans. Running through a round of cultivation before throwing clover is a nice thing to do. Either way when it comes to harvest time it’s nice to cut down handfuls of wheat rather than handfuls of, say, thistle.
Some varieties such as einkorn are allelopathic, which means they produce chemicals that repress other plants trying to grow around them.
Growth stages
After the grain sprouts it will go into tillering phase. This is when the plant starts producing young future seed-bearing stalks and look just like grass. It’s a great time to show off your super spotty “lawn” to your friends for a good laugh.
Soon the energy becomes focused upward as the stalks start climbing led by the leading flagleaf. When it reaches a sort of terminus, from beneath the lead leaf a bulge begins in the stalk. A little seedhead head then pokes out and gets lifted higher yet upward.
Then emerges what looks like little white dust dangling from the seedhead which is the grain’s flowering. Wheat is pollinated romantically enough by the summer breezes. When the flowers fall away, now begins the ripening of the grain.
At this point the grain chamber seems empty but with a little time it fills in and starts taking shape. The seed starts with what’s called the milky stage. This is when if you squeeze the seed it will ooze a milky substance. It will firm up in time into the soft dough stage. It’s basically as it sounds, when the kernel is chewed between the teeth it will feel like just that- a soft dough. Then with continued ripening the kernel hardens into a hard dough stage. The grain is rapidly loosing moisture and preparing for its future germination as a seed having gathered all the nutrients it could from the plant.
flowering wheat
When to harvest
Once the transition node between the seedhead and the stalk has browned the seed is no longer receiving nutrients from the plant. Additionally, the longer the seed remains on the plant the higher the percentage of germ will be in each kernel. The germ assists in the germination of the seed into a new plant. However if you want to for instance to make bread then you’ll want to maximize the starch and minimize the germ. In that case you will harvest about two weeks early, when the kernel is in soft dough. If you’re harvesting for seed, simply allow the plant to fully ripen, just making sure to get it before the birds do.
Harvest
Harvest by either clipping the grain heads off or by cutting the somewhere along the stalk with a sickle or machete. You’ll want to store them somewhere they can finish drying- so a well-ventilated space safe from the weather, but also somewhere away from where birds, rodents, and other rascals might be able to reach them. Tying them off into sheaves is beautiful and helpful for transporting them if you grew enough, though not fully necessary.
Once your grain is dried enough that it doesn’t dent beneath your thumbnail, it is storable and ready for the threshing floor.
What follows is the threshing, winnowing and storing, plus milling, etc. For threshing and winnowing information head on over here.
Being apart of a generation who largely had traditions that go as far back as a Betty Crocker cookbook, how do we rebirth something that might be already lost? After some thought I clumsily took up the task grasping at the few lingering strands of the past to weave into my present hopes for something to someday take shape. I gave it my best shot- by making the oldest living relative I had one of his favorite foods, and making it again and again until he like it.