Buttered Heart from a Churning Sky- a metaphorical Cultured Butter Tutorial

dairy, fermentation

If you want to see butter then look up. Sometimes a flat milk or heavy cream, and other times like puffy globs of fat clouds floating along in the buttermilk of the big bowl of sky. There is a Hindu story about that. The Gods had lost many of the treasures that gave them their powers including immortality and the way to get them back was to churn the treasures out of the milky sky. They used a mountain to do the churning, but it was too much for the Gods to handle on their own so they sought help from the Demon crew who all together got the treasures back. What an image, especially in the face of life’s sometimes unruly chaotic moments of loss, good and bad working together to shake up life to reveal its treasures hidden within. It’s interesting how our internal human processes can often mirror nature’s natural processes (who express themselves well with natural preservation). Wouldn’t it be more interesting when the challenges of life overwhelm our own horizon, to look up and see the clouds forming and say, yep it’s time to be made into butter again.

We all know that there are generally two ways to do most things anymore- the immediate way, reliably severed from the ecosystem, and the other that takes time and subtly penetrates and deepens into a moment that’s woven into existence’s greater expression. Butter can be made by buying cream, dropping it into a stand mixer, turning it on and walking away for long enough. The second, other way scours it of its purity, merging it with the natural imperfections with casein arm’s full of lactic acid bacterial life.

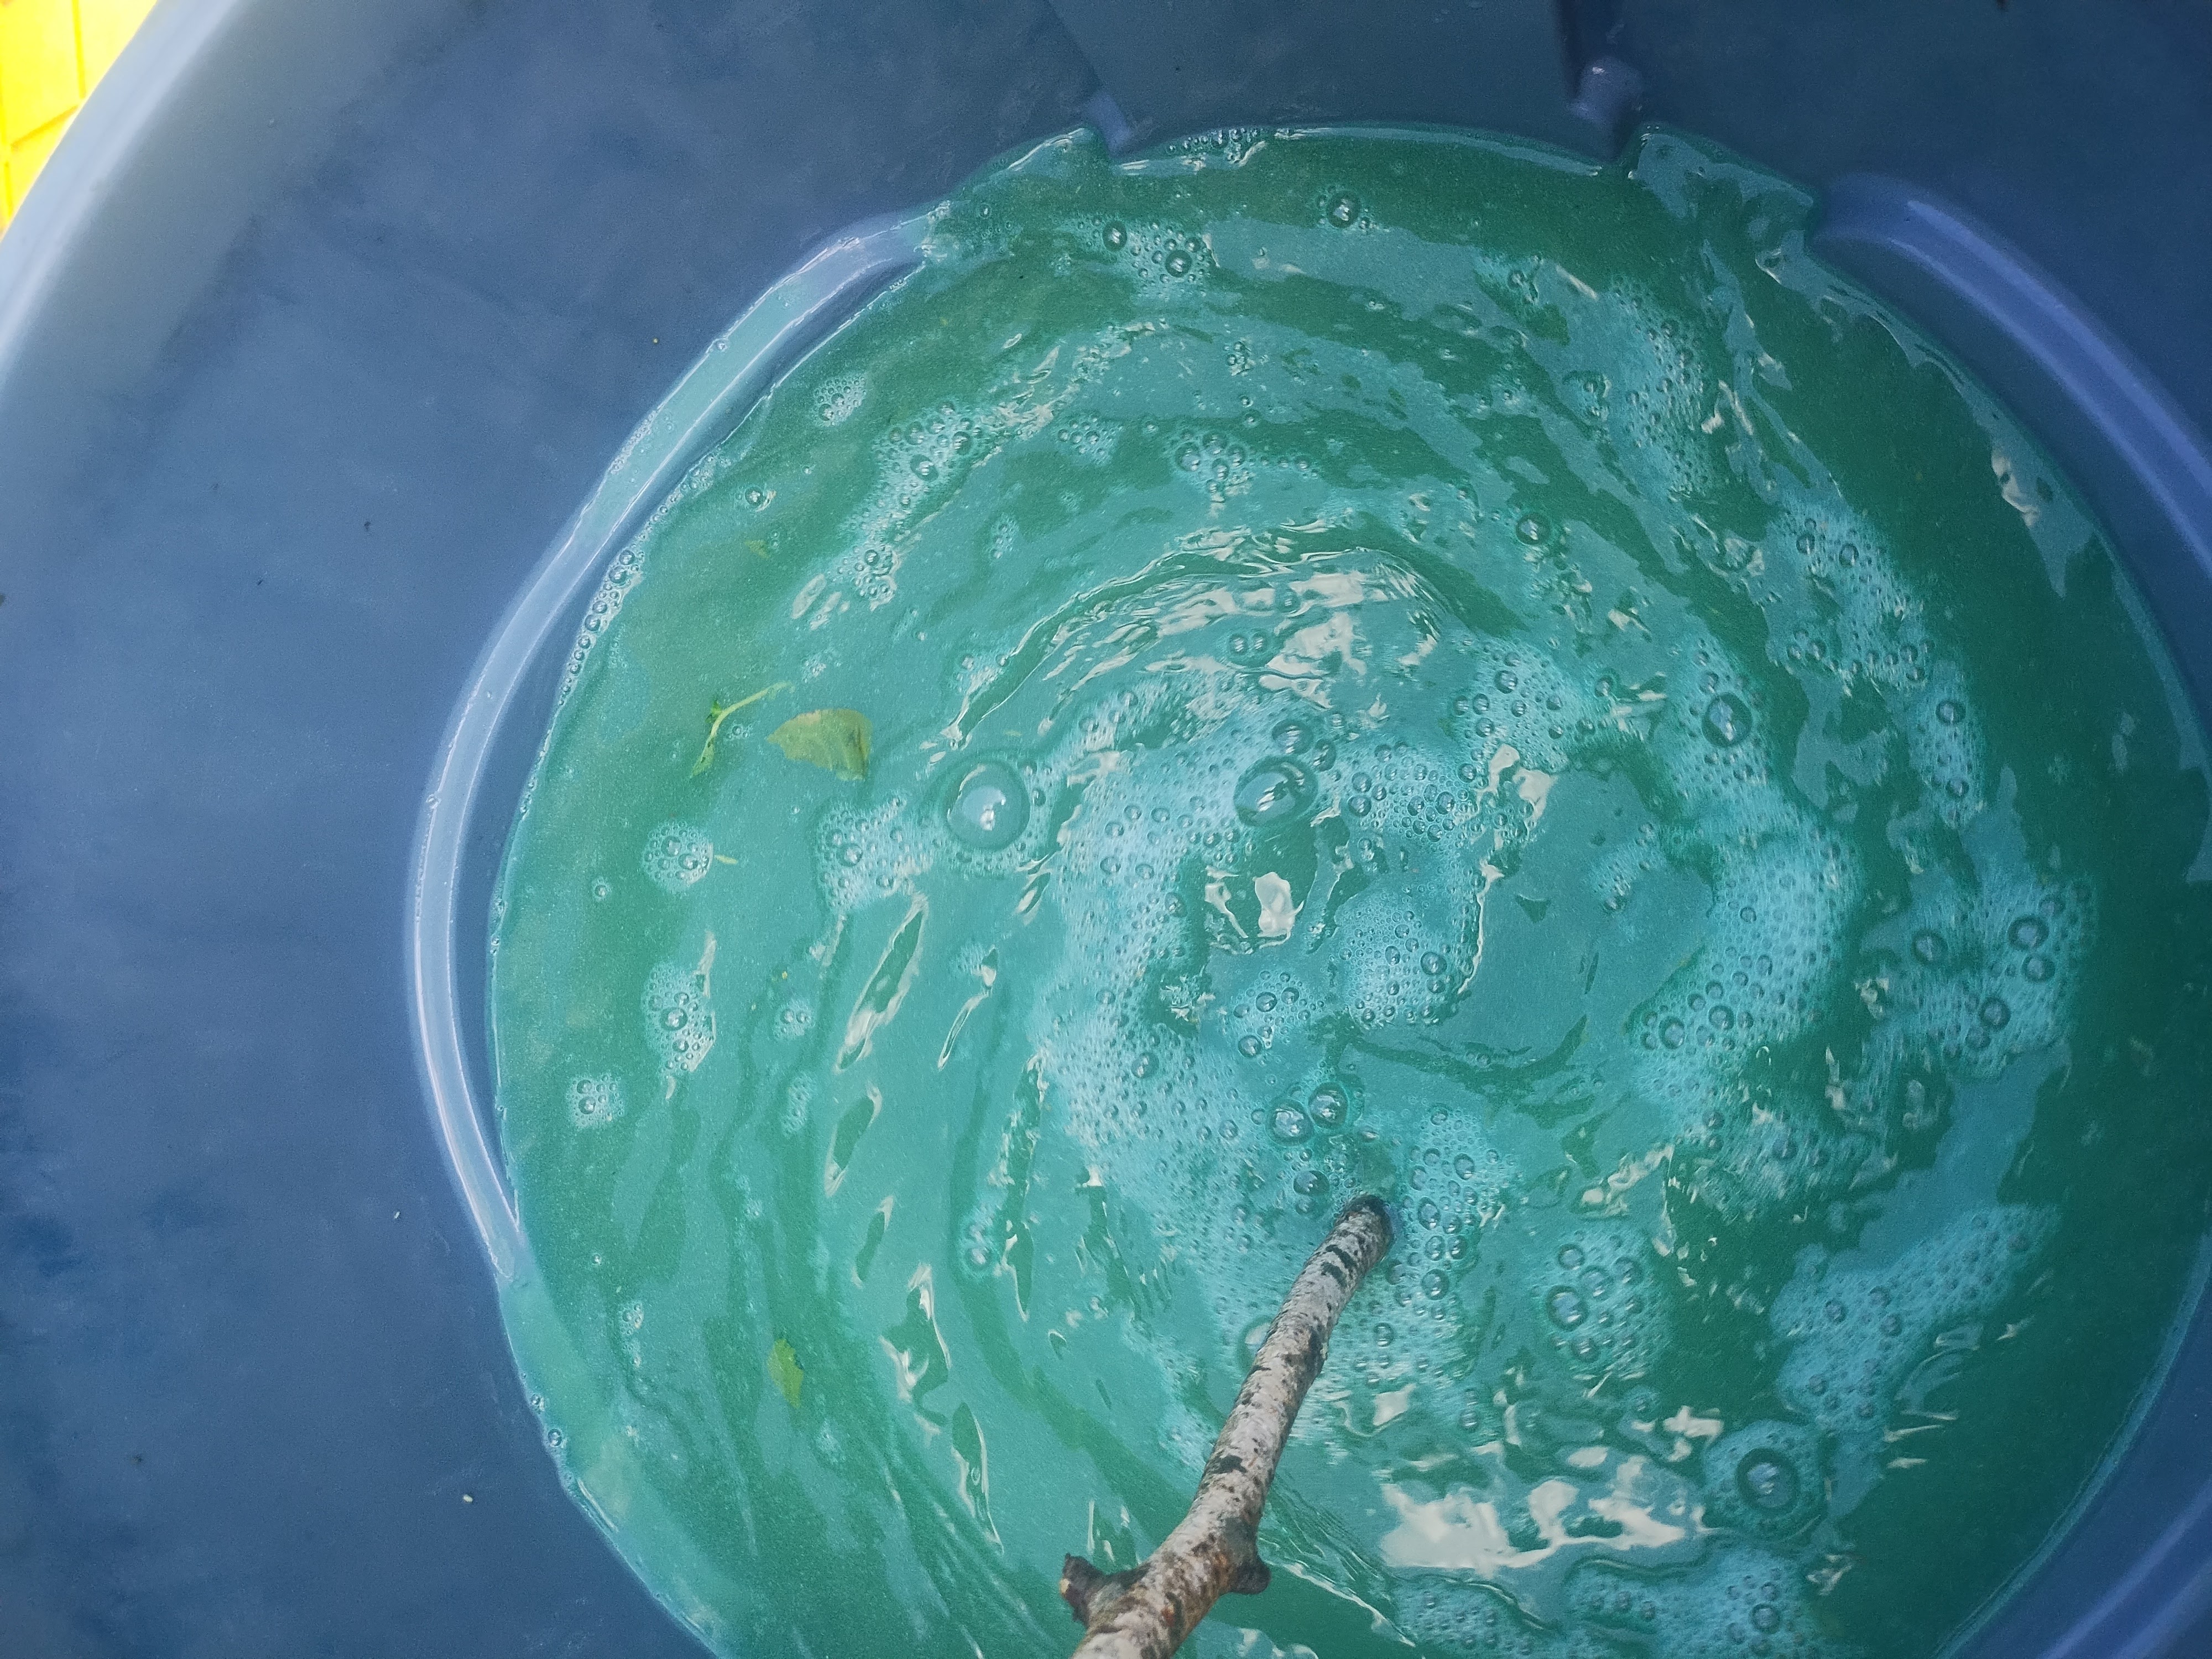
Letting time mature milk first separates the cream as the fat is less dense and will take its seat up high as a floating mountain (just be sure to be using unhomogenized milk). Other ways to do this is by force. Fresh milk can be spun, there are table top machines with varying levels of commercial and hobby ones, that mechanized or hand cranked, throw the milk and cream out in two different spouts using centripetal force based on their density. Using the slower method to create floating islands of risen cream lets you scoop the cream off, or another way to describe it is to skim.

After time has aged our cream into maturity where it can easily be plucked away separately, on its own we’ll let it keep ripening to the autumn of its life, where it gradually begins its rotting, just ever so much. This extra period is the culturing process where lactic acid bacteria adds interesting flavors, changes the acidity ever so slightly which helps with the final butter’s storage potential, and breaks things down to essentially get the final buttering ball rolling.

This culturing of cream can be matured for a couple hours or a couple days, relying on naturally occurring microbes or by adding your own through a kefir grain or backslopping a cultured product like yogurt, previous buttermilk or whathaveyou.

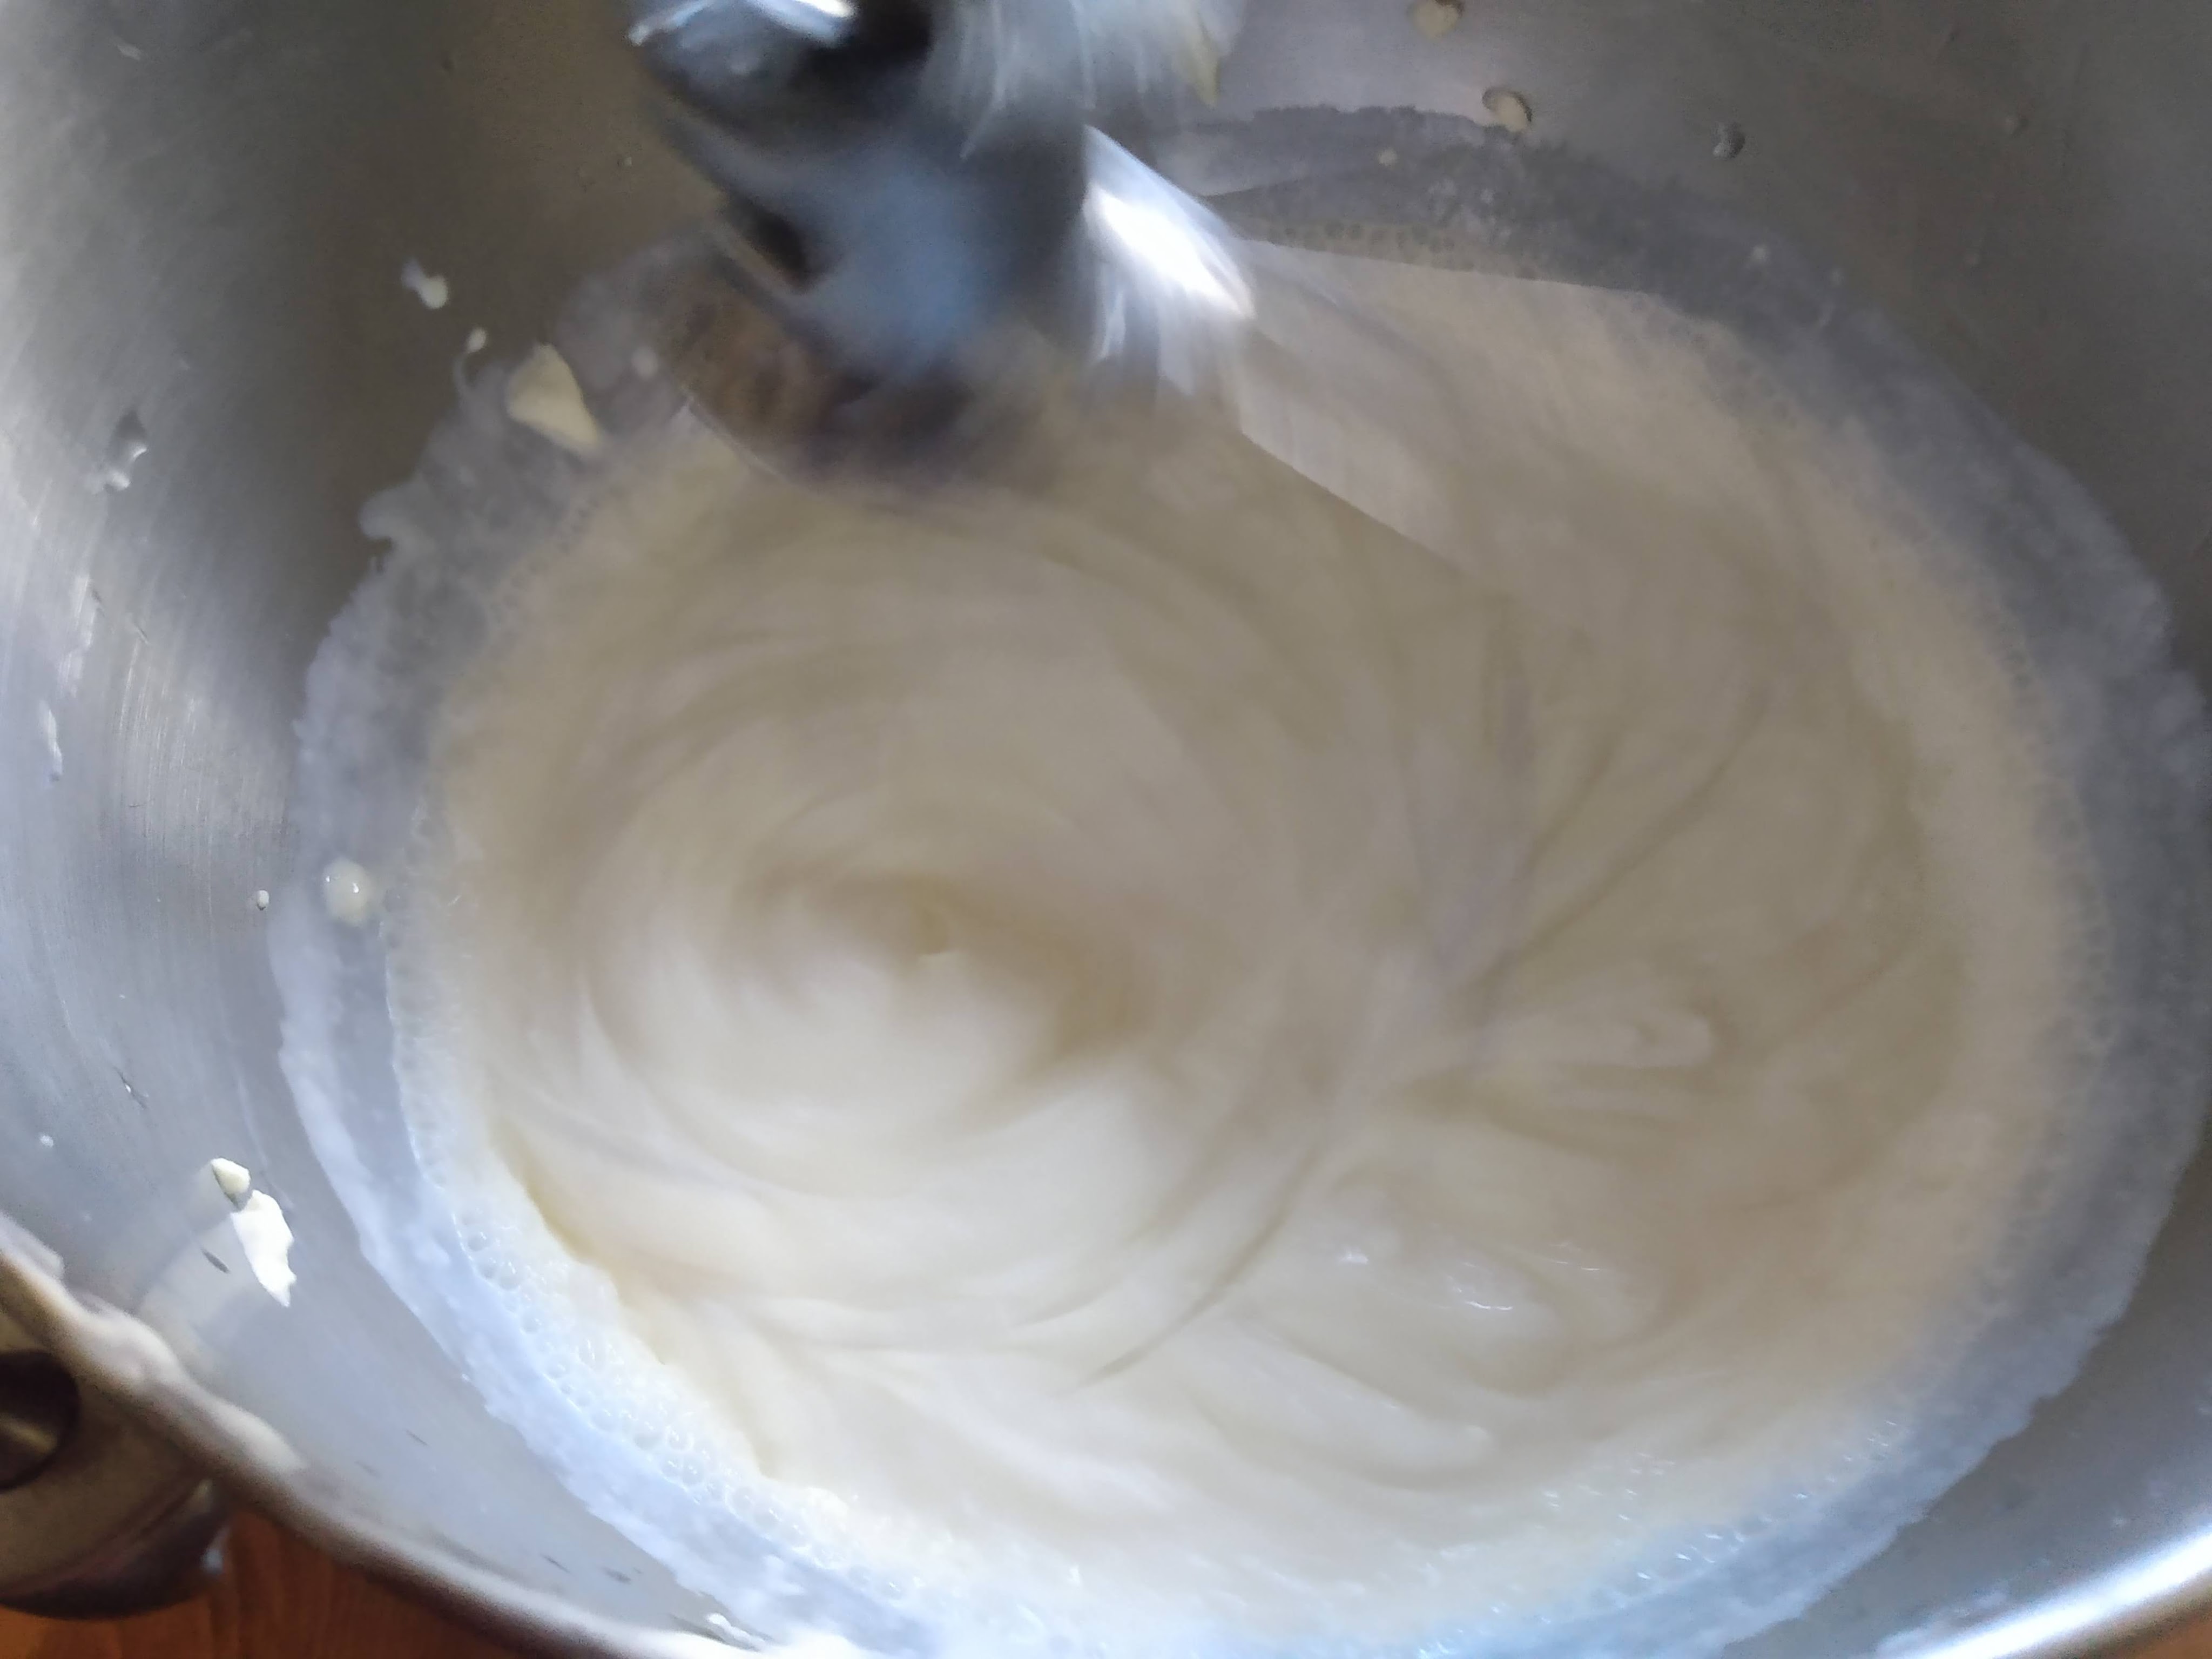
Then it’s time to churn. 

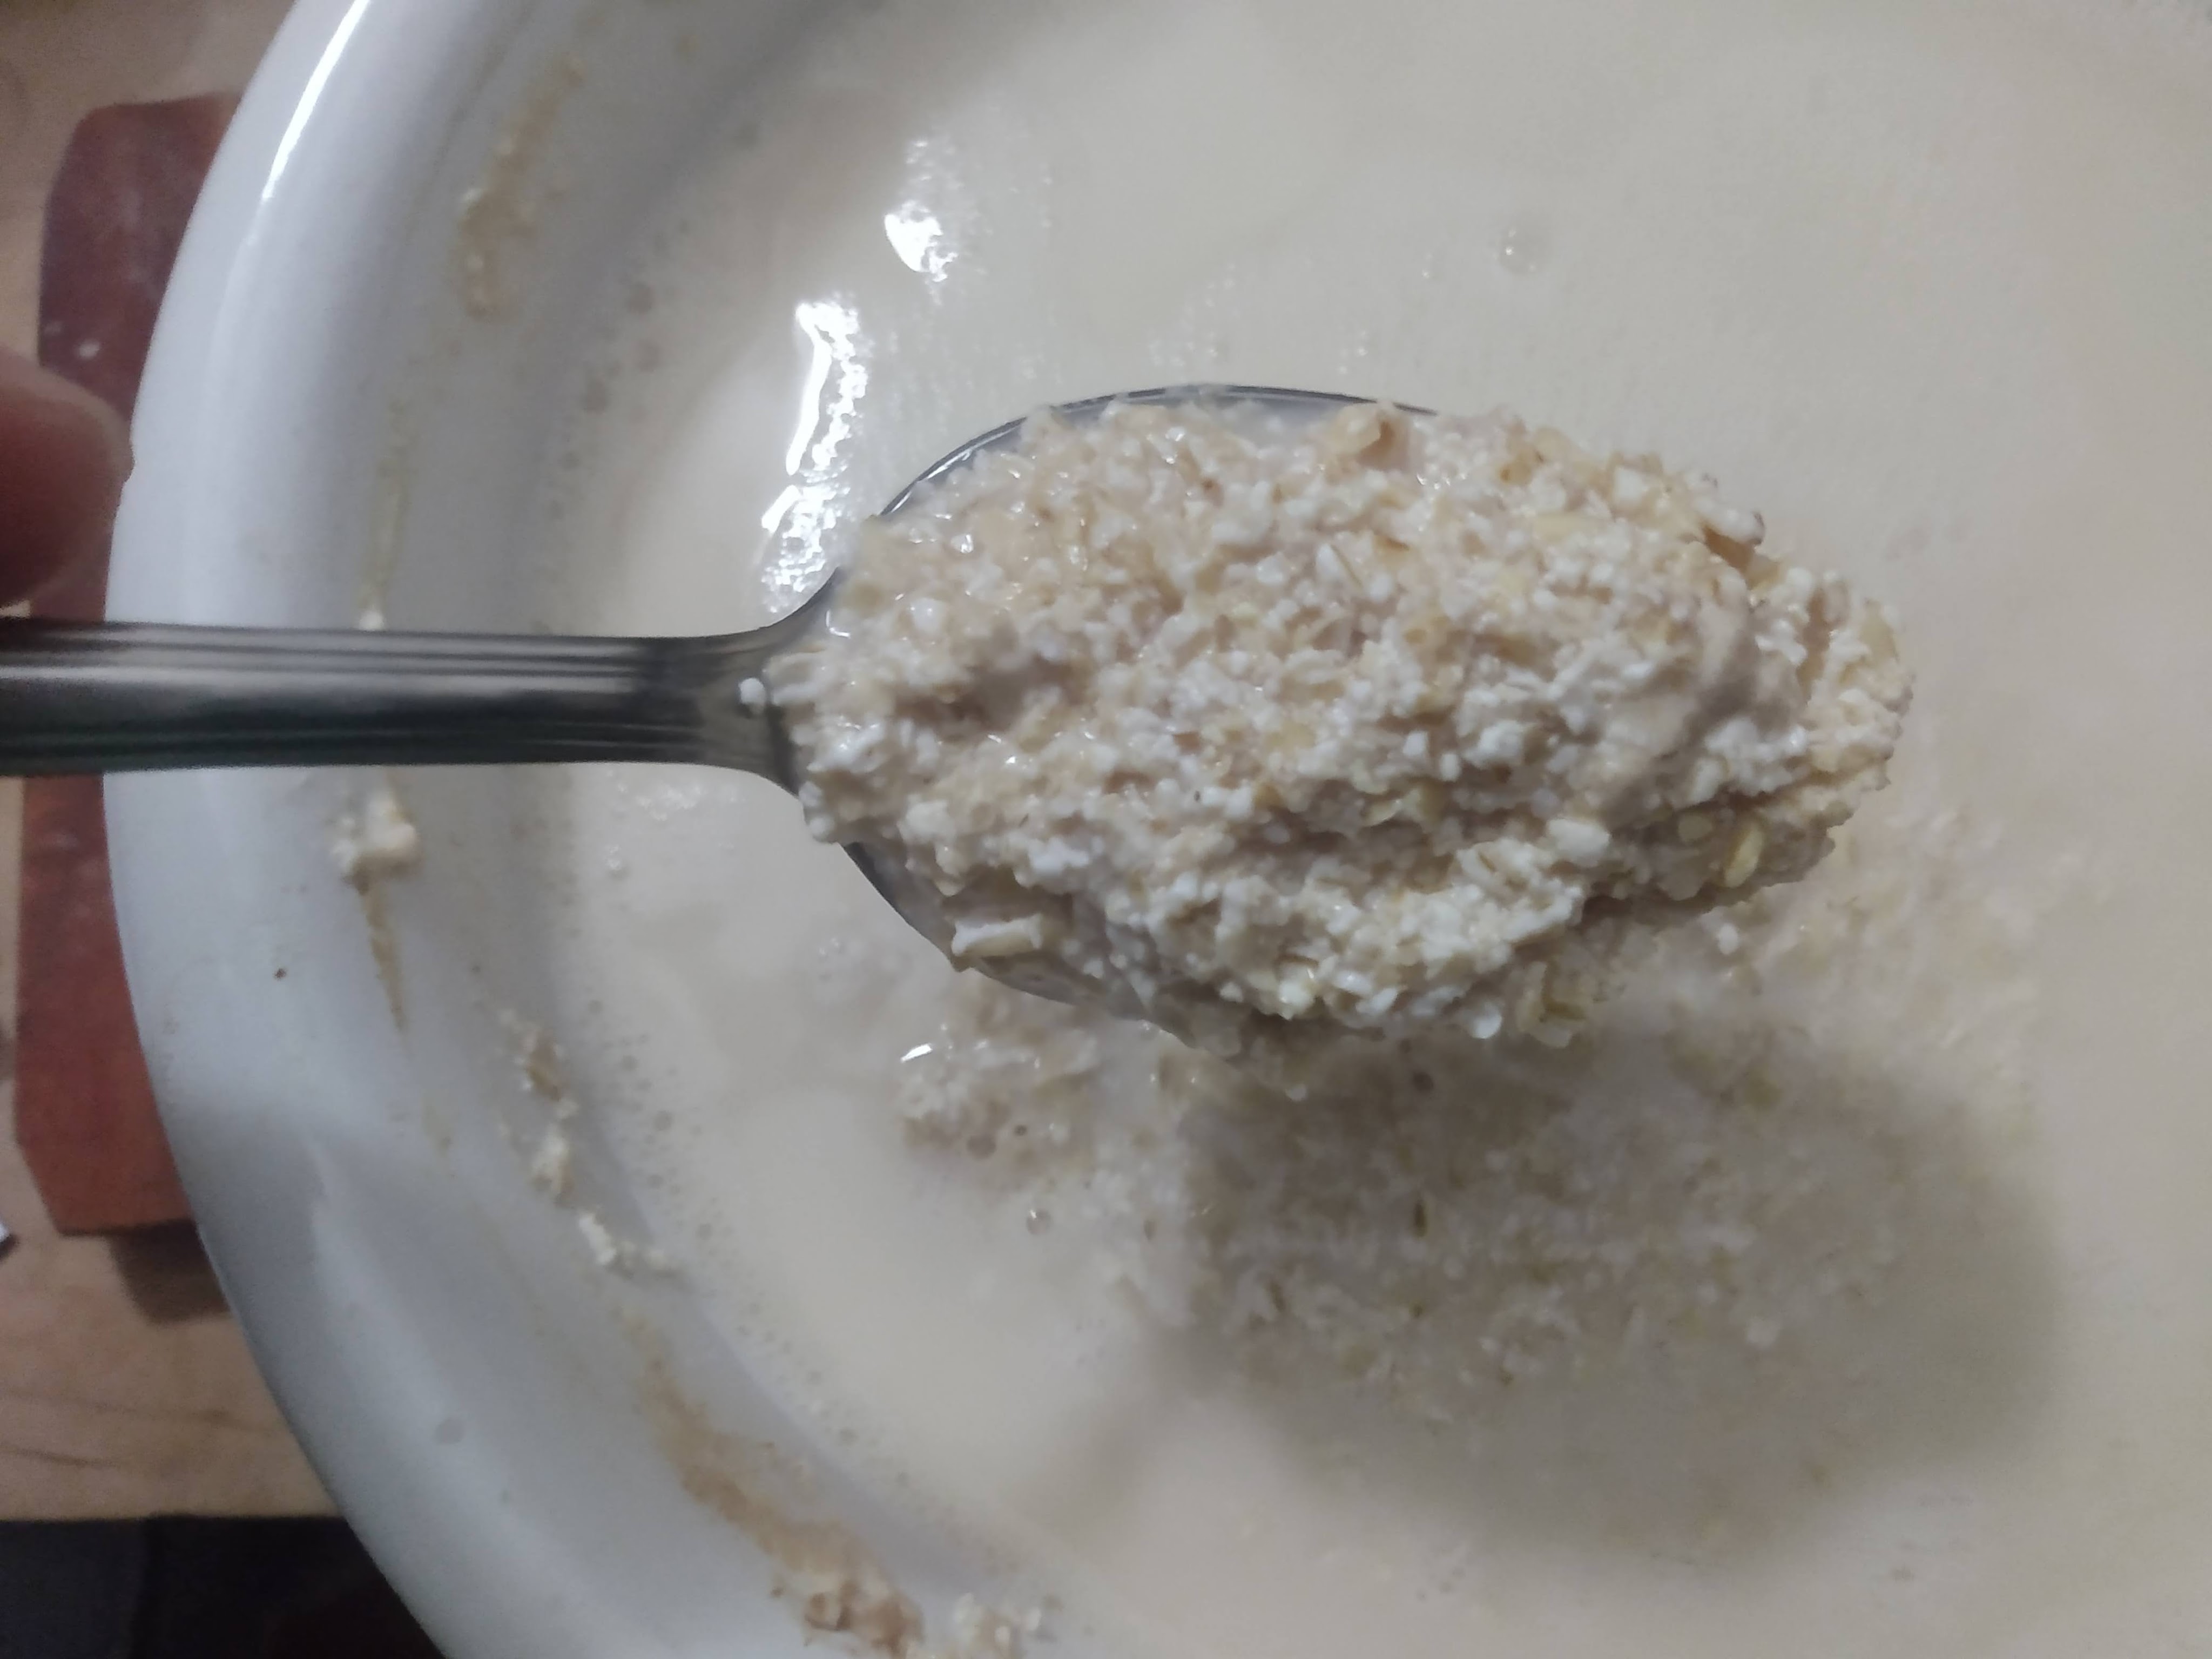
With the suddenness of a lightning bolt rushing fully charged through the sky, churning tares the old body to bits until a murky new shape slides out with better preservability. After enough agitating violence, whether in a butterchurn, shaking in a lidded jar, or mangled mechanically with a food processor or mixer, cream is taken beyond that glorious beauty of fluffy ethereal whippedness who will cling on to the very end until it can no longer and is finally broken. Given up, two separate parts spill out the other side, one blossomed into a new form solid and curiously floating in its old self, while the threshed buttermilk is spent and still.

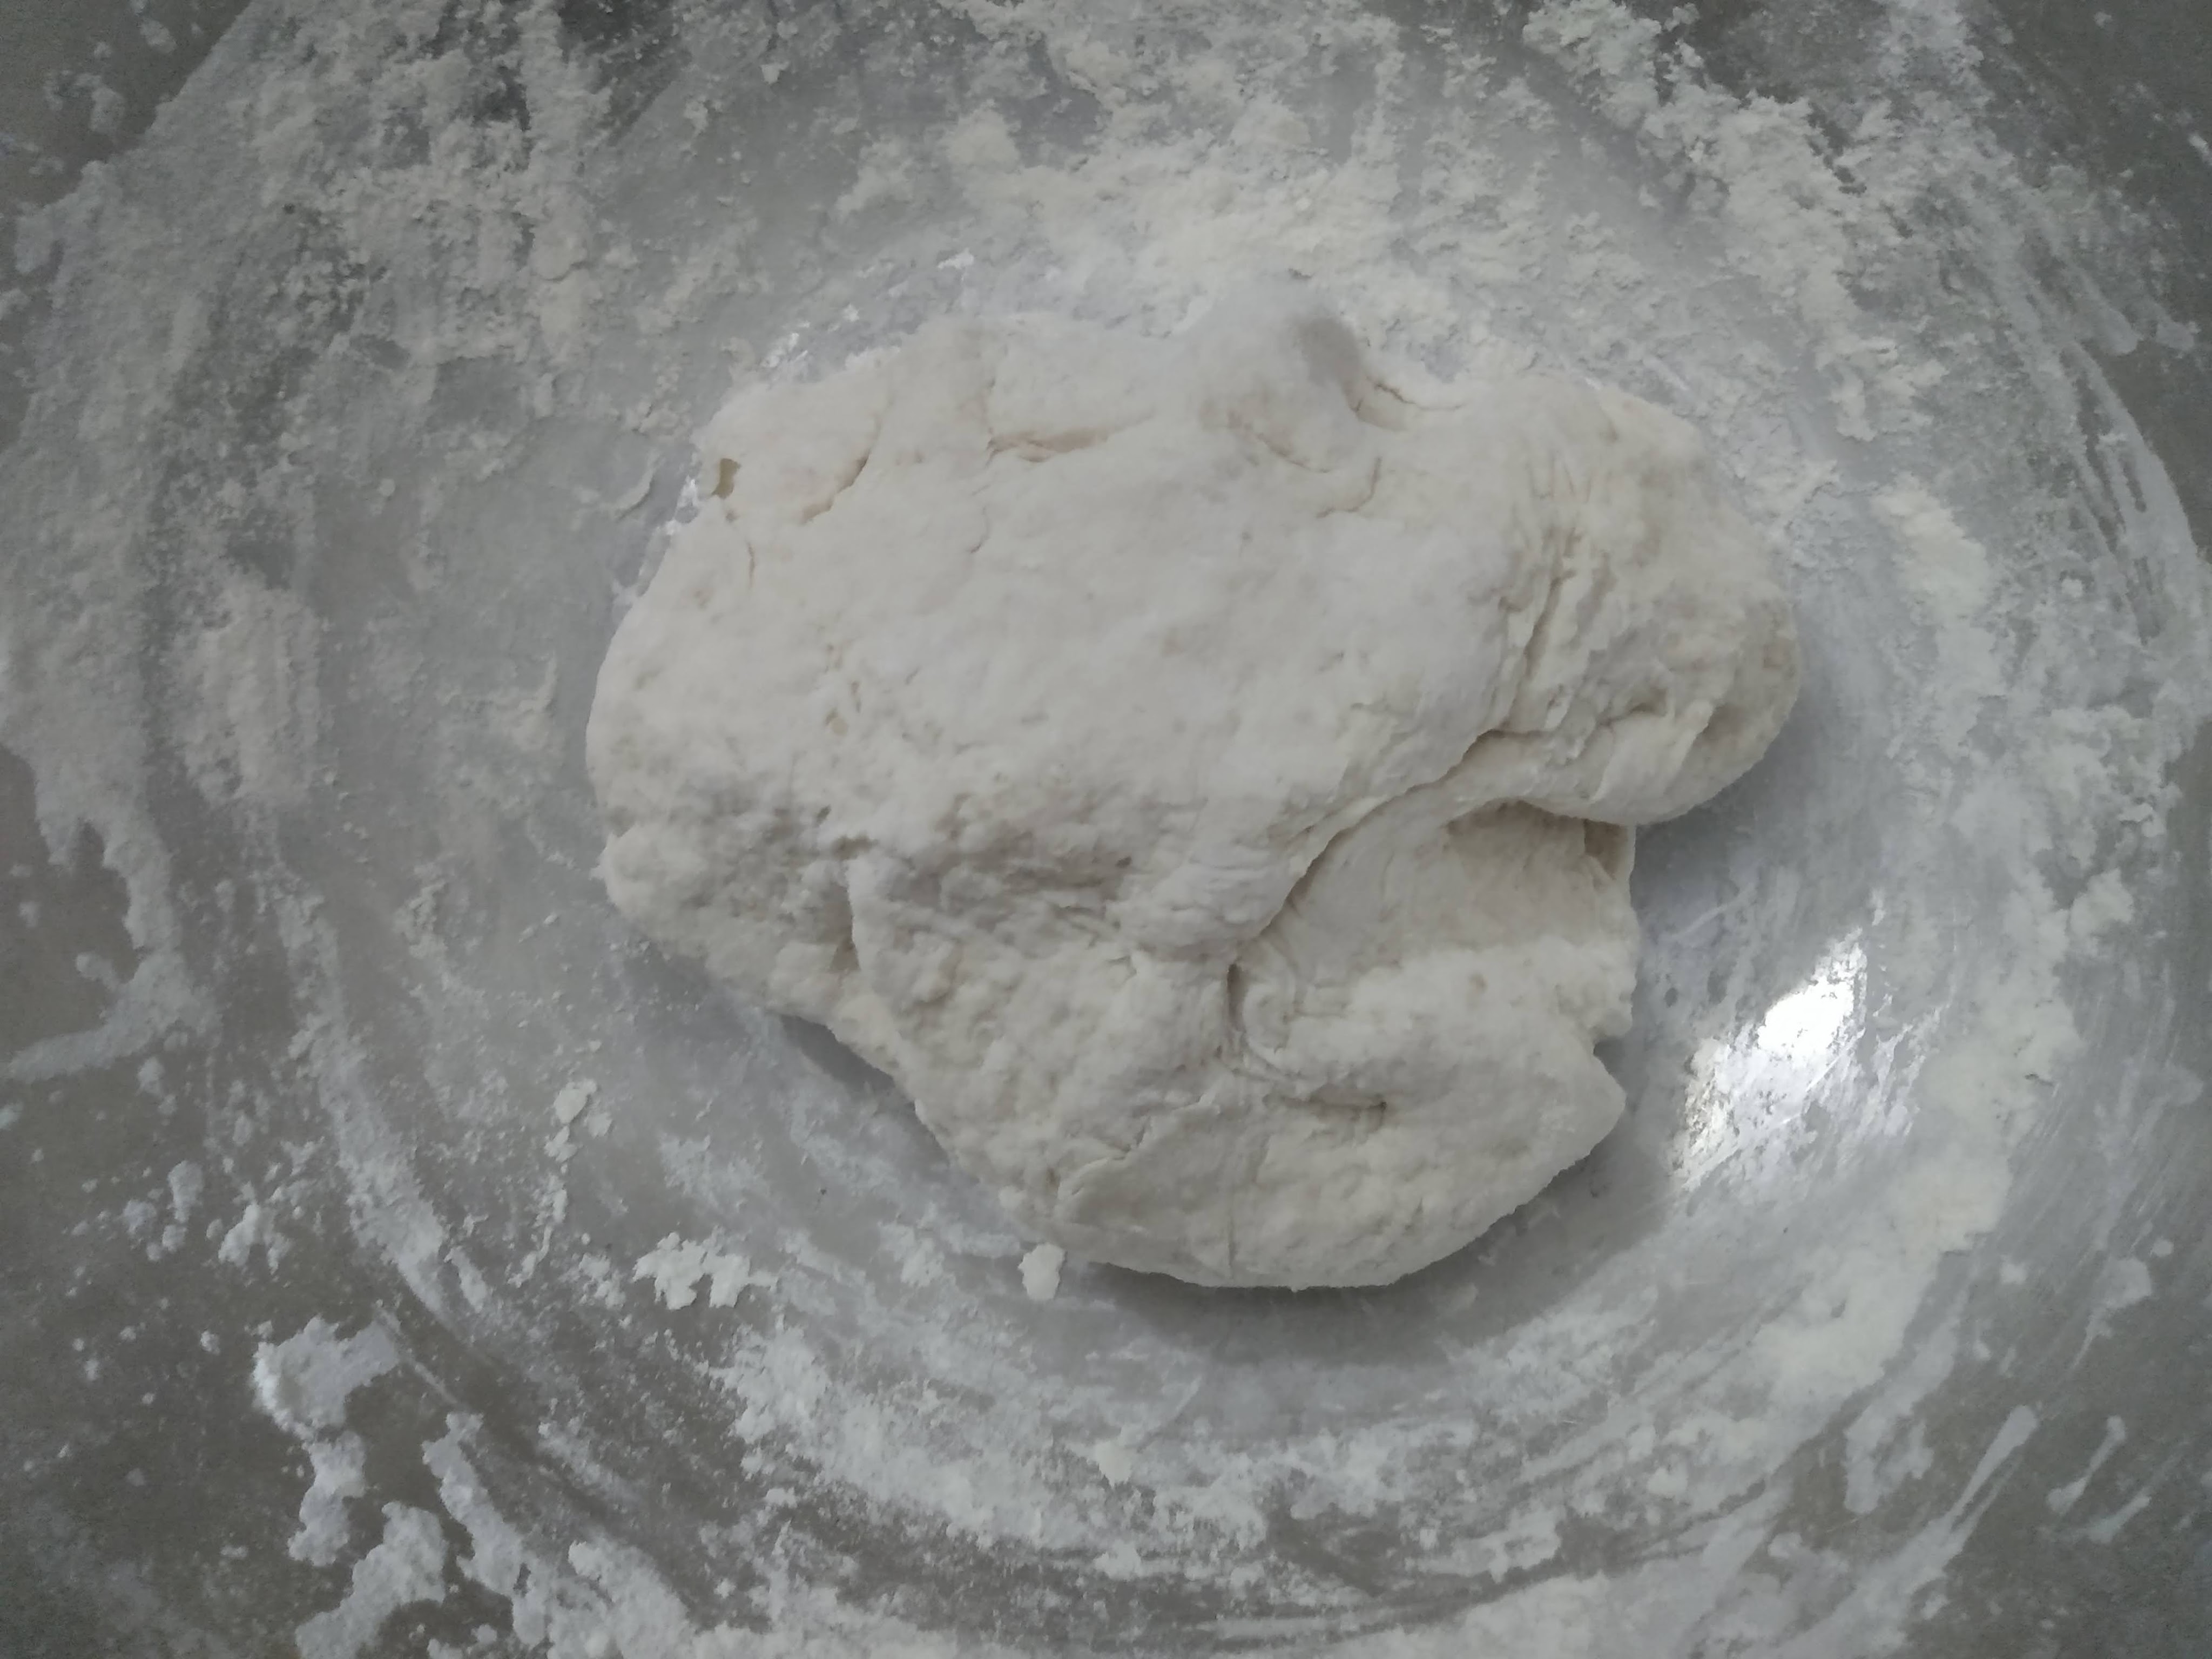
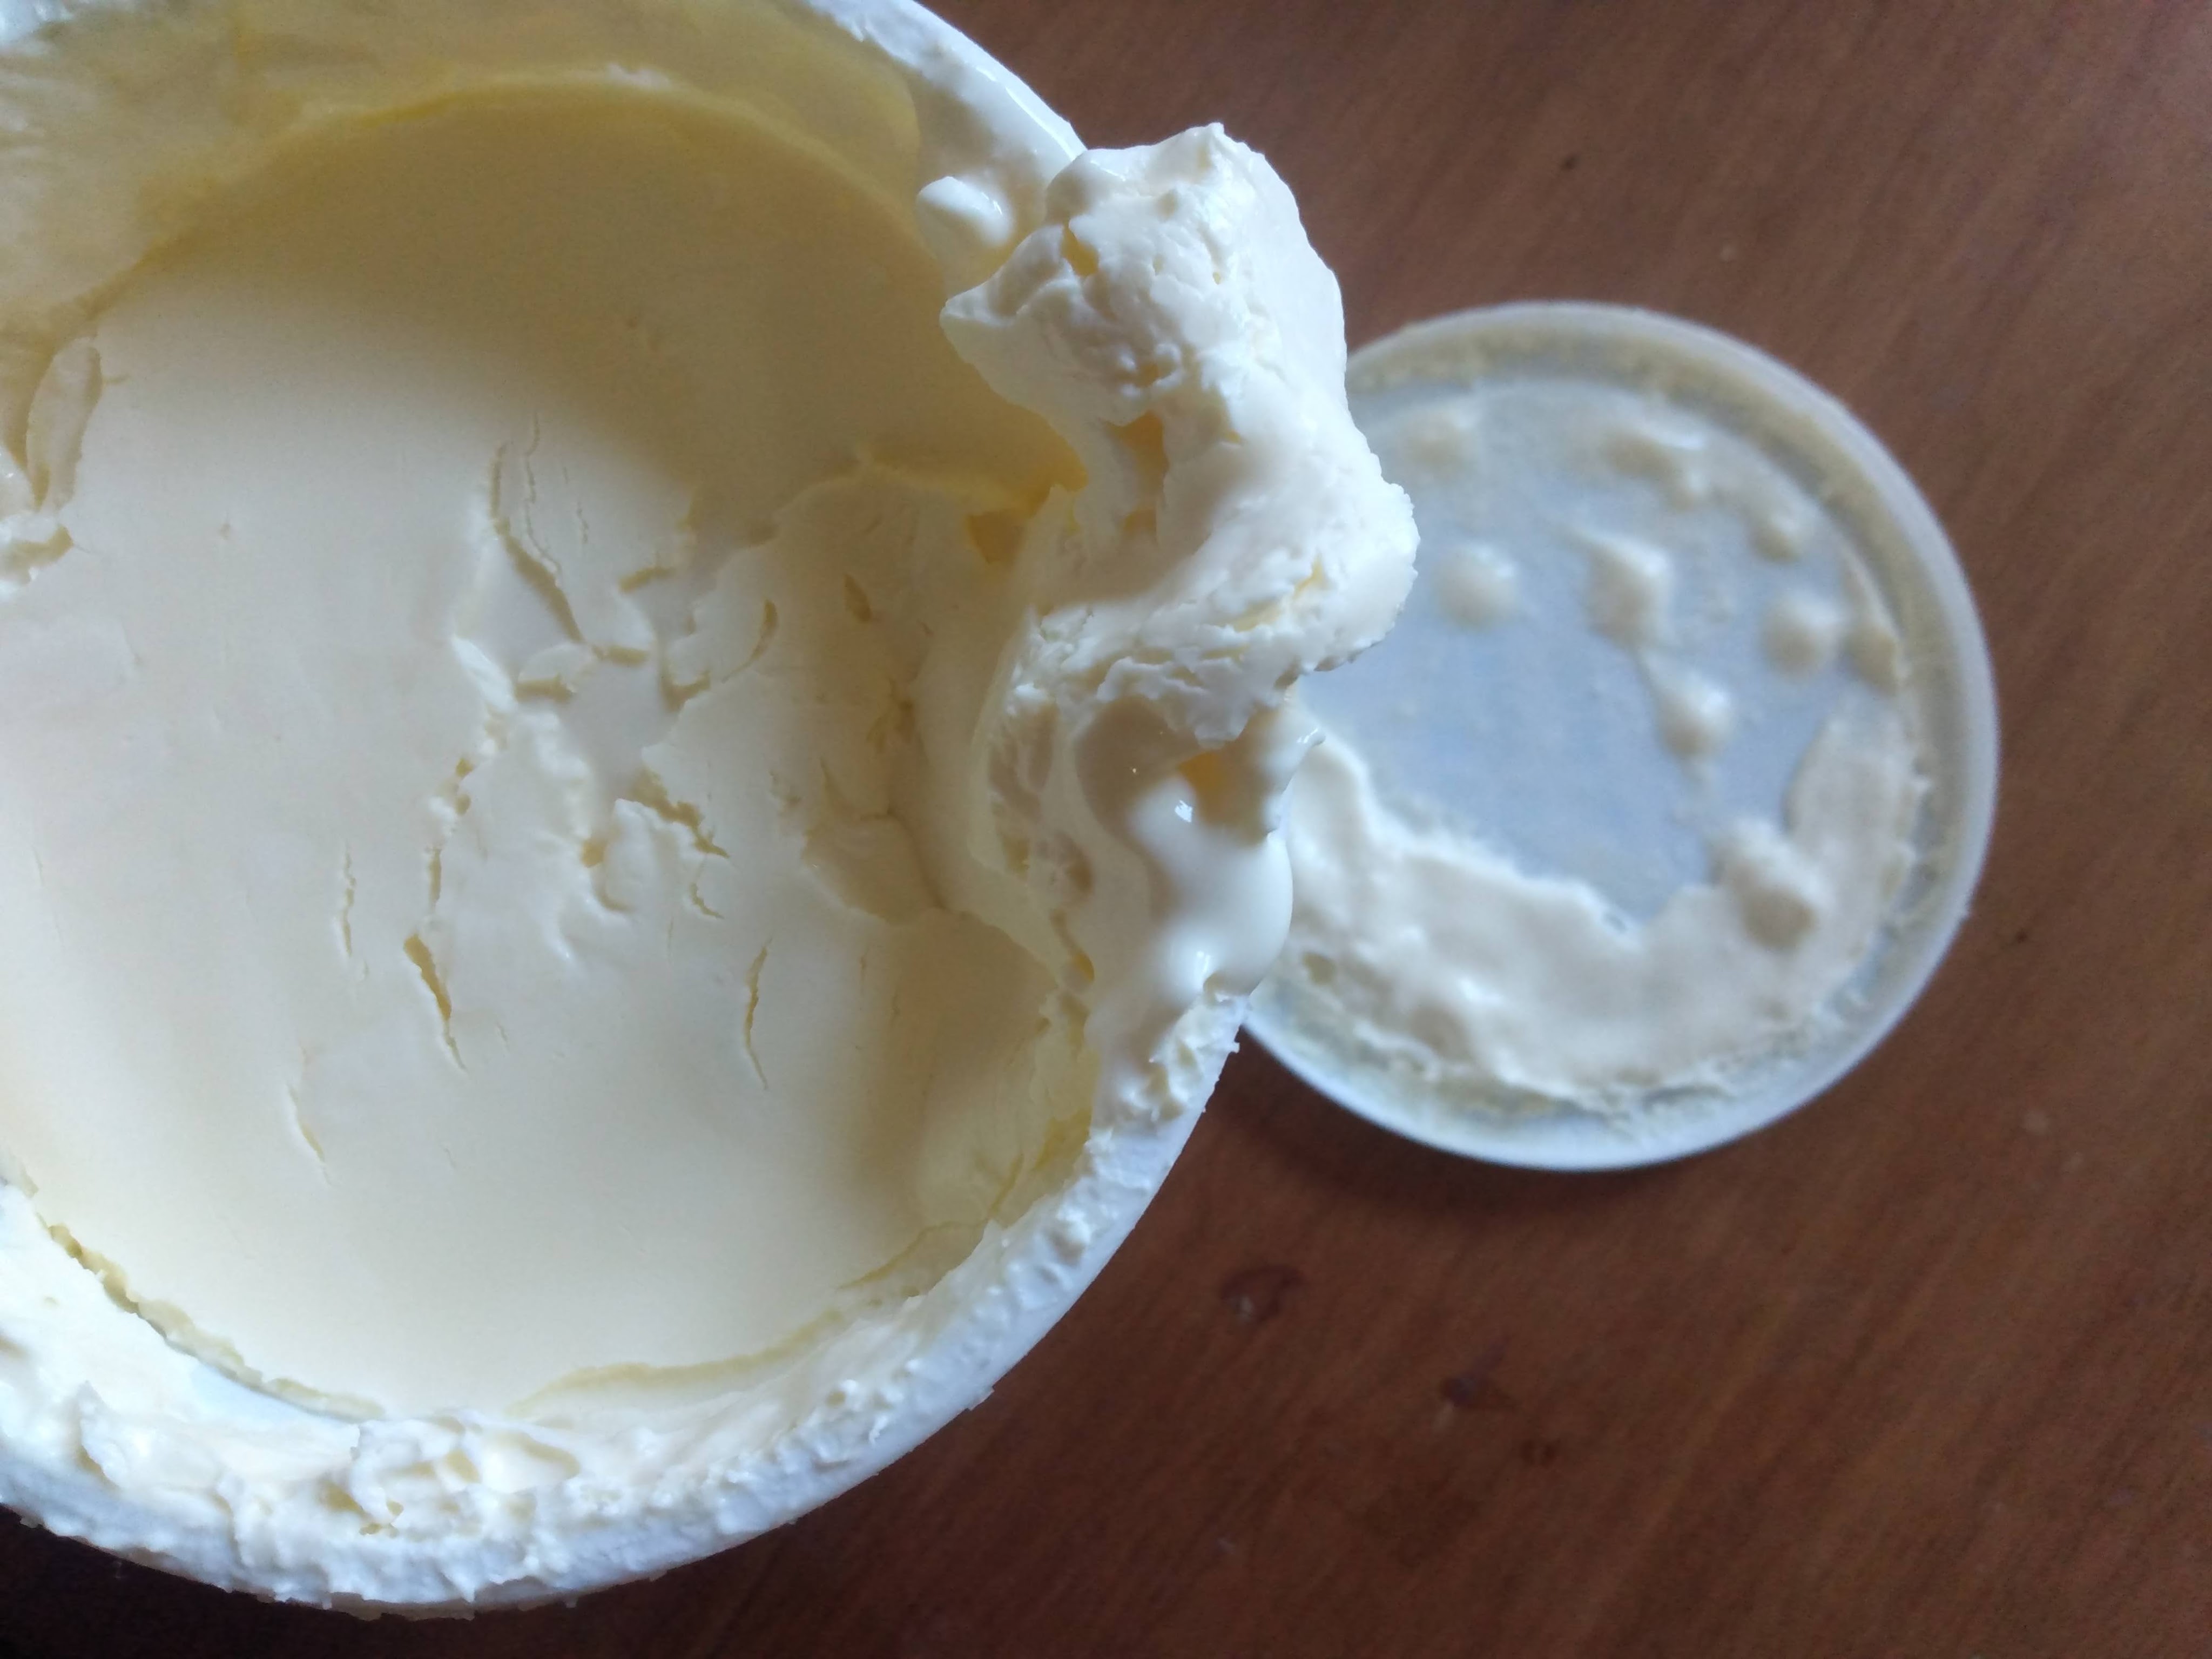
Then strained from its old excess the butterfat globs are mashed into a single mass and dunked into an icey baptismal bath to be fully purged of all of the residue of the life it once knew. It’s massaged in changes of cold water until it runs clear and fresh, standing on the ruins of the past a soft butter has emerged.

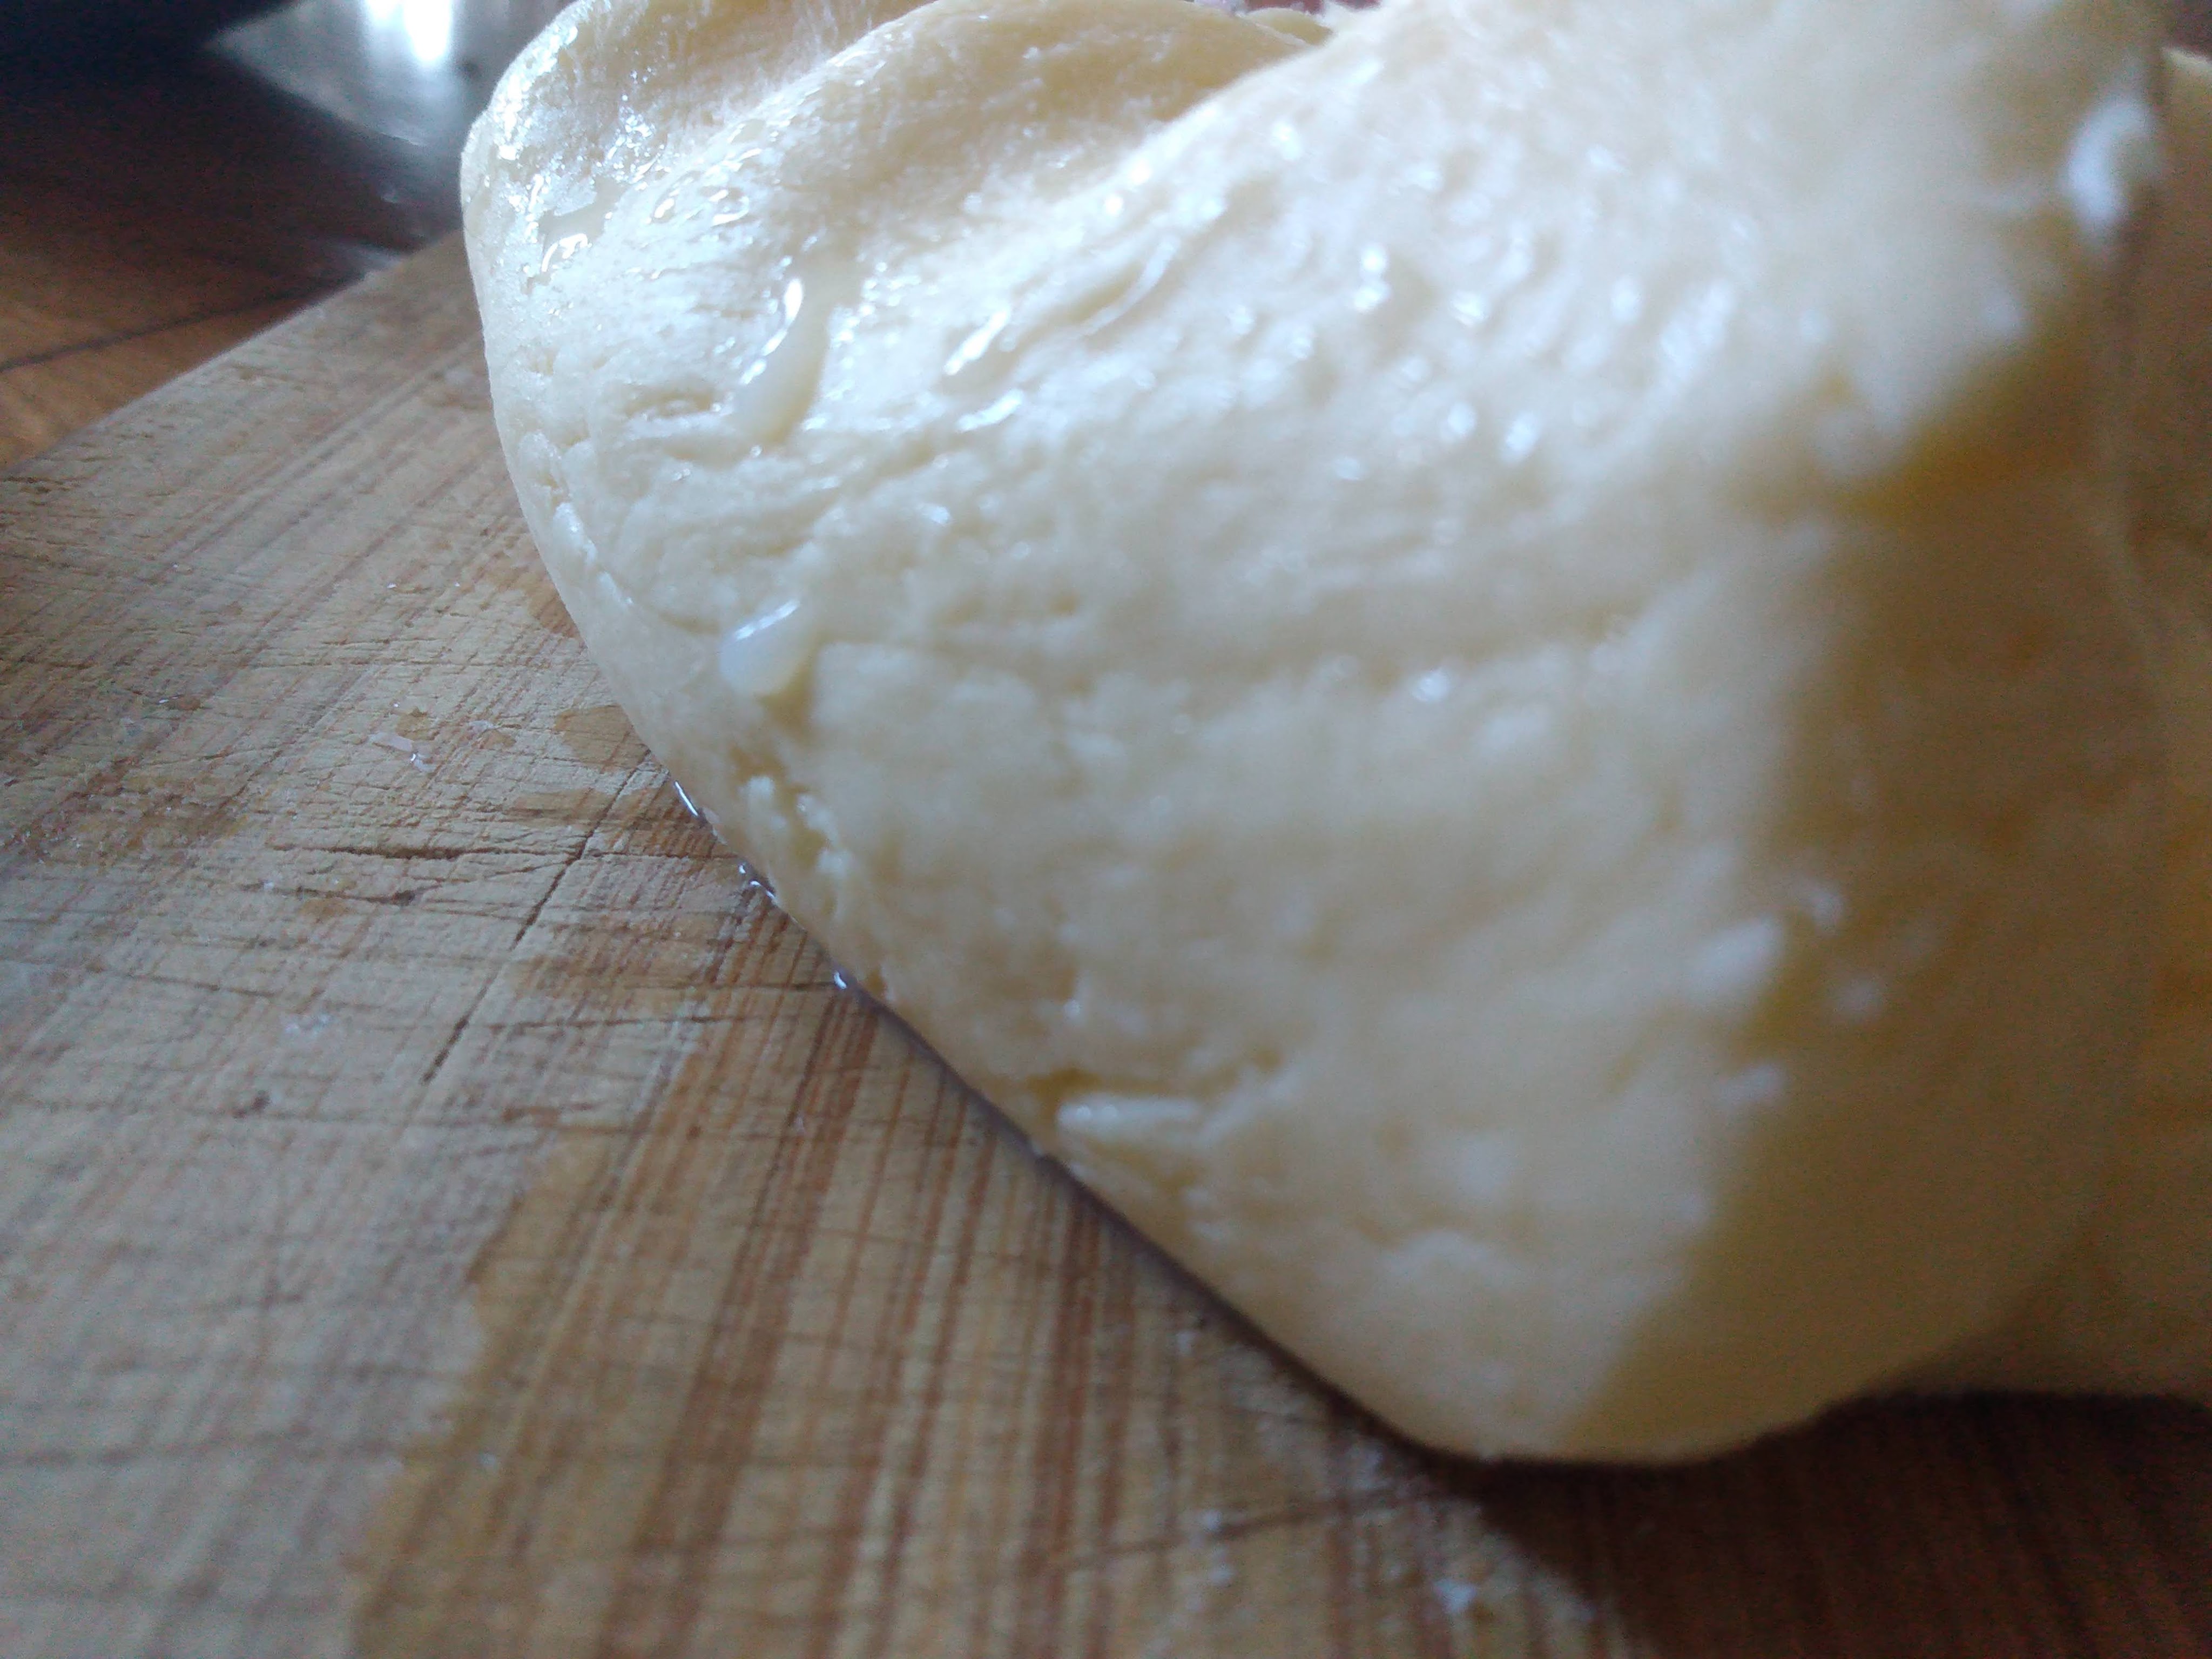
In a final act of cleansing the butter is kneaded on a board, perhaps with a sprinkle of salt, as the last tears of buttermilk are drawn off and its new form is complete, ready to look forward with renewed and matured grace to flavor the moments to come.

The beautiful truth that butter is, aged, rotted, and dismembered to be shed of its excess is only fully realized when that solid seeming glob then does what it is made it to, just like any heart that has ever been shook, broken, and separated to ultimately gather itself into a new form, it is remade to be melted once again. Butter, reborn love spilling back into delicious vulnerability.

***

The leftover buttermilk is alive and cultured and can be used to backslop into future buttermaking like an heirloom sourdough starter, or like the wisdom of the past culminating to push the future into existence.

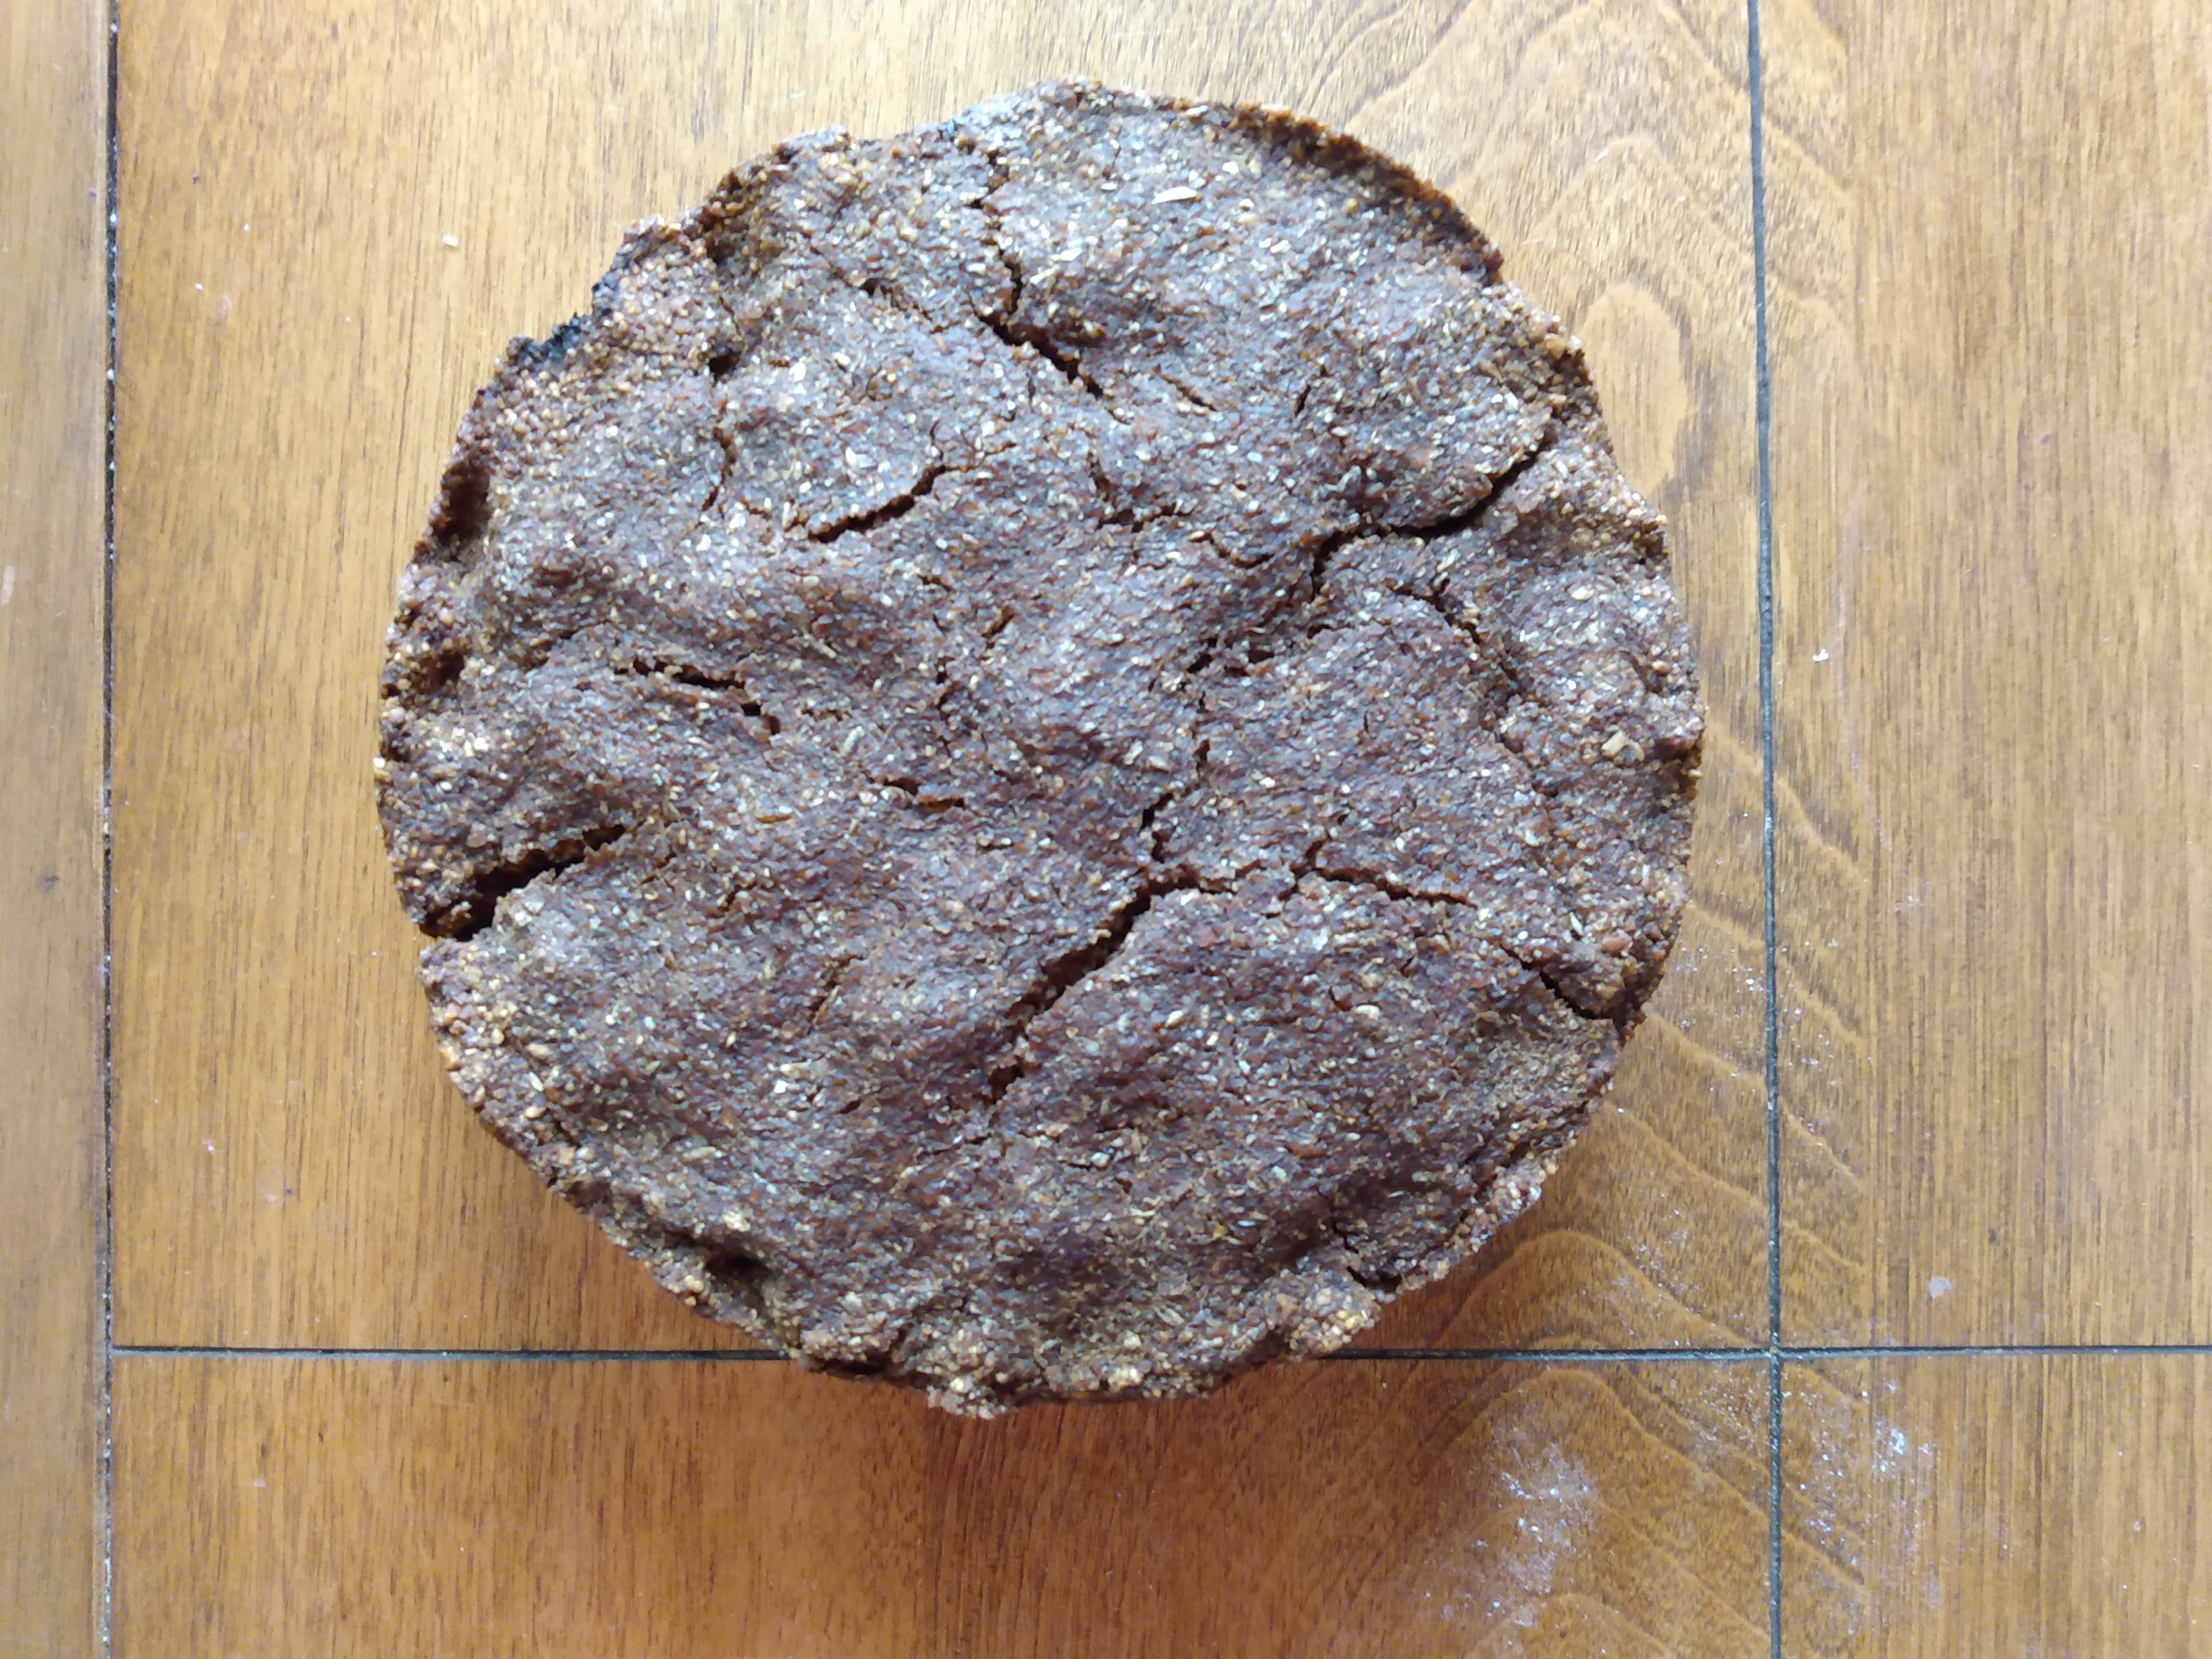
If starting the butter process with milk, which will need a hefty amount to yield much butter in the end, skim milk can be carried on to make cheese, such as this process for a naturally fermented ricotta cheese.

Growing & Making Fermented Indigo Dye

fermentation, wildcrafting

My hunch without knowing the real story is that the plant indigo’s blue dying capabilities were discovered by noticing its damaged leaves. Insects chewed bits and pieces of the plants grown at the farm this past year and the color change was distinct, like a little window into the color capabilities it had.

Indigo is so cool, I’m learning as we get to know each other. Her processes rely more on observation and play than perfectly calculated math recipes. Our first attempt made a rain cloud gray color, though through nudging some variables around we eventually got those storms to pass and opened up some delicious turquois blue skies. Indigo also requires two fermentation processes- the first is complete when the indigo says it is, and the second is concocted and tended to with the care of a sourdough starter. A fermenter will be at home with indigo.

Japanese Indigo is in the buckwheat family and looked very much like smartweed, only bigger. It was easy to start from seed but seemed to need a long growing season. This year it’ll get started indoors in March instead of April like last year. Some say you can get two harvests of it in a season, not sure I saw the opportunity for that as mine didn’t size up well until maybe September, and then when it flowered saving seed became a race against the first frost. The plant grew well in our unirrigated fields and needed no special attention aside from the usual.

After cutting down the indigo (which I heard varying accounts of when to, like before they flower or right before they seed- which I went with the latter) the whole plant was stuffed in a 44 gallon NSF Certified Brute garbage can that has retired from fermenting wine, and topped with enough water to cover and weighed down with a rock plopped on top, nothing else added. A handful of plants were partoned in the field to finish their cycle of producing seeds for the follow year’s indigo.

The fermentation took place indoors at relatively 70 degrees since the outdoor fall temps we’re dropping to the 40’s at night. Without much delay fermentation started bubbling along and gradually the liquid got an increasingly inky appearance and smelled just about right. It was decided that the fermentation was complete when looking at the leaves they appeared noticeably spent of their color- that’s the best way to describe it. This was easy to see when comparing the leaves that looked drained compared to some leaves trapped on the inside of the indigo pile who still retained a full liveliness. It’s probably noticable between the accompanying photographs.

After yanking the plant parts out of the Brute and tossing them onto the compost pile, I began to aerate the liquid by taking a bowl and repeatedly filling and dumping the greenish water. The idea here is that in the presence of oxygen the pigment precipitates down to the bottom. Sounds about right to me- after ten minutes of splashing followed by a few minutes allowing it to settle, the color was clearly in a pile collected at the bottom. The greenish liquid has become yellow.

At this point the top liquid was carefully scooped out until it could fit in a 5 gallon bucket. The precipitated pigment was stirred back into the liquid so the whole thing could pass through a seive to get out any remaining plant chunks. When the pigment settles back to the bottom it can be further scooped off and then dried into a paste or a powder or saved as is in a jar, or it can be carried on straight to the final phase in the dying process which so many affectionately call the vat.

I knew nothing of a vat prior to this experience and have been thrilled by its relation to many of the other starter cultures kept around the house. It reminds me most of a sourdough starter in that it is a living organism that needs refreshed prior to use, can go dormant, and preforms best when in its most fervently active. 

Here’s as far as I understand it: at this point the indigo pigment is a separate thing in the vat, like rocks in a bucket of water. Therefore the indigo needs to be dissolved so it can cling permanently to the fibers, and in order to do that it needs a couple things:

First is an addition of either lime or wood ash or lye to create an alkaline environment that falls somewhere between a pH of 9-10 and makes the bucket smell like you’re baking pretzels. Before this step my indigo would only turn any fabric gray. This is an intuitive guess but without a pH meter, like before pH meters were made, perhaps lime/ lye was added until the desired color was produced. Relating note, I had given up this dying attempt after only getting gray. Eventually this dyed sock (below) found its way into the laundry and made it through with full color intact. After discovering that, it reinvigorated the desire to figure out this indigo thing, now with a really nice pH meter. Using that same vat but with a corrected pH, you’ll see the lovely sky blue that came of it. Who knew?

Next is to create an environment absent of oxygen, because as previously mentioned, with oxygen present any dissolved indigo would precipitate to the bottom. Recognizing that when making wine for instance, a vigorously active fermentation is when it is most protected from oxygen, a vigorous fermentation should do the trick! So in went all the weird sugars in the cabinet- old brown rice syrup, some molding maple syrup, a dump of white sugar- cause heck, and a healthy splash of happy sourdough starter. Yum. 

Lastly is a good warm temperature. Perhaps in a natural setting this is best done quickly after harvest to cash in on the summer heat. I saw the best results with my dye the hotter I could get it, which was around 100 degrees. Going too hot would start killing the microbes so it’s worth being mindful of that. With a 5 gallon bucket it’s a challenge to keep it warm so I wrapped it in a borrowed seed heating mat and that seemed to do good enough.

After a couple days the vat was bubbling away wonderfully. I prepared a clean white cotton cloth by soaking it in water and ringing it out then dropped it in the vat, carefully trying to not distrub the liquid enough to introduce any unnecessary oxygen. After a few minutes I checked it and started getting a nice blue. What’s neat, as indigo dyers will tell you, is that indigo realizes its blue color on fabric as it is reintroduced with oxygen so upon immediately taking the fabric out of the vat you get to watch the fabric fade into blue. Neat. After a couple plunges with water rinses inbetween it seemed that the strength of the dye I have makes a lovely light, turquois blue. The vat then proceeded to dye a few other peice of clothing before getting retired with a lid on it to hibernate in a corner until the dying urge returns, and the pH is re-limed to standard, and the fermentation reawakened to dye again.

Flatbreads from Your Morning Porridge

baking, bread, fermentation, Homegrown Grains

This recipe is a continuation of a ditty about the early days of grains and the gradual “rise” of bread. The first step to this process is making some fermented porridge, which is described in aforementioned ditty. I love the variability of a process where the same porridge can be cooked for your breakfast, and any leftover can become bread for scooping up your lunch and dinner. The more active the ferment obviously the better, so if your porridge has been sitting for a long time, scoop the scum off the top and make some flatbreads!

In modern days like we’re in where just about every aspect of a food and its production are able to be controlled for really specific outcomes, this recipe is a refreshing throwback to times when intuition and experience were more valuable than control, and “perfection” was likely defined in a less homogenous way.

Process

There are no precise measurements that make sense to give. However much fermented porridge you have to use is what you have, and obviously the water to grain ratio will be all over the place. Yet, none of that business should be much of a hurdle here.

Pour your porridge into a bowl. Add a sprinkle of salt. If you are doing this on a scale something like 16 grams of salt per 500 grams of final dough is good. If your breads are undersalted you can always sprinkle some finishing salt over them straight out of the oven. Always be careful to not over salt!

Start adding in flour that has good gluten building qualities. Store bought “Bread” flour is the ticket. Add gradually, mixing it into the porridge slurry until a dough gets formed. You’d want enough flour so it’s not a sticky dough but not so much that it’s super firm either. Intuition and experience right? Getting things right the first time is boring, you learn nothing. A recipe worth making is one that you earn a relationship with, right?

Give the dough a few kneads and let it rest. The goal is to have everything mixed and incorporated but being mindful to not overmix. Giving it a covered over night or long day rest is great. The dough can be stored in a container the fridge and used here and there if not needed right away.

When it’s time to make the bread, on a lightly floured surface cut the dough into whatever size your after, perhaps the size of a doubled golf ball? And then roll them into a ball. Let the balls rest for 20 or so min and in the meantime warm up a skillet on the stovetop to medium high.

After a little rest period, using as much flour as needed, roll out the balls into flat disks. You can press them first with your fingers, and toss them like a pizza or come in with your rolling pin. Play around with the thickness and size (which will also be factors in how hot your skillet should be) until you found what you like.

Cook the flatbread, flipping as needed until both sides are lightly browned and the bread is cooked all the way through. Breads can be dressed up with a drizzle of oil and a sprinkle of seasonings if that’s your bag. Then fill em up with delights!

Fermented Porrdige & Kvass

fermentation, Homegrown Grains

Sometimes the grandeur of bread makes the grains feel unrecognizable from the labored summer months caring for it, processing it, and cleaning it. Porridge makes me feel closest to my grains. Tortilla retains an intimate connection too. I remember reading a long time ago somewhere that a bread baker was the first specialized profession. It’s easy to understand for anyone who’s tried to consistently integrate the time intensive task into their daily life. Before bread “technology” became widely accessible, porridge was the primary way people consumed their staple grains.

It’s believable to say that porridge is the rough stone that was smoothened into bread by the running waters of time, fermented porridge actually! Before porridge maybe there were handgathered kernels chewed between your teeth. Actually doing this yourself is a jolting time warp worth doing to reset your racing clock. It’s become an annual moment after harvest for us to hand thresh a small bowlful of kernels and eat them as is, just to remember. Next I’d imagine was progressing to crushing kernels between stones, earth’s teeth, and maybe add some earth tears like water, and there you’d have a porridge. Uncooked it would be a chewy mush. With enough time it would ferment and soften more, maybe making it easier to eat and introducing humans to their first versions of a sourdough starter. With a little added flour, cook a fermented porridge into a flatbread and there’s a leavened bread. Add a little more ground grain for an even firmer dough and with more time and a cook, you got yourself a loaf.

Fermented porridge can be made from any grain: wheat, rye, corn, oats, rice, and so-on. It can be cracked, ground, whole, or even just sifted bran. A hand cranked meat grinder works great for cracked grain and often pop up in the tool sections of thrift stores for a couple bucks. It’s possible to crack them too by laying the grains on a hard flat surface, draping a towel over them, and pressing hard on them with bottom of a jar, a rolling pin, or maybe a rock.

The prep work is easy, just covering your prepared grain with a generous amount of water or milk or nut/ seed “milk” to keep it submerged for a prolonged soak- a couple hours or a couple days or weeks at room temp depending how funky you’re feeling. The fermentation will help breakdown grain characteristics that inhibit digestion. In the morning, heat it in a pot until boiling, then lowering it to a short simmer, keep an eye on it all the while in case some extra liquid needs added along the way. The final consistency is up to you. Depending on where you’re trying to take your day, add a splash or nob of fat (buddder/ oil/ maybe bacon), pinch o salt, and any seasonings and delights (like those summer time berries you dehydrated or a potato) before cooking. For a quicker fermentation turn around you can backslop today’s porridge into a new one just like splashing in a starter. What an easy vehicle for any adventure.

Remember the rye bread recipe for traditional style pumpernickel from a few months ago? This one? The recipe used “scalding” which was heating a porridge situation until it was at least 160 degrees at which point the flour released its starches and gelatinized. In pumpernickel, this is what gave the gluten-lacking rye bread some bonding to help it hold its shape. This is the same process that occurs when cooking the porridge, transforming it into a lovely cohesive mush rather than water and grain that sit separately in a bowl like oil and water. It’s also the same process used for making injera which is a mixing of “fermented porridge” and scalded porridge to help the thin batter hold together.


Kvass

The same grains- whether cracked, ground, whole, or bran, but this time also adding old baked bread to the list, when covered with water and left to ferment is the beverage associated with Eastern European origin called kvass. There are a million variations to this beverage (including versions without grain), with many adding some kind of additional sugar whether it be cane, fruit, berries, vegetables, juice, honey, sorghum, or maple in order to get a spritely effervescent and maybe alcoholic beverage. Where’s the line between fermented porridge and kvass? Doesn’t seem like there is much of one, just don’t boil your kvass or you’ll lose the fire in that firewater. What’s the difference between beer and kvass? Beer gets most of its sugar out of its grains by sprouting them first (aka malting) and steeping them at a specific temperature (mashing), kvass is a little lazier and ferments things as they are with no special processes (although malt still may be used). It almost feels like kvass is a brew made of collected leftovers.

Winter is a good time to perch a brew of kvass on your radiators as if it were your hearth. To make it add cracked grains, old bread, and as much sweetener of choice as suits you. Dress it up with any other flavors and seasonings that inspire you. Don’t forget a little splash of sourdough starter to help get everything rolling (not required). Let the wild yeast ferment it at room temperature till it’s actively bubbling. Remember it’s winter so be patient. Then strain out the contents and enjoy.

(I suppose you can also not strain out the contents and warm it up into a nice porridge! Boom.)

Saving your own Koji Spores

fermentation, mold

One time a million years ago was the only time we ever purchased koji spores. As with our gardens and farms where the priority of seed saving carries us from one season to the next, hopefully adapting to the unique character of our land and weather, so it also made sense to foster that seed saving mentality to our spores and cultures.

Saving koji spores is as easy as growing koji because, well, they are the same thing. If you’re a grower of koji already then you can perhaps find the permission to follow through with your spore saving here.

To save koji spores we are simply looking for mature koji. I usually shoot for mature rather than over-mature as I feel better about a cleaner population. Many times I won’t even attempt to over-shoot my koji incubation, instead proceed with the process as usual, and put some aside for “seed” and it always ends up working fine. When growing your koji hopefully you can notice a bit of powder on the surface as that’s sign enough that’s ready. The bits I save from a batch are usually the best looking parts, with no discoloration or peculiarities. Those pieces are allowed to air-dry fully then they are bagged and stored in the freezer until the next time I make a batch of koji. To use them I’ll hand grind just before sprinkling on my newly cooked grain. And like any other culture, a little is saved again to keep it all going.

Making a Miso Tradition

fermentation, Homegrown Grains, mold

The winter solstice has for myself become the day for annual miso-making traditions. It’s after most of the hardy holdout plants are finally delt a frosty blow, and grains and beans from the year are (hopefully) dried and threshed and stored away. Miso was introduced to me with an aura of magic- one of the first ferments I interacted with and so carries the same wild mystic held by the woods on a full moon’ed night as when I met it then. It’s retained its magic over the years, and that seems like a feeling worth fostering in anyway possible.

Sticking to annual miso-making means there are countless jars who present like vintages of wine marking out the years. The differences between the young and old ones are tremendous. It’s something that if you make, I highly recommend then hiding it from yourself for a couple of years. Just the other day I unearthed a crock that has been living on my porch for two years. It’s made of our homegrown marfax beans and danko rye. The location was an accident, probably nowhere anyone would recommend. I never really covered it or protected it from weather. The ceramic weights were covered thickly in fly pupal cases. After pulling them out and scraping off the top layer it was gorgeous miso with a fruity alcoholic smell the rest of the way down. It was scooped into a series of peanut butter jars to continue aging in the basement somewhere I already can’t recall.

Here’s how we’ve made miso, generally this same way every time, and may you find a way that works for you and becomes your own:

Preparing the Koji

First you’ll need some koji spores. Most people love GEM Cultures. If you’re really impressive you can go outside and find some growing out there somewhere. Either way add your cultures to a cooked starchy grain, mix, and incubate in mid-80 degree temps until your mold spores have colonized the grain. Since we mostly make our misos from homegrown grains like wheat or rye, it takes some extra cooking soften the grain enough to receive the mold. In other cases like with rice, a kernel that is just-cooked through and holds its shape is best. When your grain is cooked spread it out to let dry some and cool to about a mid-80’s temp and inoculate right away by spreading and mixing your spores in. The finished koji grain can be dried and saved or used immediately.

Preparing the beans

Unlike when making tempeh– who does better with beans cooked juuuust right (not over cooked), miso has no such need. Cook your beans fully after a nice overnight soak by boiling them, but in this cook no salt is needed.

Strain and let the beans cool. Often times I’ll let them sit out until the next day because life is busy.

Mixing

Next it’s time to combine the beans and koji’d grain. The many styles of miso can vary according to the ratio of each, as well as the salt levels but my usual aim is eyeballing a 60% bean and 40% koji ratio when preparing the ingredients. Whatever I come out with in the end is what I mix together in the biggest bowl I have. Something like a potato masher can be used but I feel like this is a job for your hands to make the beginnings of your paste. The beans will mush but obviously the grain won’t yet. You can still get the general idea of the consistency already though. Add a little water here and there to get a consistency close to paste with the understanding that things will be breaking down more over time.

Then mix in salt. I hold true here to the salt to taste perspective. Salt, mix, taste, salt, mix, taste. You want something salty but pleasantly so. Not overwhelming, but not under salted.

Packing & Aging

Pack the miso in a jar or container pushing down to minimize air pockets. Leave ample head space for the big initial fermentation event on the horizon (the photo below shows too little headspace and the consequential overflowing). Many folks like to put a fresh sprinkling layer of salt over the final miso surface. It’s possible to pop a screw lid on top but the miso will commence fermentation and need some gas release. I like a loose-fitting lid but a cloth with rubber band or similar is good too. When the vigorous fermentation eventually ceases it’s a good idea to throw on some kind of lid. Depending on your conditions the miso could dry out. I’ll let the fermentation boil to a dripple in a bigger vessel, then transfer the miso to mason/ peanut butter jars and lid them to be taken to the basement for long term storage. I like breaking them down into many smaller jars so when one is being actively scooped from, the oxygen exposure is limited to just that jar as with all the microbial activity in there, things will begin to grow.

Consume when you’re ready to- in a few months, a year, or many years.

Saving Tomato Seeds from Your Garden

farm, fermentation

When venturing out to save tomato seeds look for the plants and fruits that are performing best- most beautiful, undamaged fruit, best disease resistance, excellent flavor, etc. A single tomato, depending on variety can yield perhaps enough seeds alone for the following year, making it a crop you can still continue to enjoy while simultaneously saving its seed. I like to pick ripe fruit throughout the year from the best plants while keeping detailed notes for each batch of seeds that gets saved.

Tomatoes for seeds can be cut open or just smashed, then placed in a jar to let ferment for a day or two. The fermentation helps separate the seed from the tomato flesh and any membrane that might be clinging to it. Fermenting too long can possibly have an adverse effect on germination later on.

When you’re ready to strain, shake up the jar and let things settle. This will help get the viable seeds to collect at the bottom. Next I’ll pull out the tomato solids I can grab with my hands then top the jar off with water. Carefully pour off the water and the remaining tomato debris should pour out with it. Keep refilling the jar and pouring out until the water is clear and clean. Then you can strain out the seeds and lay them on a surface for drying.

Dry gradually, which I do by leaving either on my breezy porch or in a room with a ceiling fan on- caution that fruit flies will be looking for them. Mix up the seeds occasionally to ensure even drying as they can tend to clump up. After a lazy week or two pack them up in a jar or bag or elsewhere safely away until you’re ready to use them next season.

Saving Zucchini & Cucumber Seed

fermentation, homesteading, Vegetable Fermentation

Zucchini and cucumber seeds are vegetables that both use a little fermentation to help in saving the seeds. When saving them you’ll want as mature of a fruit as you can get. Even after you harvest them it can help to let them cure for a couple days before cutting them open. It’s still a strange feeling to stop eating the favorite plants of a crop and let them grow out for seed. Maybe the pleasure is in the hope it gives to next year.

For zucchini start by cutting off any “neck” that is only flesh and doesn’t contain any seeds. Then carefully with a good knife cut the first half inch or so or around the perimeter of the vegetable so it can be pulled apart into two halves. The reason for this procedure is to prevent throwing a knife straight through the seed cavity and slicing a handful of them.

Next, scoop out the seeds.

Or thumb out the seeds.

The seeds will have a thin coating around them. To remove that place the seeds and anything stuck to them into a container and cover it with water. Add a cover to keep the flies out and ferment for 1-2 days. Caution not to forget about the ferment for too long as it can eventually begin to deteriorate the seeds germinating potential.

After the light fermentation the seed should be free from their covering. Check to make sure then you can stir up the seeds in the water, the good seeds should sink to the bottom and you can pour the rest off the top. This can be repeated by adding more water, stirring, and pouring until the seeds are generally clean. Then drain, rinse, and dry the seeds in a warm, dry place, and mix them up periodically to keep it going evenly.

Strawberry Amazake

fermentation

Amazake is a Japanese sweet beverage/ porridge made from koji mold and grain that can be reminiscent of a smoothie. (Mold smoothie? Yum.) Amazake is easy to make, wonderfully delicious, as well as vegan and sugar free. Its unique earthy sweetness is provided by enzymes in the koji that saccharify the grain starches into sugars. It is the infant state of sake and mirin, as amazake is the stage where sugars are being made to later convert into alcohol.

Making amazake is just mixing koji, a cooked grain, and water, and letting it incubate in a jar or sealed container for around 6-12 hours. The ratio of ingredients can be changed to your preference but a good starting place is 1:1.5:3/ koji: cooked grain: water. Incubation needs to be on the warmer side, ~120-140 degrees, as the higher temperatures are what activates sweeter results.

This is definitely a good “taste as it moves along” type recipe as you find your perfect “sweet spot.” An over mature amazake will start tasting sour (alcoholic).

When you have the amazake of your dreams incubated you can just pop it in the fridge to put the brakes on the fermentation. It’ll likely keep creeping along but you probably have a few days before it starts souring. For a refreshing summer smoothie give it a blitz in the blender, but if you do, why not also toss in a couple strawberries or whatever else you have on hand? Yum.

It’s also possible to make amazake from leftover grains from dinner as well as things like oat “milk.” To sweeten and inoculate your favorite non-dairy “milk” do a 1:3 ration of koji to “milk” and follow the same procedure.

Need some koji? Buy some online or get some spores to make your own.

Fermented Nettle for the Garden

farm, fermentation

If you take the stinging nettle season very seriously- as I hope you do- we previously mentioned a couple of ways to preserve them, but now it’s high time to transition with the plant as it grows. Personally I’ll never pick anything taller than my knee and here in Pittsburgh stop right around May 1st. After this point the tender leaves and stems will become courser as the stem elongates and she prepares to flower and set seed. Let’s let that happen and let the seeds drop too, then we can cut down the tall stalks to use as an all-purpose fertilizer for our gardens. We’ll be trying out in earnest this year making some fiber from them too, which we hope using this technique will produce some good results.

Stinging nettles contain a wide span of nutrients leafy green plants love such as potassium, phosphorus, calcium, and magnesium. By doing a basic ferment those nutrients are released for easier access. The liquid can be dumped at the foot of a plant or sprayed on the leaves for foliar feeding. This fertilizer is best for leafy green plants or plants in their growth stage, that is, before showing any signs of transitioning to flowering.

The process is easy. Cut down the tall nettles and stuff em in a bucket. Cover them with water, with rainwater being best, and let get good and stinky (outside naturally). Use anytime really. Depending on conditions we tend to start using it once the plant looks good and broken down and use a sprayer to foliar feed a lot of crops. It’s really satisfying to leave the farm behind in a cloud of stink.